
Loading...
Loading...
Loading...
Loading...
Loading...
Loading...
Loading...
Loading...
Loading...
Loading...
Loading...
Loading...
Loading...
Loading...
Loading...
Loading...
Loading...
Loading...
Loading...
Loading...
Loading...
Loading...
Loading...
Loading...
Loading...
Loading...
Loading...
Loading...
Loading...
Loading...
Loading...
Loading...
Loading...
Loading...
Loading...
Loading...
Loading...
Loading...
Loading...
Loading...
Loading...
Loading...
Loading...
Loading...
Loading...
Loading...
Loading...
Loading...
Loading...
Loading...
Loading...
Loading...
Loading...
Loading...
Loading...
Loading...
Loading...
Loading...
Loading...
Loading...
Loading...
Loading...
Loading...
Loading...
Loading...
Loading...
Loading...
Loading...
Loading...
Loading...
Loading...
Loading...
Loading...
Loading...
Loading...
Loading...
Loading...
Loading...
Loading...
Loading...
Loading...
Loading...
Loading...
Loading...
Loading...
Loading...
Loading...
Loading...
Loading...
Loading...
Loading...
Loading...
Loading...
Loading...
Loading...
Loading...
Loading...
Loading...
Loading...
Loading...
SPE includes several built-in interfaces for managing and executing scripts, as well as provides tools for modifying content.

Custom ribbon commands for use in the ISE.


$Host.UI.RawUI.BackgroundColor = ($bckgrnd = 'DarkRed')
$Host.UI.RawUI.ForegroundColor = 'Cyan'
$Host.PrivateData.WarningForegroundColor = 'Magenta'
$Host.PrivateData.WarningBackgroundColor = "Green"
$Host.PrivateData.VerboseForegroundColor = 'Green'
$Host.PrivateData.VerboseBackgroundColor = "Red"
Write-Host " Write-Host "
Write-Verbose " Write-Verbose " -Verbose
Write-Warning " Write-Warning "
Show-Result -Text -Width 500 -Height 300
$pipelineArgs = Get-Variable -Name pipelineArgs -ValueOnly<#
.SYNOPSIS
A short synopsis of this function.
.DESCRIPTION
A much more detailed description of this function, which outputs a value.
.PARAMETER Value
The value that will be output
.EXAMPLE
PS> Output-Value "My value"
My value
#>
Function Output-String
{
param(
[string]$value
)
Write-Host $value
} Get-Help Output-String$pipelineArgs.Username
$pipelineArgs.Password
$pipelineArgs.Success
$pipelineArgs.StartUrl$pipelineArgs.Username
$pipelineArgs.StartUrl$item = $SitecoreContextItem
$comment = Show-Input -Prompt "Enter a comment:"
if($comment) {
New-ItemWorkflowEvent -Item $item -Text $comment
}
Close-Window<configuration xmlns:patch="https://www.sitecore.net/xmlconfig/">
<sitecore>
<events>
<event name="item:added">
<handler type="Spe.Integrations.Tasks.ScriptedItemEventHandler, Spe" method="OnEvent" />
</event>
</events>
</sitecore>
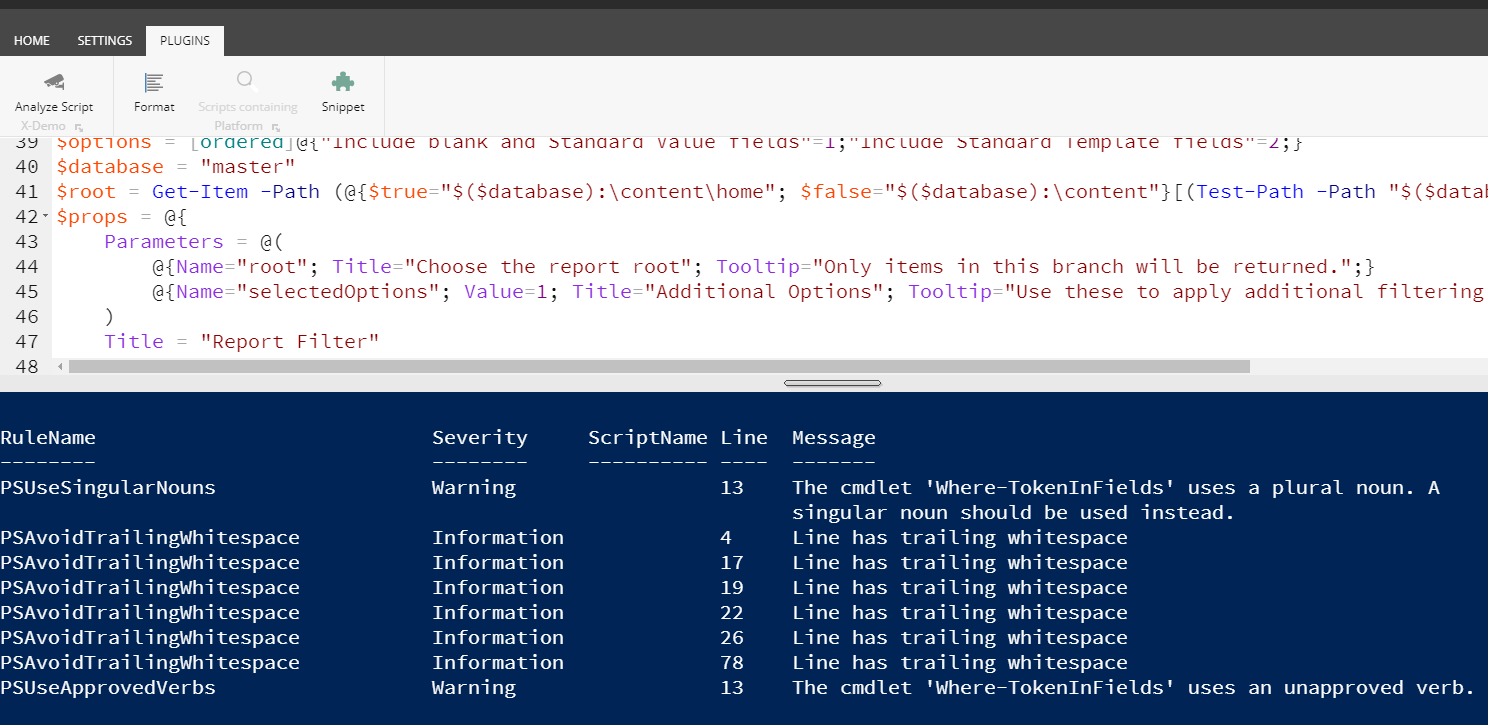
</configuration>Import-Function to discover the available functions.if([string]::IsNullOrWhiteSpace($scriptText)){
Show-Alert "Script is empty - nothing to format."
exit
}
Import-Module -Name PSScriptAnalyzer
Invoke-ScriptAnalyzer -ScriptDefinition $scriptText$title = "Thank you for using SPE!"
$text = "Today is $([datetime]::Now.ToLongDateString())"
$icon = @{$true="Office/32x32/information.png";$false="Applications/16x16/warning.png"}[$SitecoreVersion.Major -gt 7]
$notification = New-Object -TypeName Sitecore.Pipelines.GetPageEditorNotifications.PageEditorNotification -ArgumentList $text, "Info"
$notification.Icon = $icon
$pipelineArgs.Notifications.Add($notification)


scriptArguments. Use this PowerShell hashtable inside of your scripts. Check out the function Invoke-ApiScript for an example of how these parameters can be put to good use.Examples for managing item referrers maintained by the Link Database.
$item = Get-Item -Path "master:\media library\images\koala"
$itemNew = Get-Item -Path "master:\media library\images\penguins"
$links = Get-ItemReferrer -Item $item -ItemLink
foreach($link in $links) {
$linkedItem = Get-Item -Path master:\ -ID $link.SourceItemID
$itemField = $linkedItem.Fields[$link.SourceFieldID]
$field = [Sitecore.Data.Fields.FieldTypeManager]::GetField($itemField)
$linkedItem.Editing.BeginEdit()
$field.Relink($link, $itemNew)
$linkedItem.Editing.EndEdit() | Out-Null
}Examples for managing item templates.
# Sample Item
$sourceTemplate = Get-Item -Path "master:\{76036F5E-CBCE-46D1-AF0A-4143F9B557AA}"
# Sample Content
$targetTemplate = Get-Item -Path "master:\{93A8866B-972F-4FBF-8FD9-D6004B18C0AF}"
# Use Get-ItemReferrer to find all items referencing the template, rather than scanning the content tree.
$sourceTemplate | Get-ItemReferrer |
Where-Object { $PSItem.TemplateId -eq $sourceTemplate.ID -and $PSItem.Paths.IsContentItem } |
ForEach-Object {
Set-ItemTemplate -Item $PSItem -TemplateItem $targetTemplate
}# The script must return an item. This is useful for populating a Droplink.
Get-ChildItem -Path "master:" -ID "{110D559F-DEA5-42EA-9C1C-8A5DF7E70EF9}"script:/sitecore/system/Modules/PowerShell/Script Library/X-Demo/Data Sources/Get-GlobalOption$item = Get-Item -Path .
$response = Show-Input -Prompt "What's the message for $($item.Name)?"
if($response) {
$mailSettings = @{
To = @("Michael West < [email protected] >")
From = "Console < [email protected] >"
BodyAsHtml = $true
SmtpServer = "localhost"
}
$subject = "Message sent regarding item $($item.Name) from $($SitecoreAuthority)"
$response += "<br/>$($item.ItemPath)"
Send-MailMessage @mailSettings -Subject $subject -Body $response
}
Close-Window$username = "admin"
$password = "b"
$pair = "$($username):$($password)"
$encodedCreds = [System.Convert]::ToBase64String([System.Text.Encoding]::ASCII.GetBytes($pair))
$basicAuthValue = "Basic $encodedCreds"
$headers = @{
Authorization = $basicAuthValue
}
Invoke-RestMethod -Headers $headers -Uri "https://spe.dev.local/-/script/v2/master/TrainingWebApi?offset=3&limit=2&fields=(Name,ItemPath,Id)"PS master:\> Close-Window# Crafted by Dylan
function Remove-ItemLink {
param([Item]$item)
$linkDb = [Sitecore.Globals]::LinkDatabase
$links = Get-ItemReferrer -Item $item -ItemLink
foreach($link in $links) {
$linkedItem = Get-Item -Path master:\ -ID $link.SourceItemID
$itemField = $linkedItem.Fields[$link.SourceFieldID]
$field = [Sitecore.Data.Fields.FieldTypeManager]::GetField($itemField)
$linkedItem.Editing.BeginEdit()
$field.RemoveLink($link)
$linkedItem.Editing.EndEdit()
}
}
# Example usage: delete items along with their references that have passed a certain date defined by a 'date' field
$today = Get-Date
$todayIsoDate = [Sitecore.DateUtil]::ToIsoDate($today)
$query = "/sitecore/system/Modules/Mysite/Service Schedules/*[@date < '$($todayIsoDate)']"
$itemsToDelete = Get-Item -Path master: -Query $query
foreach($item in $itemsToDelete) {
Write-Host "Cleaning up $($itemsToDelete.Paths.Path)"
Remove-ItemLink -Item $item
Remove-Item -Path $item.Paths.Path
}<powershell>
<uploadFile>
<allowedFileTypes>
<pattern>image/*</pattern>
<pattern>.xls</pattern>
<pattern>.xlsx</pattern>
<pattern>.csv</pattern>
</allowedFileTypes>
<allowedLocations>
<path>$SitecoreMediaFolder</path>
</allowedLocations>
</uploadFile>
</powershell><configuration xmlns:patch="https://www.sitecore.net/xmlconfig/">
<sitecore>
<powershell>
<uploadFile>
<allowedFileTypes>
<pattern>.csv</pattern>
<pattern>.txt</pattern>
<pattern>.xml</pattern>
<pattern>.json</pattern>
</allowedFileTypes>
</uploadFile>
</powershell>
</sitecore>
</configuration><configuration xmlns:patch="https://www.sitecore.net/xmlconfig/">
<sitecore>
<powershell>
<uploadFile>
<allowedFileTypes>
<!-- All image types -->
<pattern>image/*</pattern>
<!-- All text types -->
<pattern>text/*</pattern>
<!-- Specific MIME type -->
<pattern>application/json</pattern>
<pattern>application/xml</pattern>
</allowedFileTypes>
</uploadFile>
</powershell>
</sitecore>
</configuration><configuration xmlns:patch="https://www.sitecore.net/xmlconfig/">
<sitecore>
<powershell>
<uploadFile>
<allowedFileTypes>
<!-- Excel -->
<pattern>.xls</pattern>
<pattern>.xlsx</pattern>
<pattern>application/vnd.ms-excel</pattern>
<pattern>application/vnd.openxmlformats-officedocument.spreadsheetml.sheet</pattern>
<!-- Word -->
<pattern>.doc</pattern>
<pattern>.docx</pattern>
<pattern>application/msword</pattern>
<pattern>application/vnd.openxmlformats-officedocument.wordprocessingml.document</pattern>
<!-- PowerPoint -->
<pattern>.ppt</pattern>
<pattern>.pptx</pattern>
<pattern>application/vnd.ms-powerpoint</pattern>
<pattern>application/vnd.openxmlformats-officedocument.presentationml.presentation</pattern>
</allowedFileTypes>
</uploadFile>
</powershell>
</sitecore>
</configuration><configuration xmlns:patch="https://www.sitecore.net/xmlconfig/">
<sitecore>
<powershell>
<uploadFile>
<allowedLocations>
<path>$SitecoreTempFolder</path>
</allowedLocations>
</uploadFile>
</powershell>
</sitecore>
</configuration><configuration xmlns:patch="https://www.sitecore.net/xmlconfig/">
<sitecore>
<powershell>
<uploadFile>
<allowedLocations>
<path>$SitecoreTempFolder</path>
<path>$SitecoreDataFolder\uploads</path>
<path>$SitecorePackageFolder</path>
</allowedLocations>
</uploadFile>
</powershell>
</sitecore>
</configuration><!-- DO NOT DO THIS -->
<allowedLocations>
<path>C:\</path> <!-- Root drive -->
<path>C:\Windows</path> <!-- Windows directory -->
<path>C:\inetpub\wwwroot</path> <!-- Web root (allows direct access) -->
</allowedLocations><configuration xmlns:patch="https://www.sitecore.net/xmlconfig/">
<sitecore>
<powershell>
<uploadFile>
<!-- Only allow data file types -->
<allowedFileTypes>
<pattern>.csv</pattern>
<pattern>.xls</pattern>
<pattern>.xlsx</pattern>
<pattern>text/csv</pattern>
<pattern>application/vnd.ms-excel</pattern>
<pattern>application/vnd.openxmlformats-officedocument.spreadsheetml.sheet</pattern>
</allowedFileTypes>
<!-- Only allow specific import locations -->
<allowedLocations>
<path>$SitecoreTempFolder</path>
<path>$SitecoreDataFolder\uploads</path>
</allowedLocations>
</uploadFile>
</powershell>
</sitecore>
</configuration>


Get-Command -Noun Role*,User,ItemAcl* | Select-Object -Property Name | Sort-Object -Property Nameforeach($num in 0..10) {
$key = -join ((65..90) + (97..122) | Get-Random -Count 7 | % {[char]$_})
New-User -Identity "TestUser$($key)" -Enabled -Password "b" -ProfileItemId "{AE4C4969-5B7E-4B4E-9042-B2D8701CE214}" | Out-Null
}
Get-User -Filter "sitecore\TestUser*"Get-ChildItem "master:\content" -Recurse |
Add-ItemLanguage -Language "en-us" -TargetLanguage "en-ca" -IfExist OverwriteLatest$languageParameters = @{
Path = "master:\content\home"
Language = "en"
TargetLanguage = @("pl-pl","en-us")
IfExist = "Skip"
IgnoredFields = @("Title")
}
Add-ItemLanguage @languageParametersReview prerequisites and details on how to get setup with SPE.

9.09.19.2$package = New-Package "Package-of-Stuff"
$package.Sources.Clear()
$package.Metadata.Author = "Michael West"
$package.Metadata.Publisher = "Team Awesome"
$package.Metadata.Version = "1.0"
$package.Metadata.Readme = @"
Set of instructions for the user.
"@
# Items using New-ItemSource and New-ExplicitItemSource
$source = Get-Item -Path "master:\templates\Feature\Forms" |
New-ItemSource -Name 'Feature Forms Items' -InstallMode Overwrite
$package.Sources.Add($source)
# Files using New-FileSource and New-ExplicitFileSource
$source = Get-Item -Path "$AppPath\App_Config\Include\Feature\Forms\Company.Feature.Forms.config" |
New-ExplicitFileSource -Name "Feature Forms Files"
$package.Sources.Add($source)
Export-Package -Project $package -Path "$($package.Name)-$($package.Metadata.Version).xml"
Export-Package -Project $package -Path "$($package.Name)-$($package.Metadata.Version).zip" -Zip
Download-File "$SitecorePackageFolder\$($package.Name)-$($package.Metadata.Version).zip"cd "C:\Source\Console" // Your local source folder, with a new folder for the solution
git init
git remote add origin https://github.com/SitecorePowerShell/Console.git
git fetch origin
git checkout -b master --track origin/master{
"sites": [
{
"path": "C:\\inetput\\wwwroot\\SitecoreSPE_8\\Website",
"version": 8,
"junction": true
}
]
}Get-User -Id "michael" -Authenticated |
Set-User -ProfileItemId "{AE4C4969-5B7E-4B4E-9042-B2D8701CE214}"$users = Get-User -Filter * | Where-Object { $_.Profile.GetCustomProperty("age") -gt 18 }
$property = @(
"Name",
@{Name="Age";Expression={ $PSItem.Profile.GetCustomProperty("age") }}
)
$users | Select-Object -Property $property |
Export-CSV -Path "$($SitecoreDataFolder)\export\users-over-eighteen.csv" -NoTypeInformation# Identity can be "[domain]\[name]", "Creator-Owner", and "\Everyone"
Get-Role -Identity "default\Everyone"Get-Role -Filter * | Show-ListView -Property Name, Domain$user = Get-User -Identity "sitecore\author"
$role = Get-Role -Identity "sitecore\Sitecore Client Authoring"
Add-RoleMember -Identity $role -Members $user$user = Get-User -Identity "sitecore\author"
$role = Get-Role -Identity "sitecore\Sitecore Client Authoring"
Remove-RoleMember -Identity $role -Members $userGet-ChildItem "master:\content\home" -Language "en" -Recurse |
Where-Object { $_.TemplateName -eq "Sample Item" } |
Add-ItemLanguage -TargetLanguage "pl-pl" -IfExist Append |
Format-Table Name, Language, Version -AutoSizeAdd-ItemLanguage -Path "master:\content\home" -TargetLanguage "pl-pl" -IfExist Skip -DoNotCopyFields -RecurseGet-ChildItem "master:\content" -Recurse |
Remove-ItemLanguage -Language "fr-CA"$itemPath = "master:\content\home\sample item\Sample Item 3"
New-Item -Path $itemPath -ItemType "Sample/Sample Item" -Language "en-CA"
Name Children Language Version Id TemplateName
---- -------- -------- ------- -- ------------
Sample Item 3 False en-CA 1 {C9517583-3AF9-4AFB-B247-BB0A09F55D94} Sample Item<configuration xmlns:patch="https://www.sitecore.net/xmlconfig/">
<sitecore>
<powershell>
<translation>
<ignoredFields>
<field>__Archive date</field>
<field>__Archive Version date</field>
<field>__Lock</field>
<field>__Owner</field>
<field>__Page Level Test Set Definition</field>
<field>__Reminder date</field>
<field>__Reminder recipients</field>
<field>__Reminder text</field>
<!--field>__Security</field-->
</ignoredFields>
</translation>
</sitecore>
</configuration>PS master:\> #Convert original item to xml
PS master:\> $myCliXmlItem = Get-Item -Path master:\content\home | ConvertTo-CliXml
PS master:\> #print the CliXml
PS master:\> $myCliXmlItem
PS master:\> #print the Item converted back from CliXml
PS master:\> $myCliXmlItem | ConvertFrom-CliXmlPS master:\> Get-Cache -Name master*
Name Enabled Count Size Max Size Default Scavengable
Priority
---- ------- ----- ---- -------- -------- -----------
master[blobIDs] True 0 0 512000 Normal False
master[blobIDs] True 0 0 512000 Normal False
master[blobIDs] True 0 0 512000 Normal False
master[itempaths] True 292 108228 10485760 Normal False
master[standardValues] True 57 38610 512000 Normal False
master[paths] True 108 13608 512000 Normal False
master[items] True 1010 5080300 10485760 Normal False
master[data] True 3427 7420654 20971520 Normal False$package = New-Package "Package-of-Stuff"
$package.Sources.Clear()
$package.Metadata.Author = "Michael West"
$package.Metadata.Publisher = "Team Awesome"
$package.Metadata.Version = "1.0"
$package.Metadata.Readme = @"
Set of instructions for the user.
"@
$package.Metadata.PostStep = "Some.Library.Class,Some.Library"
$package.Metadata.Attributes = "scriptId={9b9a3906-1979-11e7-8c9d-177c30471cec}|width=50|height=200"
Export-Package -Project $package -Path "$($package.Name)-$($package.Metadata.Version).xml"Import-Function -Name New-PackagePostStep
$package = New-Package "Package-of-Stuff"
$package.Sources.Clear()
$package.Metadata.Author = "Michael West"
$package.Metadata.Publisher = "Team Awesome"
$package.Metadata.Version = "1.0"
$package.Metadata.Readme = @"
Set of instructions for the user.
"@
$newPackageFiles = @([PSCustomObject]@{"FileName"="/bin/Company.Feature.Unused.dll"})
$package.Metadata.PostStep = "Spe.Package.Install.PackagePostStep, Spe.Package"
$package.Metadata.Comment = New-PackagePostStep -PackageFiles $newPackageFiles$package = New-Package "Package-of-Stuff"
$package.Sources.Clear()
$package.Metadata.Author = "Michael West"
$package.Metadata.Publisher = "Team Awesome"
$package.Metadata.Version = "1.0"
$package.Metadata.Readme = @"
Set of instructions for the user.
"@
$package.Metadata.PostStep = "Spe.Integrations.Install.ScriptPostStep, Spe"
$package.Metadata.Attributes = "scriptId={737CD0CC-12F7-4528-8FBD-E0FDEFC41325}"Write-Log "Processing changes to ensure backwards compatibility."
$oldVersion = New-Object System.Version(10,0)
if($PSVersionTable["SitecoreVersion"] -lt $oldVersion) {
$iseButton = Get-Item -Path "core:{bfc79034-857c-4432-a5c2-2d93af784384}"
$iseButton.Editing.BeginEdit()
$iseButton.Fields["{D25B56D4-23B6-4462-BE25-B6A6D7F38E13}"].Value = "powershell/32x32/ise8.png"
$iseButton.Editing.EndEdit() > $null
$reportButton = Get-Item -Path "core:{74744022-353c-43f1-b8e4-5bc569ca9348}"
$reportButton.Editing.BeginEdit()
$reportButton.Fields["{D25B56D4-23B6-4462-BE25-B6A6D7F38E13}"].Value = "Office/32x32/chart_donut.png"
$reportButton.Editing.EndEdit() > $null
Write-Log "Changes complete."
} else {
Write-Host "No changes required."
}
Close-Window$paths = @("C:\inetpub\wwwroot\Console\Website\App_Config\Include\*")
$patterns = @("Sitecore.Analytics*.config", "Sitecore.ExperienceAnalytics*.config")
$paths | Get-ChildItem -Include $patterns -Recurse | Rename-Item -NewName { $PSItem.Name + ".disabled" }$defaultLayout = Get-LayoutDevice -Default
$rootItem = Get-Item -Path "master:" -ID "{961563FC-3445-4558-BF3A-06DF06BA6298}"
Get-Rendering -Item $rootItem -Device $defaultLayout -FinalLayout$rendering = Get-Item -Path "master:\sitecore\layout\Sublayouts\Sample Sublayout"
$items = Get-ChildItem -Path "master:\sitecore\templates\Sample Item" -Recurse
foreach($item in $items) {
$renderingInstance = Get-Rendering -Item $_ -Rendering $rendering
if ($renderingInstance) {
Set-Rendering -Item $_ -Instance $renderingInstance -Parameter @{
"Lorem" = "Ipsum"
}
Write-Host "Updated $($_.Paths.FullPath)"
}
}Get-Item "master:\layout\Renderings\Feature\Experience Accelerator\Page Content\Page Content" |
Get-ItemReferrer | Where-Object { $_.ContentPath.StartsWith("/Demo/usa/Home") } | Show-ListViewGet-ChildItem -Path "master:\layout\Renderings" -Recurse |
Where-Object { $_.Cacheable -eq "1" } |
Select-Object -Property Name, Cacheable, ClearOnIndexUpdate, VaryBy* |
Sort-Object -Property Name | Show-ListView$query = "fast:/sitecore/content//*[@__renderings='%<conditions%' or @#__Final Renderings#='%<conditions%']"
$items = Get-Item -Path "master:" -Query $query$VerbosePreference = "Continue"
Get-ChildItem -Path "master:\layout\Renderings" -Recurse |
Where-Object { $_.Cacheable -eq "1" } |
ForEach-Object { Write-Verbose "Disabled global caching on $($_.Name)"; $_.Cacheable = "0" }
# VERBOSE: Disabled global caching on Navigation$placeholderMappings = @(
@("/old-placeholder","/new-placeholder"),
@("/another-old-placeholder","/new-placeholder")
)
$rootItem = Get-Item -Path master:/sitecore/content/Home
$defaultLayout = Get-LayoutDevice "Default"
# Toggle for whether to update Shared or Final Layout
$useFinalLayout = $True
# If set to true, the script will only list the renderings that need fixing, rather than fixing them.
$reportOnly = $False
foreach ( $item in Get-ChildItem -Item $rootItem -Recurse )
{
# Only interested in items that have a layout
if (Get-Layout $item)
{
foreach( $mapping in $placeholderMappings )
{
# Get renderings in this item that have renderings in the placeholder we want to update
$renderings = Get-Rendering -Item $item -Placeholder ($mapping[0] + '/*') -Device $defaultLayout -FinalLayout:$useFinalLayout
foreach ( $rendering in $renderings )
{
# Only update the rendering if we're not in "Report Only" mode
if (!$reportOnly)
{
# Update the placeholder in the rendering and set it back in the item
$rendering.Placeholder = $rendering.Placeholder -replace $mapping[0], $mapping[1]
Set-Rendering -Item $item -Instance $rendering -FinalLayout:$useFinalLayout
}
Write-Host "$($item.FullPath) - Rendering $($rendering.UniqueID) - Placeholder: $($mapping[0]) --> $($mapping[1])"
}
}
}
}Get-Rendering -Item $item -PlaceHolder "main" |
Foreach-Object { Set-Rendering -Item $item -Instance $_ -DataSource $null -FinalLayout }$rendering = Get-Item master:\layout\path\to\your\rendering
$renderingPageContainer = Get-Rendering -Item $item "{F39BAC93-1EEC-446B-A4A1-AB7F7C1B6267}" -Device $defaultLayout
$renderingPageContainer.ItemID = $rendering.ID
Set-Rendering -Item $item -Instance $renderingPageContainer
services:
mssql-init:
image: ${REGISTRY}${COMPOSE_PROJECT_NAME}-xm1-mssql-init:${VERSION:-latest}
build:
context: ./docker/build/mssql-init
args:
BASE_IMAGE: ${SITECORE_DOCKER_REGISTRY}sitecore-xm1-mssql-init:${SITECORE_VERSION}
SPE_IMAGE: ${SITECORE_MODULE_REGISTRY}sitecore-spe-assets:${SPE_VERSION}
cm:
image: ${REGISTRY}${COMPOSE_PROJECT_NAME}-xm1-cm:${VERSION:-latest}
build:
context: ./docker/build/cm
args:
BASE_IMAGE: ${SITECORE_DOCKER_REGISTRY}sitecore-xm1-cm:${SITECORE_VERSION}
SPE_IMAGE: ${SITECORE_MODULE_REGISTRY}sitecore-spe-assets:${SPE_VERSION}# escape=`
ARG BASE_IMAGE
ARG SPE_IMAGE
FROM ${SPE_IMAGE} as spe
FROM ${BASE_IMAGE}
COPY --from=spe C:\module\db C:\resources\spe# escape=`
ARG BASE_IMAGE
ARG SPE_IMAGE
FROM ${SPE_IMAGE} as spe
FROM ${BASE_IMAGE}
SHELL ["powershell", "-Command", "$ErrorActionPreference = 'Stop'; $ProgressPreference = 'SilentlyContinue';"]
WORKDIR /inetpub/wwwroot
COPY --from=spe \module\cm\content .\PS master:\> #Convert original item to xml
PS master:\> $myCliXmlItem = Get-Item -Path master:\content\home | ConvertTo-CliXml
PS master:\> #print the CliXml
PS master:\> $myCliXmlItem
PS master:\> #print the Item converted back from CliXml
PS master:\> $myCliXmlItem | ConvertFrom-CliXml


Examples for managing complex field types such as MultilistField and NameValueListField.
# Hardcoded list of Ids.
$item.Editing.BeginEdit()
$item["Allowed Controls"] = "{guid1}|{guid2}|{guid3}"
$item.Editing.EndEdit()# Array of Ids.
$array = [System.Collections.ArrayList]@()
$array.Add({guid1}) > $null
$array.Add({guid2}) > $null
$ids = [System.String]::Join("|", $array)
$item.Editing.BeginEdit()
$item["Allowed Controls"] = $ids
$item.Editing.EndEdit()[Sitecore.Data.Fields.MultilistField]$field = $item.Fields["Allowed Controls"]
$item.Editing.BeginEdit()
$field.Replace("{493B3A83-0FA7-4484-8FC9-4680991CF742}","{493B3A83-0FA7-4484-8FC9-4680991CF743}")
$item.Editing.EndEdit()[Sitecore.Text.ListString]$ids = $item.Fields["Rendering"].Value
$ids.AddAt(0,"{guid1}") > $null
$ids.Add("{guid2}") > $null
$ids.Add("{guid3}") > $null
$item.Editing.BeginEdit()
$item.Fields["Rendering"].Value = $ids.ToString()
$item.Editing.EndEdit() > $null$items = Get-ChildItem -Path "master:\sitecore\content\home" -Recurse -Language *
foreach($item in $items) {
if ($item.Keywords -and $item.Keywords.Length -gt 0) {
$item.Keywords = $item.Keywords + "|{guid}"
} else {
$item.Keywords = "{guid}"
}
}See some of the community contributed modules built for SPE.


$items = Get-ChildItem -Path "master:\sitecore\content\home" -Recurse -Language *
foreach($item in $items) {
$item.Keywords = (@() + $item.Keywords.GetItems().ID + "{6D1EACDD-0DE7-4F3D-B55A-2CAE8EBFF3D0}" | Select-Object -Unique) -join "|"
}
$item.Editing.BeginEdit()
$item["Title"] = "New Title"
$item.Editing.EndEdit()foreach($item in $items) {
$item.Editing.BeginEdit()
try {
# Make your changes
$item["Title"] = "New Title"
$item["Text"] = "New content"
# Commit changes
$item.Editing.EndEdit()
}
catch {
# Roll back on error
$item.Editing.CancelEdit()
Write-Error "Failed to update $($item.ItemPath): $_"
}
}# DANGEROUS on large content trees!
Get-ChildItem -Path "master:\content" -Recurse# Recurse only within a specific subtree
Get-ChildItem -Path "master:\content\home\articles" -Recurse# Much faster for large queries
$parameters = @{
Index = "sitecore_master_index"
Criteria = @{Filter = "DescendantOf"; Value = "{110D559F-DEA5-42EA-9C1C-8A5DF7E70EF9}"}
}
$items = Find-Item @parameters | Initialize-Item$items = Get-ChildItem -Path "master:\content" -Depth 2# WRONG - Using C# operators
if($count == 0) { } # Syntax error!
# RIGHT - Using PowerShell operators
if($count -eq 0) { } # Correct
# WRONG - Case-sensitive by default assumption
if($name -eq "MICHAEL") { } # Will match "michael"!
# RIGHT - Explicit case-sensitive check
if($name -ceq "MICHAEL") { } # Only matches exact case# This gets the item in the DEFAULT language (usually en)
$item = Get-Item -Path "master:\content\home"
$item["Title"] # Returns English title# Get specific language version
$item = Get-Item -Path "master:\content\home" -Language "de-DE"
# Get all language versions
$item = Get-Item -Path "master:\content\home"
$allVersions = Get-ItemField -Item $item -IncludeStandardFields -Name "*" -ReturnType Field
# Edit specific language
$item = Get-Item -Path "master:\content\home" -Language "de-DE"
$item.Editing.BeginEdit()
$item["Title"] = "Deutscher Titel"
$item.Editing.EndEdit()# SLOW - Out-Null is a cmdlet, adds pipeline overhead
$builder.Append("Text") | Out-Null
# FAST - Redirect to $null
$builder.Append("Text") > $null# Slow (don't use for simple suppression)
$list.Add($item) | Out-Null
# Fast (use this instead)
$list.Add($item) > $nullfunction Get-KeywordsAsString($item) {
[Sitecore.Data.Fields.MultilistField] $field = $item.Fields["Keywords"]
$items = $field.GetItems()
$strArray = $items | Foreach { $_.DisplayName }
$strArray -join ', '
}
Get-ChildItem -Path 'master:\content\home\path-to-item' `
| Show-ListView -Property Name, Language, Version, ID, TemplateName, ItemPath, `
@{ Label = "KeywordsAsString"; Expression = { Get-KeywordsAsString($_) } }$item = Get-Item -Path "master:" -ID "{371EEE15-B6F3-423A-BB25-0B5CED860EEA}"
$nameValues = [System.Web.HttpUtility]::ParseQueryString($item.UrlMapping)
# Here you can add or remove name/value pairs
$nameValues["^/ab[cde]/$"] = "/somewhere/fun?lang=en"
foreach($key in $nameValues.AllKeys) {
$nameValues[$key] = [Uri]::EscapeDataString($nameValues[$key])
}
$item.UrlMapping = [Sitecore.StringUtil]::NameValuesToString($nameValues,"&")PS master:\> Get-Archive -Database "master"
Name Items
---- -----
archive 0
recyclebin 1950PS master:\> Get-Database
Name Languages Protected Read Only
---- --------- --------- ---------
core {da, pl-PL, ja-JP, en...} False False
master {en, de-DE, es-ES, pt-BR...} False False
web {es-ES, de-DE, pt-BR, pl-PL... False False
filesystem {en, en-US} False TruePS master:\> Get-Database -Name "master"
Name Languages Protected Read Only
---- --------- --------- ---------
master {en, de-DE, es-ES, pt-BR...} False FalsePS master:\> Get-Item . | Get-Database
Name Languages Protected Read Only
---- --------- --------- ---------
master {en, de-DE, es-ES, pt-BR...} False FalsePS master:\> Get-SitecoreJob
Category : PowerShell
Handle : b62d9129-298a-4630-bb37-d725e5ce3bbf;DCI5CG6011F3Y-sc81u3contact
IsDone : True
Name : PowerShell-ca2a0179-78c5-02a4-5970-17e4909752b0-{347EBAF8-6BE2-4ABC-91D0-36B36FCF414B}
Options : Sitecore.Jobs.JobOptions
Status : Sitecore.Jobs.JobStatus
WaitHandle : System.Threading.ManualResetEvent
QueueTime : 11/13/2017 1:03:18 PM
MessageQueue : Sitecore.Jobs.AsyncUI.MessageQueue
Category : Indexing
Handle : dca83fc7-def7-4564-ac44-987e79ffc3cd;DCI5CG6011F3Y-sc81u3contact
IsDone : True
Name : Index_Update_IndexName=sitecore_analytics_index
Options : Sitecore.Jobs.JobOptions
Status : Sitecore.Jobs.JobStatus
WaitHandle : System.Threading.ManualResetEvent
QueueTime : 11/13/2017 1:03:29 PM
MessageQueue : Sitecore.Jobs.AsyncUI.MessageQueue
Category : PowerShell
Handle : de0a1dce-45f7-44fb-81b5-02b402c1f614;DCI5CG6011F3Y-sc81u3contact
IsDone : False
Name : PowerShell-ca2a0179-78c5-02a4-5970-17e4909752b0-{47666A58-890B-4D13-8F15-3348643750E4}
Options : Sitecore.Jobs.JobOptions
Status : Sitecore.Jobs.JobStatus
WaitHandle : System.Threading.ManualResetEvent
QueueTime : 11/13/2017 1:03:29 PM
MessageQueue : Sitecore.Jobs.AsyncUI.MessageQueuePS master:\> $jobs = Get-SitecoreJob
PS master:\> $jobs[0].Status
Category : PowerShell
Handle : c9215f66-ce60-49e5-9620-bf1ec51b6ef4;DCI5CG6011F3Y-sc81u3contact
IsDone : False
Name : PowerShell-ca2a0179-78c5-02a4-5970-17e4909752b0-{DF4895A6-3EBB-4A2A-9756-3A0EF4B96396}
Options : Sitecore.Jobs.JobOptions
Status : Sitecore.Jobs.JobStatus
WaitHandle : System.Threading.ManualResetEvent
QueueTime : 11/13/2017 1:05:54 PM
MessageQueue : Sitecore.Jobs.AsyncUI.MessageQueuePS master:\> Get-SitecoreJob | Show-ListView -Property "Category", "IsDone", "Name", "QueueTime", `
@{Label="Status Expiry"; Expression={$_.Status.Expiry} },
@{Label="Status Failed"; Expression={$_.Status.Failed} },
@{Label="Status State"; Expression={$_.Status.State} },
@{Label="Status Processed"; Expression={$_.Status.Processed} },
@{Label="Status Total"; Expression={$_.Status.Total} },
@{Label="Status Message"; Expression={$_.Status.Messages} }PS master:\> Get-UserAgent
Mozilla/5.0 (Windows NT 6.1; WOW64) AppleWebKit/537.36 (KHTML, like Gecko) Chrome/36.0.1985.125 Safari/537.36# Default returns all configurations
Get-UnicornConfiguration
# Exact match
Get-UnicornConfiguration -Filter "Foundation.Foo"
# Filter using a wildcard
Get-UnicornConfiguration -Filter "Foundation.*"# Sync one
Sync-UnicornConfiguration "Foundation.Foo"
# Sync multiple by name
Sync-UnicornConfiguration @("Foundation.Foo", "Foundation.Bar")
# Sync multiple from pipeline
Get-UnicornConfiguration "Foundation.*" | Sync-UnicornConfiguration
# Sync all, except transparent sync-enabled configurations
Get-UnicornConfiguration | Sync-UnicornConfiguration -SkipTransparent
# Optionally set log output level (Debug, Info, Warn, Error)
Sync-UnicornConfiguration -LogLevel Warn# Sync a single item (note: must be under Unicorn control)
Get-Item "/sitecore/content" | Sync-UnicornItem
# Sync multiple single items (note: all must be under Unicorn control)
Get-ChildItem "/sitecore/content" | Sync-UnicornItem
# Sync an entire item tree, show only warnings and errors
Get-Item "/sitecore/content" | Sync-UnicornItem -Recurse -LogLevel Warn# Reserialize one
Export-UnicornConfiguration "Foundation.Foo"
# Reserialize multiple by name
Export-UnicornConfiguration @("Foundation.Foo", "Foundation.Bar")
# Reserialize from pipeline
Get-UnicornConfiguration "Foundation.*" | Export-UnicornConfiguration# Reserialize a single item (note: must be under Unicorn control)
Get-Item "/sitecore/content" | Export-UnicornItem
# Reserialize multiple single items (note: all must be under Unicorn control)
Get-ChildItem "/sitecore/content" | Export-UnicornItem
# Reserialize an entire item tree
Get-Item "/sitecore/content" | Export-UnicornItem -Recurse# Convert an item to YAML format (always uses default excludes and field formatters)
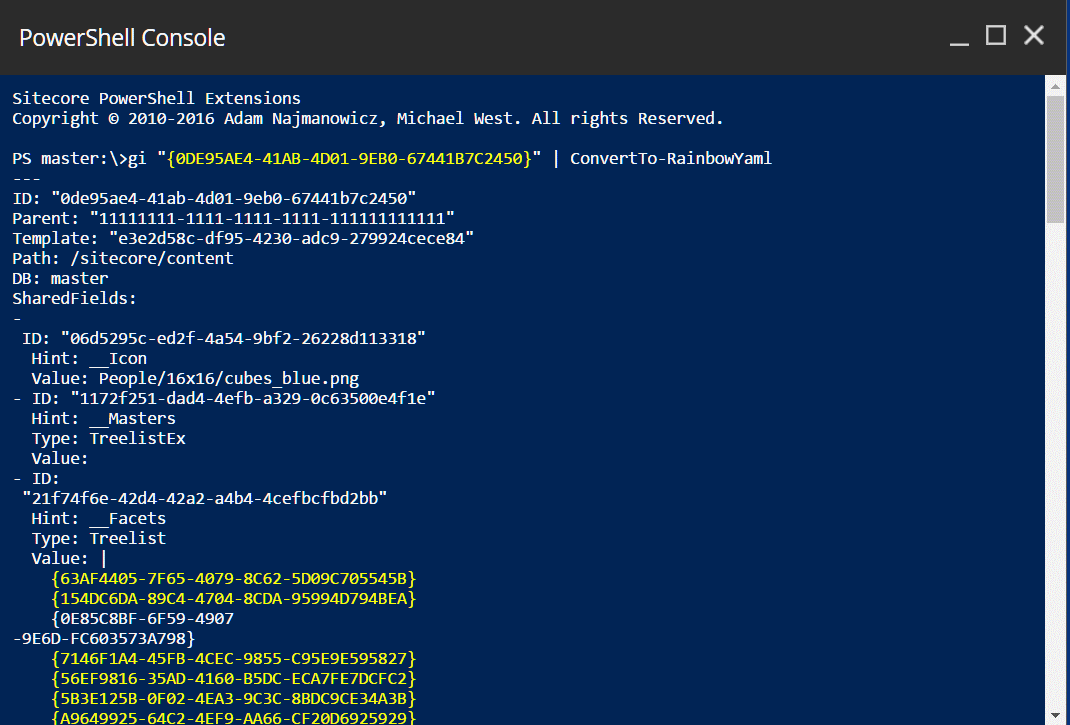
Get-Item "/sitecore/content" | ConvertTo-RainbowYaml
# Convert many items to YAML strings
Get-ChildItem "/sitecore/content" | ConvertTo-RainbowYaml
# Disable all field formats and field filtering
# (e.g. disable XML pretty printing,
# and don't ignore the Revision and Modified fields, etc)
Get-Item "/sitecore/content" | ConvertTo-RainbowYaml -Raw# Get IItemDatas from YAML variable
$rawYaml | ConvertFrom-RainbowYaml
# Get IItemData and disable all field filters
# (use this if you ran ConvertTo-RainbowYaml with -Raw)
$yaml | ConvertFrom-RainbowYaml -Raw# Deserialize IItemDatas from ConvertFrom-RainbowYaml
$rawYaml | ConvertFrom-RainbowYaml | Import-RainbowItem
# Deserialize raw YAML from pipeline into Sitecore
# Shortcut bypassing ConvertFrom-RainbowYaml
$yaml | Import-RainbowItem
# Deserialize and disable all field filters
# (use this if you ran ConvertTo-RainbowYaml with -Raw)
$yaml | Import-RainbowItem -Raw
# Deserialize multiple at once
$yamlStringArray | Import-RainbowItem
# Complete example that does nothing but eat CPU
Get-ChildItem "/sitecore/content" | ConvertTo-RainbowYaml | Import-RainbowItem# Create a new Sitecore Package (SPE cmdlet)
$pkg = New-Package -Name MyCustomPackage
# Get the Unicorn Configuration(s) we want to package
$configs = Get-UnicornConfiguration "Foundation.*"
# Pipe the configs into New-UnicornItemSource
# to process them and add them to the package project
# (without -Project, this would emit the source object(s)
# which can be manually added with $pkg.Sources.Add())
$configs | New-UnicornItemSource -Project $pkg
# Export the package to a zip file on disk
Export-Package -Project $pkg -Path "C:\foo.zip" -ZipPS master:\> Import-Function -Name Resolve-Error


# When you open the Console, you start here:
PS master:\># Master database
Get-Item -Path "master:\content\home"
# Web database
Get-Item -Path "web:\content\home"
# Core database
Get-Item -Path "core:\content"database:\path\to\itemmaster:\content\home
master:\content\home\articles\my-article
web:\content
core:\systemPS master:\> cd c:\
PS C:\> cd hklm:
PS HKLM:\> cd env:
PS Env:\> cd master:
PS master:\># Get a single item
$home = Get-Item -Path "master:\content\home"
# Get children
$children = Get-ChildItem -Path "master:\content\home"
# Get all descendants
$all = Get-ChildItem -Path "master:\content\home" -Recurse# Create a new item
New-Item -Path "master:\content\home" -Name "My New Item" -ItemType "Sample/Sample Item"# Remove an item (goes to Recycle Bin)
Remove-Item -Path "master:\content\home\test-item"# Check if an item exists
if(Test-Path -Path "master:\content\home\my-item") {
Write-Host "Item exists!"
}# Get item with specific language
Get-Item -Path "master:\content\home" -Language "de-DE"
# Get specific version
Get-Item -Path "master:\content\home" -Version 5
# Include standard fields
Get-Item -Path "master:\content\home" | Get-ItemField -IncludeStandardFields# Get files with filter
Get-ChildItem -Path "C:\temp" -Filter "*.txt"
# Get files with specific attributes
Get-ChildItem -Path "C:\temp" -File
Get-ChildItem -Path "C:\temp" -Directory# Get Sitecore items
$items = Get-ChildItem -Path "master:\content\home\articles"
# Export to file system
$items | Select-Object Name, TemplateName |
Export-Csv -Path "$($SitecoreDataFolder)\articles.csv" -NoTypeInformation# Find all items of a specific template and update a field
Get-ChildItem -Path "master:\content\home" -Recurse |
Where-Object { $_.TemplateName -eq "Sample Item" } |
ForEach-Object {
$_.Title = "Updated Title"
}# Create multiple items from a data source
$data = Import-Csv "C:\data\pages.csv"
foreach($row in $data) {
New-Item -Path "master:\content\home" -Name $row.Name -ItemType "Sample/Sample Item"
}# Copy an item tree from master to web
$sourceItem = Get-Item -Path "master:\content\home\campaign"
Copy-Item -Path $sourceItem.ProviderPath -Destination "web:\content\home" -Recurse# Generate a report of items modified in the last 7 days
$startDate = (Get-Date).AddDays(-7)
Get-ChildItem -Path "master:\content" -Recurse |
Where-Object { $_.__Updated -gt $startDate } |
Select-Object Name, ItemPath, __Updated, "__Updated by" |
Show-ListView -Property Name, ItemPath, __Updated, "__Updated by"# Provider path format (recommended)
Get-Item -Path "master:\content\home"
# Sitecore path format (also works)
Get-Item -Path "master:/sitecore/content/home"
# Mixed separators (both work)
Get-Item -Path "master:\content/home"
Get-Item -Path "master:/content\home"$item = Get-Item -Path "master:\content\home"
# DateTime fields return System.DateTime objects
$item.__Created # Returns DateTime
$item.__Created = [DateTime]::Now # Assign DateTime
# Image fields accept item references
$item.Image = Get-Item "master:\media library\logo"
# Link fields accept item references
$item.Link = Get-Item "master:\content\home\page"
# Multilist fields accept arrays of items
$item.RelatedPages = Get-ChildItem "master:\content\home"# List all item-related commands
Get-Command -Noun Item*
# Get help for a specific command
Get-Help Get-Item -Full
Get-Help Get-ChildItem -Examples
# Find commands by capability
Get-Command -Noun Item* | Where-Object { $_.Parameters.Keys -contains "Language" }<configuration xmlns:patch="https://www.sitecore.net/xmlconfig/">
<sitecore>
<powershell>
<!-- Session Elevation (UAC) -->
<userAccountControl>
<tokens>
<token name="Console">
<patch:attribute name="expiration">00:05:00</patch:attribute>
<patch:attribute name="elevationAction">Password</patch:attribute>
</token>
<token name="ISE">
<patch:attribute name="expiration">00:05:00</patch:attribute>
<patch:attribute name="elevationAction">Password</patch:attribute>
</token>
<token name="ItemSave">
<patch:attribute name="expiration">00:05:00</patch:attribute>
<patch:attribute name="elevationAction">Password</patch:attribute>
</token>
</tokens>
</userAccountControl>
<!-- Ensure web services remain disabled -->
<services>
<remoting enabled="false" />
<restfulv1 enabled="false" />
<restfulv2 enabled="false" />
<fileDownload enabled="false" />
<fileUpload enabled="false" />
<mediaDownload enabled="false" />
<mediaUpload enabled="false" />
</services>
</powershell>
</sitecore>
</configuration><configuration>
<system.web>
<authorization>
<deny users="?" />
</authorization>
</system.web>
</configuration><token name="Console">
<patch:attribute name="expiration">01:00:00</patch:attribute>
<patch:attribute name="elevationAction">Allow</patch:attribute>
</token><token name="Console">
<patch:attribute name="expiration">00:15:00</patch:attribute>
<patch:attribute name="elevationAction">Password</patch:attribute>
</token><token name="Console">
<patch:attribute name="expiration">00:05:00</patch:attribute>
<patch:attribute name="elevationAction">Password</patch:attribute>
</token><token name="Console">
<patch:attribute name="elevationAction">Confirm</patch:attribute>
</token>PS master:\> Get-ItemClone -Path master:\content\home$module = Get-SpeModule -Name "Copy Renderings"
Get-SpeModuleFeatureRoot -Feature contentEditorContextMenu -Module $module$module = Get-SpeModule -Name "Copy Renderings"
Get-SpeModuleFeatureRoot -Module $module -Feature listViewExport -ReturnPathInvoke-Script 'Examples\Script Testing\Long Running Script with Progress Demo'$scriptItem = Get-Item -Path "master:" -ID "{35311878-54EF-4E7A-9B95-3B63F5DEE97D}"
$arguments = @{
TemplateId = "{76036F5E-CBCE-46D1-AF0A-4143F9B557AA}"
}
$scriptItem | Invoke-Script -ArgumentList $argumentsparam($params)
$templateId = $params.templateId
Get-ItemReferrer -ID $templateId


# Use the notation "." to get the current directory/item.
$item = Get-Item -Path .
Show-Alert -Title $item.Name


# /sitecore/system/modules/powershell/script library/spe rocks/functions/get-datemessage
function Get-DateMessage {
"The current date and time is: $(Get-Date)"
}# /sitecore/system/modules/powershell/script library/spe rocks/alerts/show-datemessage
Import-Function -Name Get-DateMessage
Show-Alert (Get-DateMessage)New-WebServiceProxy : The request failed with HTTP status 401: Unauthorized.Import-Module -Name SPE
$credential = Get-Credential
$session = New-ScriptSession -Username admin -Password b -ConnectionUri https://remotesitecore -Credential $credential
Invoke-RemoteScript -Session $session -ScriptBlock { Get-User -id admin }
Stop-ScriptSession -Session $session
# Name Domain IsAdministrator IsAuthenticated
# ---- ------ --------------- ---------------
# sitecore\admin sitecore True False# If you need to connect to more than one instance of Sitecore add it to the list.
$instanceUrls = @("https://remotesitecore","https://remotesitecore2")
$session = New-ScriptSession -Username admin -Password b -ConnectionUri $instanceUrls
Invoke-RemoteScript -Session $session -ScriptBlock { $env:computername }
Stop-ScriptSession -Session $sessionImport-Module -Name SPE
$session = New-ScriptSession -Username admin -Password b -ConnectionUri https://remotesitecore
Receive-RemoteItem -Session $session -Path "default.js" -RootPath App -Destination "C:\Files\"
Stop-ScriptSession -Session $sessionImport-Module -Name SPE
$session = New-ScriptSession -Username admin -Password b -ConnectionUri https://remotesitecore
Receive-RemoteItem -Session $session -Path "/Default Website/cover" -Destination "C:\Images\" -Database master
Stop-ScriptSession -Session $sessionImport-Module -Name SPE
$session = New-ScriptSession -Username admin -Password b -ConnectionUri https://remotesitecore
$jobId = Invoke-RemoteScript -Session $session -ScriptBlock {
"master", "web" | Get-Database |
ForEach-Object {
[Sitecore.Globals]::LinkDatabase.Rebuild($_)
}
} -AsJob
Wait-RemoteScriptSession -Session $session -Id $jobId -Delay 5 -Verbose
Stop-ScriptSession -Session $session$jobId = Invoke-RemoteScript -Session $session -ScriptBlock {
Get-Session -ParameterDoesNotExist "SomeData"
} -AsJob
# This delay could actually be that you got up to get some coffee or tea.
Start-Sleep -Seconds 2
Invoke-RemoteScript -Session $session -ScriptBlock {
$ss = Get-ScriptSession -Id $using:JobId
$ss | Receive-ScriptSession
if($ss.LastErrors) {
$ss.LastErrors
}
}Invoke-RemoteScript -ScriptBlock {
Write-Verbose "Hello from the other side" -Verbose 4>&1
"data"
Write-Verbose "Goodbye from the other side" -Verbose 4>&1
} -Session $sessionInvoke-RemoteScript -ScriptBlock {
function Write-Verbose {
param([string]$Message)
Microsoft.PowerShell.Utility\Write-Verbose -Message $Message -Verbose 4>&1
}
Write-Verbose "Hello from the other side"
"data"
Write-Verbose "Goodbye from the other side"
} -Session $session + FullyQualifiedErrorId : NamedParameterNotFound,Microsoft.PowerShell.Commands.NewItemCommandInvoke-RemoteScript -ScriptBlock {
Set-Location -Path "master:"
...
[The rest of your script]
...
}Get-ArchiveItem -Archive <Archive>
Get-ArchiveItem -Archive <Archive> [-ItemId <ID>]
Get-ArchiveItem -Archive <Archive> [-Identity <AccountIdentity>]$database = Get-Database -Name "master"
$archiveName = "recyclebin"
$archive = Get-Archive -Database $database -Name $archiveName
Get-ArchiveItem -Archive $archive$database = Get-Database -Name "master"
$archiveName = "recyclebin"
$archive = Get-Archive -Database $database -Name $archiveName
Get-ArchiveItem -Archive $archive -ItemId "{1BB32980-66B4-4ADA-9170-10A9D3336613}"$database = Get-Database -Name "master"
$archiveName = "recyclebin"
$archive = Get-Archive -Database $database -Name $archiveName
Get-ArchiveItem -Archive $archive -Identity "sitecore\admin"$item = Get-Item -Path "master:" -ID "{1BB32980-66B4-4ADA-9170-10A9D3336613}"
$date = $item[[Sitecore.FieldIDs]::ArchiveDate]
$serverTime = [Sitecore.DateUtil]::IsoDateToServerTimeIsoDate($date)
$serverTimeDateTime = [Sitecore.DateUtil]::IsoDateToDateTime($serverTime, [datetime]::MinValue)
# Here you could add more time to the $serverTimeDateTime
$utcTimeDateTime = [Sitecore.DateUtil]::ToUniversalTime($serverTimeDateTime)
$isoTime = [Sitecore.DateUtil]::ToIsoDate($utcTimeDateTime)
$item.Editing.BeginEdit()
$item[[Sitecore.FieldIDs]::ArchiveDate] = $isoTime
$item.Editing.EndEdit()
# Some time after the date has passed
$database = Get-Database -Name "master"
$archiveName = "archive"
$archive = Get-Archive -Database $database -Name $archiveName
Get-ArchiveItem -Archive $archive -ItemId "{1BB32980-66B4-4ADA-9170-10A9D3336613}"Get-ItemCloneNotification [-Item] <Item> [-NotificationType <Notification | ChildCreatedNotification | FieldChangedNotification | FirstVersionAddedNotification | ItemMovedChildCreatedNotification | ItemMovedChildRemovedNotification | ItemMovedNotification | ItemTreeMovedNotification | ItemVersionNotification | OriginalItemChangedTemplateNotification | VersionAddedNotification>] [-Language <String[]>]
Get-ItemCloneNotification [-Path] <String> [-NotificationType <Notification | ChildCreatedNotification | FieldChangedNotification | FirstVersionAddedNotification | ItemMovedChildCreatedNotification | ItemMovedChildRemovedNotification | ItemMovedNotification | ItemTreeMovedNotification | ItemVersionNotification | OriginalItemChangedTemplateNotification | VersionAddedNotification>] [-Language <String[]>]
Get-ItemCloneNotification -Id <String> [-Database <String>] [-NotificationType <Notification | ChildCreatedNotification | FieldChangedNotification | FirstVersionAddedNotification | ItemMovedChildCreatedNotification | ItemMovedChildRemovedNotification | ItemMovedNotification | ItemTreeMovedNotification | ItemVersionNotification | OriginalItemChangedTemplateNotification | VersionAddedNotification>] [-Language <String[]>]$clonedItem = Get-Item -Path "master:" -ID "{9F158637-52C2-4005-8329-21527685CB71}"
Get-ItemCloneNotification -Item $clonedItem$clonedItem = Get-Item -Path "master:" -ID "{9F158637-52C2-4005-8329-21527685CB71}"
$clonedItem | Get-ItemCloneNotification -NotificationType ItemMovedChildRemovedNotification$sourcePath = "master:\content\home\sample item"
$destinationPath = "master:\content\home\moved"
Move-Item -Path $sourcePath -Destination $destinationPath# If "new-name" doesn't exist, item is moved and renamed
$oldPath = "master:\content\home\old-name"
$newPath = "master:\content\home\new-name"
Move-Item -Path $oldPath -Destination $newPathGet-Item -Path "master:" -ID "{65736CA0-7D69-452A-A16F-2F42264D21C5}" |
Move-Item -Destination "master:{DFDDF372-3AB7-45B1-9E7C-0D0B27350439}"Useful code snippets to help you with those complex scripts.

-Recurse when neededMove-Item -Path "master:\content\home\old-section" `
-Destination "master:\content\archive\"$originalPath = "master:\content\home\original"
$copyPath = "master:\content\home\copy"
Copy-Item -Path $originalPath -Destination $copyPath$originalPath = "master:\content\home\original"
$copyPath = "master:\content\home\copy"
$newItem = Copy-Item -Path $originalPath -Destination $copyPath -PassThru
$newItem."__Display Name" = "Copy"
Write-Host "New item ID: $($newItem.ID)"$sourceId = "{AF27FAD3-2AF0-4682-9BF7-375197587579}"
$destinationId = "{53F94442-555B-4622-B813-A16ED2CAB01B}"
Get-Item -Path "master:" -ID $sourceId | Copy-Item -Destination $destinationId -RecurseCopy-Item -Path "master:\content\home" `
-Destination "web:\content\home" `
-TransferOptions 0# These are equivalent
Copy-Item -Path "master:\content\home\sampleitem" -Destination "web:\content\home\sampleitem"
Copy-Item -Path "master:\content\home\sampleitem" -Destination "web:\content\home\sampleitem" -TransferOptions 1Get-ChildItem -Path "master:\content\temp" -Recurse |
Where-Object { $_.TemplateName -eq "Sample Item" } |
ForEach-Object {
Move-Item -Path $_.ProviderPath -Destination "master:\content\archive"
}$templates = @("Sample Item", "Article", "News Item")
Get-ChildItem -Path "master:\content\home" -Recurse |
Where-Object { $templates -contains $_.TemplateName } |
ForEach-Object {
Copy-Item -Path $_.ProviderPath -Destination "master:\content\backup"
}# Move all items of a specific template to a new location
$targetTemplate = "Article"
$newParent = Get-Item -Path "master:\content\articles"
Get-ChildItem -Path "master:\content\home" -Recurse |
Where-Object { $_.TemplateName -eq $targetTemplate } |
ForEach-Object {
Move-Item -Path $_.ProviderPath -Destination $newParent.ProviderPath
Write-Host "Moved: $($_.Name)"
}$itemsToCopy = Get-ChildItem -Path "master:\content\home\original" -Recurse
$total = $itemsToCopy.Count
$current = 0
foreach($item in $itemsToCopy) {
$current++
Write-Progress -Activity "Copying items" `
-Status "Copying $($item.Name)" `
-PercentComplete (($current / $total) * 100)
Copy-Item -Path $item.ProviderPath `
-Destination "master:\content\home\copied" `
-Recurse
}
Write-Progress -Activity "Copying items" -Completed$sourceRoot = Get-Item -Path "master:\content\home\job-search"
$destinationRoot = Get-Item -Path "master:\content\home\careers"
$sourceRoot | Copy-Item -Destination $destinationRoot.ProviderPath -Recurse
# Produces a new tree /sitecore/content/home/careers/job-search
# Existing content remains at /sitecore/content/home/job-search# BAD - if parent doesn't exist, item is renamed
Move-Item -Path "master:\content\home\demo" `
-Destination "master:\content\nonexistent"# GOOD - verify parent exists
$destination = "master:\content\archive"
if (Test-Path $destination) {
Move-Item -Path "master:\content\home\demo" -Destination $destination
} else {
Write-Host "Destination does not exist" -ForegroundColor Red
}# BAD - can't access the new item
Copy-Item -Path "master:\content\home\demo" -Destination "master:\content\copy"
# No reference to the copied item# GOOD - use PassThru to get reference
$sourcePath = "master:\content\home\demo"
$destinationPath = "master:\content\home\demo-copy"
$copiedItem = Copy-Item -Path $sourcePath -Destination $destinationPath -PassThru
$copiedItem.Title = "Updated Title"PS master:\> ConvertFrom-ItemClone -Path master:\content\homePS master:\> Get-SpeModule -Database (Get-Database "master")PS master:\> Get-SpeModule -Database (Get-Database "master")PS master:\> Get-item "master:\system\Modules\PowerShell\Script Library\Copy Renderings\Content Editor\Context Menu\Layout\Copy Renderings" | Get-SpeModulePS master:\> Get-TaskSchedule
Name Database Active Auto Remove Is Due Expired Completed Last Run Next Run
---- -------- ------ ----------- ------ ------- --------- -------- --------
__Task Schedule master True False True False False 0001-01-01 00:00:00 0001-01-01 00:00:00
Check Bounced Messages master True False False False False 2014-07-29 10:18:43 2014-07-29 22:48:43
Check DSN Messages master True False False False False 2014-07-29 10:19:18 2014-07-29 22:49:18
Clean Confirmation IDs master True False False False False 2014-07-28 22:14:30 2014-07-31 02:14:30
Clean Message History master True False False False False 2014-07-29 10:19:18 2014-07-29 22:49:18
Close Outdated Connections master True False False False False 2014-07-29 12:30:22 2014-07-29 13:30:22
Test-PowerShell master True False False False False 2014-07-28 14:30:06 2014-08-01 17:32:07
__Task Schedule web True False True False False 0001-01-01 00:00:00 0001-01-01 00:00:00
Check Bounced Messages web True False True False False 2013-11-04 08:36:22 2013-11-04 21:06:22
Check DSN Messages web True False True False False 2013-11-04 08:36:22 2013-11-04 21:06:22
Clean Confirmation IDs web True False False False False 2013-11-04 08:36:22 2013-11-04 21:36:22
Clean Message History web True False True False False 2013-11-04 08:36:22 2013-11-04 21:06:22
Close Outdated Connections web True False True False False 2013-11-04 09:36:23 2013-11-04 10:36:23
Test-PowerShell web True False True False False 2013-11-04 09:46:29 2013-11-04 09:46:30PS master:\> Get-TaskSchedule -Name "*Check*"
Name Database Active Auto Remove Is Due Expired Completed Last Run Next Run
---- -------- ------ ----------- ------ ------- --------- -------- --------
Check Bounced Messages master True False False False False 2014-07-29 10:18:43 2014-07-29 22:48:43
Check DSN Messages master True False False False False 2014-07-29 10:19:18 2014-07-29 22:49:18
Check Bounced Messages web True False True False False 2013-11-04 08:36:22 2013-11-04 21:06:22
Check DSN Messages web True False True False False 2013-11-04 08:36:22 2013-11-04 21:06:22PS master:\> Get-TaskSchedule -Name "*Check*" -Database "master"
Name Database Active Auto Remove Is Due Expired Completed Last Run Next Run
---- -------- ------ ----------- ------ ------- --------- -------- --------
Check Bounced Messages master True False False False False 2014-07-29 10:18:43 2014-07-29 22:48:43
Check DSN Messages master True False False False False 2014-07-29 10:19:18 2014-07-29 22:49:18# Create a list of field names on the Standard Template. This will help us filter out extraneous fields.
$standardTemplate = Get-Item -Path "master:" -ID "{1930BBEB-7805-471A-A3BE-4858AC7CF696}"
$standardTemplateTemplateItem = [Sitecore.Data.Items.TemplateItem]$standardTemplate
$standardFields = $standardTemplateTemplateItem.OwnFields + $standardTemplateTemplateItem.Fields | Select-Object -ExpandProperty key -Unique
$itemTemplate = Get-Item -Path "master:" -ID "{76036F5E-CBCE-46D1-AF0A-4143F9B557AA}"
$itemTemplateTemplateItem = [Sitecore.Data.Items.TemplateItem]$itemTemplate
$itemTemplateFields = $itemTemplateTemplateItem.OwnFields + $itemTemplateTemplateItem.Fields | Select-Object -ExpandProperty key -Unique
$filterFields = $itemTemplateFields | Where-Object { $standardFields -notcontains $_ } | Sort-Object$item = Get-Item -Path "master:{04DAD0FD-DB66-4070-881F-17264CA257E1}"
$siteName = "website"
$site = [Sitecore.Sites.SiteContextFactory]::GetSiteContext($siteName)
New-UsingBlock (New-Object Sitecore.Sites.SiteContextSwitcher $site) {
[Sitecore.Resources.Media.MediaManager]::GetMediaUrl($item)
}
# /-/media/default-website/cover.jpg$html = "<ul><li>foo</li><li>bar</li></ul>"
$htmlDocument = New-Object -TypeName HtmlAgilityPack.HtmlDocument
$htmlDocument.LoadHtml($html)
foreach($x in $htmlDocument.DocumentNode.SelectNodes("//li")) {
$x.InnerText;
}$html = @"
<div class="kitchen">
<div class="kitchen">
<blockquote>kitchen<br />
<span class="kitchen">kitchen</span>
</blockquote>
<a><img title="kitchen" src="https://kitchen-sink.local" /></a>
</div>
</div>
"@
$htmlDocument = New-Object -TypeName HtmlAgilityPack.HtmlDocument
$htmlDocument.LoadHtml($html)
foreach($x in $htmlDocument.DocumentNode.Descendants()) {
if($x.Name -ne "img" -and ![string]::IsNullOrEmpty($x.Text)) {
$x.Text = $x.Text.Replace("kitchen", "sink")
}
}
$htmlDocument.DocumentNode.OuterHtml$html = @"
<div style='padding: 10px 10px;'>Some Text</div>
"@
$htmlDocument = New-Object -TypeName HtmlAgilityPack.HtmlDocument
$htmlDocument.LoadHtml($html)
$nodes = $htmlDocument.DocumentNode.SelectNodes("//@style");
foreach($node in $nodes) {
$node.Attributes["style"].Remove()
}
$htmlDocument.DocumentNode.OuterHtml$item = Get-Item -Path "master:" -Id "{110D559F-DEA5-42EA-9C1C-8A5DF7E70EF9}"
$db = Get-Database -Name "master"
$workflowProvider = $db.WorkflowProvider
foreach($version in $item.Versions.GetVersions()) {
$workflowEvents = $workflowProvider.HistoryStore.GetHistory($version)
foreach($workflowEvent in $workflowEvents) {
"[$($workflowEvent.Date)] ($($workflowEvent.User)) $(($workflowEvent.Text -replace '(\r|\n)',''))"
}
}Write-Host "Restoring items recycled after $($archivedDate.ToShortDateString())"
foreach($archive in Get-Archive -Name "recyclebin") {
Write-Host " - Found $($archive.GetEntryCount()) entries"
$entries = $archive.GetEntries(0, $archive.GetEntryCount())
foreach($entry in $entries) {
if($entry.ArchiveLocalDate -ge $archivedDate) {
Write-Host "Restoring item: $($entry.OriginalLocation) {$($entry.ArchivalId)}on date $($entry.ArchiveLocalDate)"
$archive.RestoreItem($entry.ArchivalId)
} else {
Write-Host "Skipping $($entry.OriginalLocation) on date $($entry.ArchiveLocalDate)"
}
}
}$database = Get-Database -Name "master"
$archiveName = "recyclebin"
$archive = Get-Archive -Database $database -Name $archiveName
$items = Get-ArchiveItem -Archive $archive
$count = 0
$total = $items.Count
foreach($item in $items) {
$count++
if($count % 100 -eq 0) {
Write-Host "[$(Get-Date -Format 'yyyy-MM-dd hh:mm:ss')] $([math]::round($count * 100 / $total, 2))% complete"
}
$item | Remove-ArchiveItem
}
Write-Host "Completed processing recycle bin"1..5 | ForEach-Object {
Start-Sleep -Seconds 1
Invoke-JavaScript -Script "console.log('Hello World! Call #$($_) from PowerShell...');"
}
Invoke-JavaScript -Script "alert('hello from powershell');"Import-Module -Name SPE -Force
$packageName = "$($SitecorePackageFolder)\[PACKAGE].zip"
$session = New-ScriptSession -Username "admin" -Password "b" -ConnectionUri "https://remotesitecore"
Test-RemoteConnection -Session $session -Quiet
$jobId = Invoke-RemoteScript -Session $session -ScriptBlock {
[Sitecore.Configuration.Settings+Indexing]::Enabled = $false
Get-SearchIndex | ForEach-Object { Stop-SearchIndex -Name $_.Name }
Import-Package -Path "$($SitecorePackageFolder)\$($using:packageName)" -InstallMode Merge -MergeMode Merge
[Sitecore.Configuration.Settings+Indexing]::Enabled = $true
} -AsJob
Wait-RemoteScriptSession -Session $session -Id $jobId -Delay 5 -Verbose
Stop-ScriptSession -Session $sessionPS master:\> Add-BaseTemplate -Path "master:/sitecore/content/User Defined/Page" -Template "/sitecore/templates/User Defined/BaseTemplate"PS master:\> $baseA = Get-Item -Path master:/sitecore/content/User Defined/BaseTemplateA
PS master:\> $baseB = Get-Item -Path master:/sitecore/content/User Defined/BaseTemplateB
PS master:\> Add-BaseTemplate -Path "master:/sitecore/content/User Defined/Page" -TemplateItem @($baseA, $baseB)Get-Item -Path "master:\content\home" | Expand-Token$tokens = @('$name', '$id', '$parentId', '$parentname', '$date', '$time', '$now')
$item = Get-Item -Path "master:\content\home"
$standardValueFields = Get-ItemField -Item $item -ReturnType Field -Name "*" `
| Where-Object { $_.ContainsStandardValue }
$item.Editing.BeginEdit()
foreach ($field in $standardValueFields) {
$value = $field.Value
if ($tokens -contains $value) {
$item[$field.Name] = $value
}
}
$item.Editing.EndEdit()
Expand-Token -Item $itemPS master:\>Get-ItemReference -Path master:\content\home
Name Children Languages Id TemplateName
---- -------- --------- -- ------------
Home True {en, de-DE, es-ES, pt... {110D559F-DEA5-42EA-9C1C-8A5DF7E70EF9} Sample Item
Home True {en, de-DE, es-ES, pt... {110D559F-DEA5-42EA-9C1C-8A5DF7E70EF9} Sample ItemPS master:\>Get-Item master:\content\home | Get-ItemReference -ItemLink
SourceItemLanguage : en
SourceItemVersion : 1
TargetItemLanguage :
TargetItemVersion : 0
SourceDatabaseName : master
SourceFieldID : {F685964D-02E1-4DB6-A0A2-BFA59F5F9806}
SourceItemID : {110D559F-DEA5-42EA-9C1C-8A5DF7E70EF9}
TargetDatabaseName : master
TargetItemID : {110D559F-DEA5-42EA-9C1C-8A5DF7E70EF9}
TargetPath : /sitecore/content/HomePS master:\>Get-ItemReferrer -Path master:\content\home
Name Children Languages Id TemplateName
---- -------- --------- -- ------------
Home True {en, de-DE, es-ES, pt... {110D559F-DEA5-42EA-9C1C-8A5DF7E70EF9} Sample Item
Form False {en, de-DE, es-ES, pt... {6D3B4E7D-FEF8-4110-804A-B56605688830} Webcontrol
news True {en, de-DE, es-ES, pt... {DB894F2F-D53F-4A2D-B58F-957BFAC2C848} Article
learn-about-oms False {en, de-DE, es-ES, pt... {79ECF4DF-9DB7-430F-9BFF-D164978C2333} LinkPS master:\>Get-Item master:\content\home | Get-ItemReferrer -ItemLink
SourceItemLanguage : en
SourceItemVersion : 1
TargetItemLanguage :
TargetItemVersion : 0
SourceDatabaseName : master
SourceFieldID : {F685964D-02E1-4DB6-A0A2-BFA59F5F9806}
SourceItemID : {110D559F-DEA5-42EA-9C1C-8A5DF7E70EF9}
TargetDatabaseName : master
TargetItemID : {110D559F-DEA5-42EA-9C1C-8A5DF7E70EF9}
TargetPath : /sitecore/content/HomePS master:\> Get-ItemTemplate -Path master:\content\home
BaseTemplates : {Standard template}
Fields : {__Context Menu, __Display name, __Editor, __Editors...}
FullName : Sample/Sample Item
Key : sample item
OwnFields : {Title, Text, Image, State...}
StandardValues : Sitecore.Data.Items.Item
Database : master
DisplayName : Sample Item
Icon : Applications/16x16/document.png
ID : {76036F5E-CBCE-46D1-AF0A-4143F9B557AA}
InnerItem : Sitecore.Data.Items.Item
Name : Sample ItemPS master:\> Get-Item -Path master:/content/Home | Get-ItemTemplate -Recurse | ft Name, FullName, Key -auto
Name FullName Key
---- -------- ---
Sample Item Sample/Sample Item sample item
Standard template System/Templates/Standard template standard template
Advanced System/Templates/Sections/Advanced advanced
Appearance System/Templates/Sections/Appearance appearance
Help System/Templates/Sections/Help help
Layout System/Templates/Sections/Layout layout
Lifetime System/Templates/Sections/Lifetime lifetime
Insert Options System/Templates/Sections/Insert Options insert options
Publishing System/Templates/Sections/Publishing publishing
Security System/Templates/Sections/Security security
Statistics System/Templates/Sections/Statistics statistics
Tasks System/Templates/Sections/Tasks tasks
Validators System/Templates/Sections/Validators validators
Workflow System/Templates/Sections/Workflow workflowPS master:\> Get-ItemWorkflowEvent -Path master:\content\home
Date : 2014-07-27 14:23:33
NewState : {190B1C84-F1BE-47ED-AA41-F42193D9C8FC}
OldState : {46DA5376-10DC-4B66-B464-AFDAA29DE84F}
Text : Automated
User : sitecore\admin
Date : 2014-08-01 15:43:29
NewState : {190B1C84-F1BE-47ED-AA41-F42193D9C8FC}
OldState : {190B1C84-F1BE-47ED-AA41-F42193D9C8FC}
Text : Just leaving a note
User : sitecore\adminPS master:\> Get-Item master:\content\home\ | Invoke-ShellCommand "item:publishingviewer"PS master:\> Get-Item master:/content/home | Invoke-ShellCommand "item:duplicate"PS master:\> Get-Item master:/content/home | Invoke-ShellCommand "contenteditor:properties"PS master:\> Invoke-Workflow -Path master:/content/home -CommandName "Submit" -Comments "Automated"PS master:\> Get-Item master:/content/home | Invoke-Workflow -CommandName "Reject" -Comments "Automated"PS master:\> $newTarget = Get-Item master:\content\new-target\
PS master:\> New-ItemClone -Path master:\content\home -Destination $newTarget -Name "New Home"

Hands-on examples to get you started with practical Sitecore automation.


master: - The database# Items
Get-Item -Path "master:\content\home"
Get-ChildItem -Path "master:\content" -Recurse
New-Item -Path "master:\content\home" -Name "Item"
Remove-Item -Path "master:\content\home\item"
# Filtering
... | Where-Object { $_.TemplateName -eq "Article" }
... | Select-Object -Property Name, ID, TemplateName
... | Sort-Object -Property Name
# Editing
$item.Editing.BeginEdit()
$item["Title"] = "New Value"
$item.Editing.EndEdit()
# Publishing
Publish-Item -Item $item -PublishMode Smart -Target web
# Help
Get-Help Get-Item
Get-Command *Item*
$item | Get-Member# Safe editing
foreach($item in $items) {
$item.Editing.BeginEdit()
try {
$item["Field"] = "Value"
$item.Editing.EndEdit()
}
catch {
$item.Editing.CancelEdit()
Write-Error $_
}
}
# Progress reporting
$total = $items.Count
for($i = 0; $i -lt $total; $i++) {
Write-Progress -Activity "Processing" `
-Status "$i of $total" `
-PercentComplete (($i / $total) * 100)
# Process item
}Get-Item -Path "master:\content\home"Name Children Language Version Id TemplateName
---- -------- -------- ------- -- ------------
Home False en 1 {110D559F-DEA5-42EA-9C1C-8A5DF7E70EF9} Sample ItemGet-Item -Path "master:\content\home"Get-ChildItem -Path "master:\content\home"Get-ChildItem -Path "master:\content\home" -RecurseGet-Item -Path "master:\content\home" | Select-Object -Property Name, ID, TemplateNameName ID TemplateName
---- -- ------------
Home {110D559F-DEA5-42EA-9C1C-8A5DF7E70EF9} Sample ItemGet-ChildItem -Path "master:\content\home" | Where-Object { $_.Name -like "*Sample*" }# Get the home item
$homeItem = Get-Item -Path "master:\content\home"
# Show its children
$children = Get-ChildItem -Path $homeItem.ProviderPath
# Display count
Write-Host "Home has $($children.Count) children" -ForegroundColor Green
# Show the list
$children | Select-Object Name, TemplateName$item = Get-Item -Path "master:\content\home"
$name = $item.Name
$count = 5Get-ChildItem -Path "master:\content\home" |
Where-Object { $_.TemplateName -eq "Sample Item" } |
Select-Object Name, ID# Sitecore databases
Get-Item -Path "master:\content\home"
Get-Item -Path "web:\content\home"
Get-Item -Path "core:\content"
# File system
Get-Item -Path "C:\temp"
# Registry
Get-Item -Path "HKLM:\SOFTWARE"if(Test-Path "master:\content\home\test") {
Write-Host "Item exists!" -ForegroundColor Green
} else {
Write-Host "Item not found" -ForegroundColor Yellow
}$items = Get-ChildItem -Path "master:\content\home" -Recurse
$items | Group-Object TemplateName | Select-Object Name, Count | Sort-Object Count -Descending$threshold = (Get-Date).AddDays(-7)
Get-ChildItem -Path "master:\content\home" -Recurse |
Where-Object { $_."__Updated" -gt $threshold } |
Select-Object Name, ItemPath, "__Updated"$items = Get-ChildItem -Path "master:\content\home"
$items | Select-Object Name, TemplateName, "__Updated" |
Export-Csv -Path "$($SitecoreDataFolder)\export\items.csv" -NoTypeInformationGet-Help Get-ItemAclGet-Help Read-Variable -DetailedGet-Help Find-Item -ExamplesGet-Command | Where-Object { $_.ImplementingType -and $_.ImplementingType.Assembly.GetName().Name -eq "Spe" }database:\path\to\item
Examples:
master:\content\home
web:\content\home\article
core:\content$_ # Current item in pipeline
$PSItem # Same as $_
$true # Boolean true
$false # Boolean false
$null # Null value<configuration xmlns:patch="https://www.sitecore.net/xmlconfig/">
<sitecore>
<controlSources>
<source mode="on" namespace="Spe.Client.Controls" assembly="Spe">
<patch:delete />
</source>
<source mode="on" namespace="Spe.Client.Applications"
folder="/sitecore modules/Shell/PowerShell/" deep="true">
<patch:delete />
</source>
</controlSources>
</sitecore>
</configuration><configuration xmlns:patch="https://www.sitecore.net/xmlconfig/">
<sitecore>
<powershell>
<services>
<!-- Enable remoting with HTTPS requirement -->
<remoting>
<patch:attribute name="enabled">true</patch:attribute>
<patch:attribute name="requireSecureConnection">true</patch:attribute>
<!-- Clear default authorization -->
<authorization>
<patch:delete />
</authorization>
<!-- Add specific service account -->
<authorization>
<add Permission="Allow" IdentityType="User" Identity="sitecore\automation-user" desc="CI/CD automation account" />
</authorization>
</remoting>
<!-- Optionally enable file operations for package deployment -->
<fileDownload>
<patch:attribute name="enabled">true</patch:attribute>
</fileDownload>
<fileUpload>
<patch:attribute name="enabled">true</patch:attribute>
</fileUpload>
</services>
</powershell>
</sitecore>
</configuration><configuration>
<system.web>
<authorization>
<!-- Deny anonymous access -->
<deny users="?" />
</authorization>
</system.web>
<system.webServer>
<security>
<!-- Require HTTPS -->
<access sslFlags="Ssl" />
<!-- Optional: IP restrictions for build servers -->
<ipSecurity allowUnlisted="false">
<add ipAddress="10.0.0.100" allowed="true" desc="Build Server 1" />
<add ipAddress="10.0.0.101" allowed="true" desc="Build Server 2" />
</ipSecurity>
</security>
</system.webServer>
</configuration># Test from remote machine using SPE Remoting module
Import-Module SPE
# Create session
$session = New-ScriptSession `
-Username "sitecore\automation-user" `
-Password "SecurePassword123!" `
-ConnectionUri "https://sitecore-instance.local"
# Test script execution
$result = Invoke-RemoteScript -Session $session -ScriptBlock {
Get-Item -Path "master:\content\home" | Select-Object -ExpandProperty Name
}
Write-Host "Result: $result" -ForegroundColor Green
# Close session
Stop-ScriptSession -Session $sessionGet-Item -Path "master:\content\home"Name Children Language Version Id TemplateName
---- -------- -------- ------- -- ------------
Home True en 2 {110D559F-DEA5-42EA-9C1C-8A5DF7E70EF9} Sample ItemSitecore.Data.Database master = Sitecore.Configuration.Factory.GetDatabase("master");
Sitecore.Data.Items.Item item = master.GetItem("/sitecore/content/home");Get-Item -Path "master:\content\home" -Language "da" |
Format-Table DisplayName, Language, Id, Version, TemplateNameDisplayName Language ID Version TemplateName
----------- -------- -- ------- ------------
Hjem da {110D559F-DEA5-42EA-9C1C-8A5DF7E70EF9} 1 Sample ItemGet-Item -Path "master:\content\home" -Language * |
Format-Table DisplayName, Language, Id, Version, TemplateNameDisplayName Language ID Version TemplateName
----------- -------- -- ------- ------------
Home en {110D559F-DEA5-42EA-9C1C-8A5DF7E70EF9} 1 Sample Item
Home de-DE {110D559F-DEA5-42EA-9C1C-8A5DF7E70EF9} 1 Sample Item
Home pl-PL {110D559F-DEA5-42EA-9C1C-8A5DF7E70EF9} 1 Sample Item
Home en-US {110D559F-DEA5-42EA-9C1C-8A5DF7E70EF9} 3 Sample Item
Home en-GB {110D559F-DEA5-42EA-9C1C-8A5DF7E70EF9} 1 Sample Item
Hjem da {110D559F-DEA5-42EA-9C1C-8A5DF7E70EF9} 1 Sample ItemGet-Item -Path "master:\content\home" -Language * -Version * |
Format-Table DisplayName, Language, Id, Version, TemplateNameDisplayName Language ID Version TemplateName
----------- -------- -- ------- ------------
Home en {110D559F-DEA5-42EA-9C1C-8A5DF7E70EF9} 1 Sample Item
Home de-DE {110D559F-DEA5-42EA-9C1C-8A5DF7E70EF9} 1 Sample Item
Home pl-PL {110D559F-DEA5-42EA-9C1C-8A5DF7E70EF9} 1 Sample Item
Home en-US {110D559F-DEA5-42EA-9C1C-8A5DF7E70EF9} 1 Sample Item
Home en-US {110D559F-DEA5-42EA-9C1C-8A5DF7E70EF9} 2 Sample Item
Home en-US {110D559F-DEA5-42EA-9C1C-8A5DF7E70EF9} 3 Sample Item
Home en-GB {110D559F-DEA5-42EA-9C1C-8A5DF7E70EF9} 1 Sample Item
Hjem da {110D559F-DEA5-42EA-9C1C-8A5DF7E70EF9} 1 Sample ItemGet-Item -Path "master:\content\home" -Language "en","en-*"Get-ChildItem -Path "master:\content"Get-ChildItem -Path "master:\content\home" -RecurseGet-ChildItem -Path "master:\content" -Language * -Version * |
Format-Table DisplayName, Language, Id, Version, TemplateNameGet-Item -Path "master:" -ID "{110D559F-DEA5-42EA-9C1C-8A5DF7E70EF9}" -Language *Name Children Language Version Id TemplateName
---- -------- -------- ------- -- ------------
Home True en 3 {110D559F-DEA5-42EA-9C1C-8A5DF7E70EF9} Sample Item
Home True en-CA 2 {110D559F-DEA5-42EA-9C1C-8A5DF7E70EF9} Sample ItemGet-Item -Path "master:" -Uri "sitecore://master/{110D559F-DEA5-42EA-9C1C-8A5DF7E70EF9}?lang=en&ver=1"Name Children Language Version Id TemplateName
---- -------- -------- ------- -- ------------
Home True en 1 {110D559F-DEA5-42EA-9C1C-8A5DF7E70EF9} Sample ItemGet-Item -Path "master:" -Query "/sitecore/content//*[@@templatename='Sample Item']"Name Children Language Version Id TemplateName
---- -------- -------- ------- -- ------------
Home True en 3 {110D559F-DEA5-42EA-9C1C-8A5DF7E70EF9} Sample Item
Contact False en 1 {357D85DB-4F6C-42AF-B9A0-C232FD86F679} Sample Item
History False en 1 {49D54DA4-EEB9-463B-AB19-BD8647270442} Sample Item
Team False en 1 {2E4F7BBB-C71C-4CBC-BBA1-B4C05F946138} Sample Item
BulkItem1 False en 1 {81E660ED-0207-4C1F-BCEF-DAD9286B4E02} Sample ItemGet-Item -Path "master:" -Query "/sitecore/content//*[@@templatename='Sample Item']" -Language * -Version * |
Format-Table DisplayName, Language, Id, Version, TemplateName -AutoSize$isoDate = [Sitecore.DateUtil]::ToIsoDate([datetime]::Today)
Get-Item -Path "master:" -Query "/sitecore/content/home//*[@__Publish > '$($isoDate)']" |
Show-ListView -Property ID, Name, ItemPath$query = "ancestor-or-self::*[@@templatename='Sample Item']"
# Option 1: Use Axes directly on an item
$SitecoreContextItem.Axes.SelectItems($query)
# Option 2: Prepend the context path to the query
Get-Item -Path "master:" -Query "$($SitecoreContextItem.Paths.Path)/$query"Get-Item -Path "master:\content\home" | Select-Object -Property PSSecurityName ID __Owner __Security
---- -- ------- ----------
Home {110D559F-DEA5-42EA-9C1C-8A5DF7E70EF9} sitecore\Admin ar|sitecore\Developer|pd|+item:read|pe|+item:read|Get-Item -Path "master:" -ID "{04DAD0FD-DB66-4070-881F-17264CA257E1}" | Select-Object -Property PSTemplateName ID BaseTemplate
---- -- ------------
cover {04DAD0FD-DB66-4070-881F-17264CA257E1} {Image, File, Standard template, Advanced...}Get-Item -Path "master:\media library\Default Website\cover" | Select-Object -Property PSImageName : cover
ID : {04DAD0FD-DB66-4070-881F-17264CA257E1}
Alt :
Width : 1600
Height : 550
Extension : jpg
Size : 119719Get-Item -Path "master:\system\Tasks\Schedules\Forms\FileStorageCleanup" |
Select-Object -Property PSScheduleName : FileStorageCleanup
ID : {3D8F6795-1C4E-462D-8A81-BE27B1AEC5BD}
Schedule : 20190101|99990101|127|24:00:00
Last run : 11/29/2025 4:46:29 AM
Command : {D4ADAD17-E648-4FDC-BC4C-43F9D1513720}
Items :# Get the root node using Get-Item, then call Axes
$mediaItemContainer = Get-Item -Path "master:\media library"
$items = $mediaItemContainer.Axes.GetDescendants() |
Where-Object { [int]$_.Fields["Size"].Value -gt 100000 } |
Initialize-Item# Using Get-ChildItem with filtering
Get-ChildItem -Path "master:\content\home" -Recurse |
Where-Object { $_.TemplateName -eq "Sample Item" }
# Using Sitecore query (more efficient for large trees)
Get-Item -Path "master:" -Query "/sitecore/content/home//*[@@templatename='Sample Item']"$cutoffDate = (Get-Date).AddDays(-7)
Get-ChildItem -Path "master:\content" -Recurse |
Where-Object { $_.__Updated -gt $cutoffDate }# Using Where-Object
Get-ChildItem -Path "master:\content\home" -Recurse |
Where-Object { $_.Title -like "*Welcome*" }
# Using Sitecore query
Get-Item -Path "master:" -Query "/sitecore/content/home//*[contains(@Title, 'Welcome')]"Get-ChildItem -Path "master:\media library" -Recurse |
Where-Object { $_.Size -gt 1MB } |
Select-Object Name, Size, Extension, ItemPathforeach($item in $selectedData){
# Run Sheer application on Desktop
Show-Application `
-Application "Content Editor" `
-Parameter @{id ="$($item.ID)"; fo="$($item.ID)";
la="$($item.Language.Name)"; vs="$($item.Version.Number)";
sc_content="$($item.Database.Name)"}
}Get-ChildItem master:\ | Show-ListView -ViewName ListChildrenGet-ChildItem master:\ | Show-ListView -ViewName ListChildren -Property Name, ProviderPathGet-ChildItem master:\ | Show-ListView -Property Name, ProviderPathfor($i = 0; $i -le 10; $i++){
Write-Progress -Activity "I need to do something important for 5 seconds" `
-Status "I'm quite on track..." `
-PercentComplete ($i*10) -SecondsRemaining (5-$i/2) `
-CurrentOperation "Trying to look busy.";
Start-Sleep -m 500
}
Write-Progress -Activity "Now I'm doing something else..." `
-Status "Should take me about 3 seconds but I'm not quite sure...";
Start-Sleep -s 3;
for($i = 0; $i -le 10; $i++){
Write-Progress -Activity "Ok let me revisit one more thing..." `
-Status "Just 5 more seconds" `
-PercentComplete ($i*10) -SecondsRemaining (5-$i/2) `
-CurrentOperation "Just making sure.";
Start-Sleep -m 500;
}
Write-Progress -Completed -Activity "Done."Get-ChildItem master:\ |
Show-ListView `
-Hide AllActions, AllExport, Filter, PagingWhenNotNeeded, StatusBar `
-Property Name, DisplayName, ProviderPath, __Updated, "__Updated By"# Test file system access
Test-Path "C:\Windows\System32" -PathType Container
Test-Path "C:\inetpub\wwwroot" -PathType Container
# Check current identity
[System.Security.Principal.WindowsIdentity]::GetCurrent().Name
# Verify HOME directory
$HOME# This respects Sitecore security
Get-Item -Path "master:\content\home"
# This also respects Sitecore security
Get-User -Identity "sitecore\testuser"# This bypasses Sitecore security
New-UsingBlock (New-Object Sitecore.SecurityModel.SecurityDisabler) {
# Code here runs with full Sitecore permissions
Get-Item -Path "master:\content\home"
}# Get current user
$user = Get-User -Current
Write-Host "Current User: $($user.Name)"
# Check if user is in a role
$user.IsInRole("sitecore\Developer")
# List all roles for current user
$user.Roles | ForEach-Object { $_.Name }
# Test item access
$item = Get-Item -Path "master:\content\home"
$item.Access.CanRead()
$item.Access.CanWrite()
$item.Access.CanDelete()# Navigate to the home item
$homeItem = Get-Item -Path "master:\content\home"
# Get all descendants
$items = Get-ChildItem -Path $homeItem.ProviderPath -Recurse
# Filter items in "Draft" workflow state
$draftItems = $items | Where-Object {
$_.Fields["__Workflow state"] -ne $null -and
$_."__Workflow state" -match "{190B1C84-F1BE-47ED-AA41-F42193D9C8FC}"
}
# Display results in an interactive list
$draftItems | Show-ListView -Property Name, ItemPath, "__Updated", "__Updated by"# Get items to update
$items = Get-ChildItem -Path "master:\content\home\articles" -Recurse |
Where-Object { $_.TemplateName -eq "Article" }
# Update each item
foreach($item in $items) {
# Begin editing
$item.Editing.BeginEdit()
# Update field
$item["Category"] = "Updated"
# Save changes
$item.Editing.EndEdit()
}
Write-Host "Updated $($items.Count) items" -ForegroundColor Green# Prompt user for input
$rootPath = Get-Item -Path "master:\content\home"
$publishItems = $true
$props = @{
Parameters = @(
@{Name="rootPath"; Title="Root Path"; Tooltip="Select the starting location"},
@{Name="templateName"; Title="Template Name";
Source="DataSource=/sitecore/templates&DatabaseName=master&IncludeTemplatesForDisplay=Node,Folder,Template,Template Folder&IncludeTemplatesForSelection=Template";
editor="groupeddroplist"; }
)
Title = "Bulk Item Processor"
Description = "Select items to process"
Width = 500
Height = 300
}
$result = Read-Variable @props
if($result -ne "ok") {
Exit
}
# Process items based on user input
$items = Get-ChildItem -Path $rootPath.ProviderPath -Recurse |
Where-Object { $_.TemplateName -eq $templateName }
Write-Host "Found $($items.Count) items"# Get your home item
Get-Item -Path "master:\content\home"
# List its children
Get-ChildItem -Path "master:\content\home"
# Find items by name
Get-ChildItem -Path "master:\content\home" -Recurse |
Where-Object { $_.Name -like "*Sample*" }foreach($item in $items) {
$item.Editing.BeginEdit()
try {
$item["FieldName"] = "Value"
$item.Editing.EndEdit() | Out-Null
}
catch {
$item.Editing.CancelEdit()
Write-Error "Failed to update $($item.ItemPath): $_"
}
}$itemPath = "master:\content\home\test"
if(Test-Path $itemPath) {
$item = Get-Item $itemPath
# Process item
}
else {
Write-Host "Item not found" -ForegroundColor Yellow
}$items = Get-ChildItem -Path "master:\content" -Recurse
$total = $items.Count
$current = 0
foreach($item in $items) {
$current++
Write-Progress -Activity "Processing Items" `
-Status "$current of $total" `
-PercentComplete (($current / $total) * 100)
# Process item here
}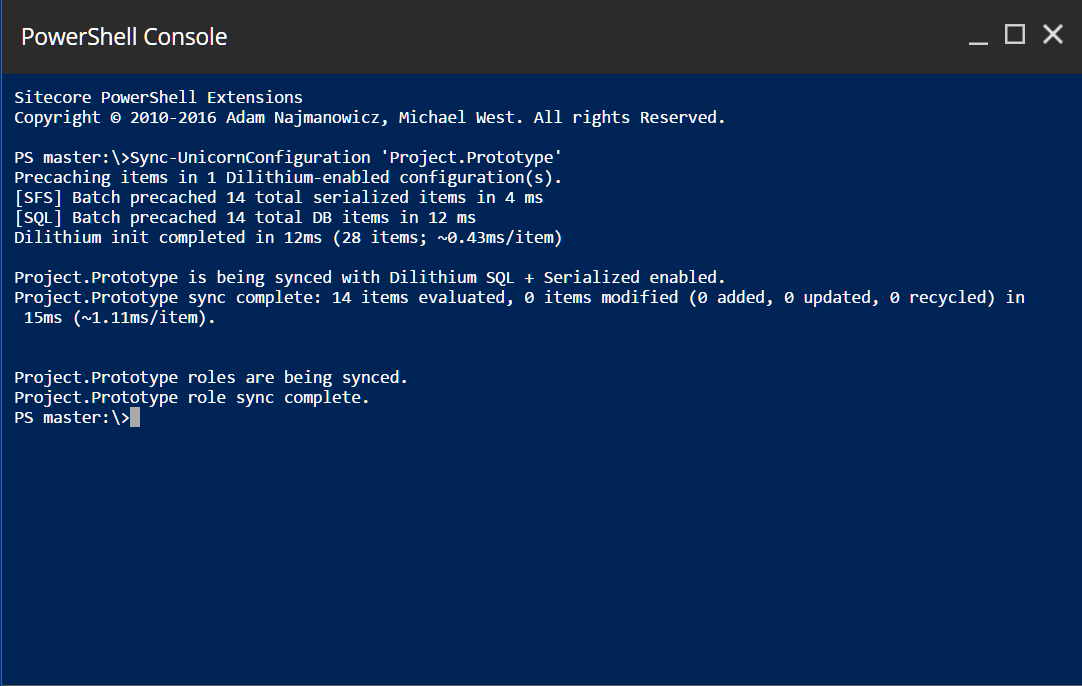
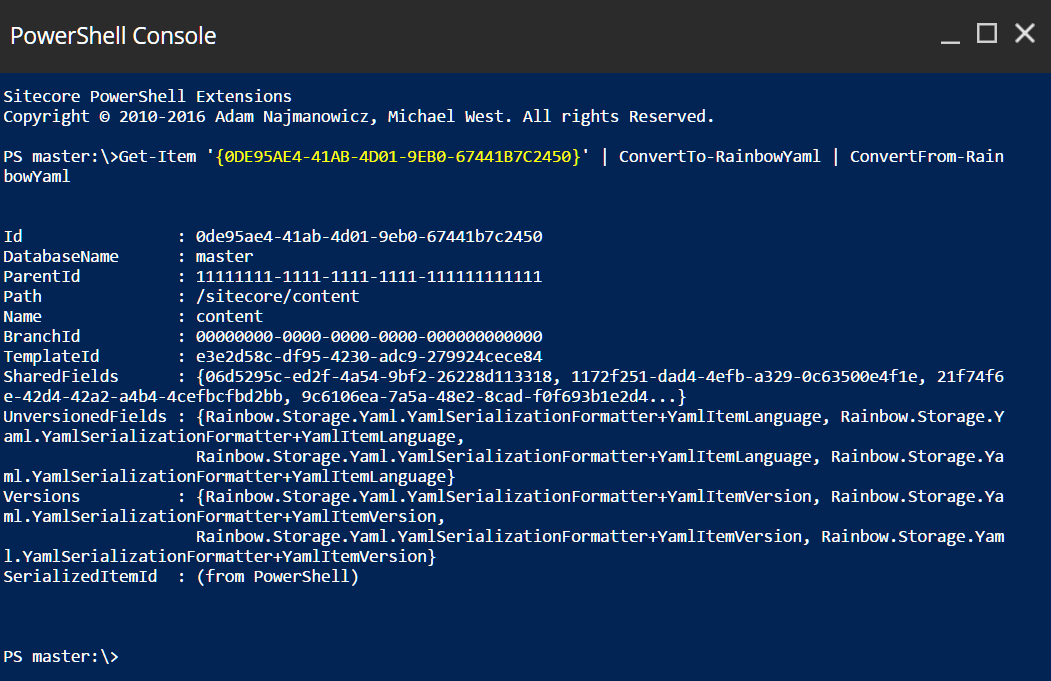
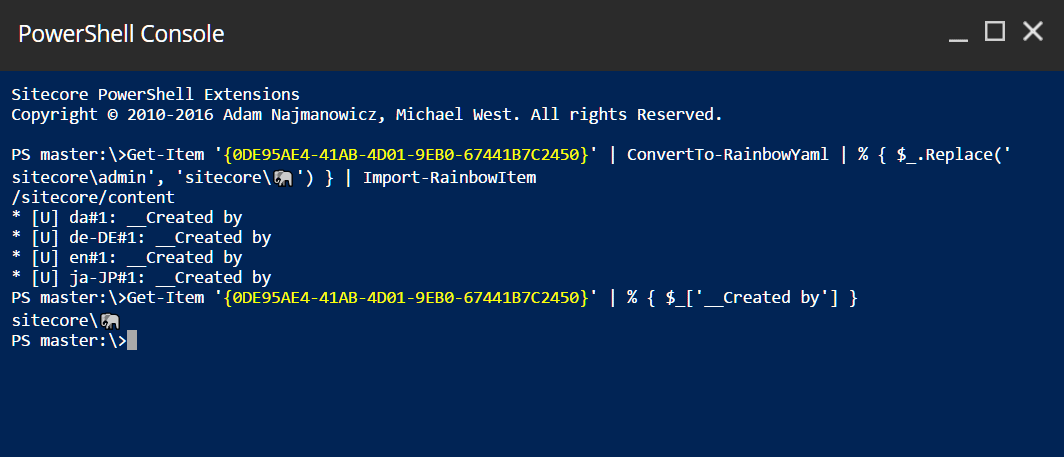
PS master:\> Get-ItemField -Path master:\content\home
Text
Title
ImagePS master:\> Get-Item master:\content\home | Get-ItemField -IncludeStandardFields -ReturnType Field -Name "*" | ft Name, DisplayName, SectionDisplayName, Description -auto
Name DisplayName SectionDisplayName Description
---- ----------- ------------------ -----------
__Revision Revision Statistics
__Standard values __Standard values Advanced
__Updated by Updated by Statistics
__Validate Button Validation Rules Validation Button Validation Rules Validation Rules
__Created Created Statistics
__Thumbnail Thumbnail Appearance
__Insert Rules Insert Rules Insert Options
__Short description Short description Help
__Created by Created by Statistics
__Presets Presets Layout
Text Text Data The text is the main content of the document.Get-ChildItem -Path "master:\content" -Recurse |
Where-Object {
[string]::IsNullOrEmpty($_.Fields["Title"].Value)
} |
Show-ListView -Property Name, ItemPath, TemplateName$items = Get-ChildItem -Path "master:\content\home" -Recurse
$templateCounts = $items | Group-Object TemplateName |
Select-Object Name, Count |
Sort-Object Count -Descending
$templateCounts | Show-ListView$items = Get-ChildItem -Path "master:\content\home" -Recurse
$export = $items | Select-Object Name,
@{Name="Path";Expression={$_.ItemPath}},
@{Name="Template";Expression={$_.TemplateName}},
@{Name="Updated";Expression={$_."__Updated"}}
$export | Export-Csv -Path "$($SitecoreDataFolder)\items-export.csv" -NoTypeInformation
Write-Host "Exported $($items.Count) items"1. Content Author (limited permissions) clicks report
2. SPE checks for delegated access configuration
3. If found, script executes as Administrator
4. Script can access/modify content beyond author's permissions
5. Actions are logged showing both identities2304 14:02:32 INFO [Gutter] Executing script {CFE81AF6-2468-4E62-8BF2-588B7CC60F80} for Context User sitecore\contentauthor as sitecore\Admin.# Find all delegated access operations
$logfiles = Get-ChildItem -Path $SitecoreLogFolder -Filter "SPE.log.*"
foreach($logfile in $logfiles) {
$logEntries = Get-Content -Path $logfile.FullName | Where-Object {
$_ -match "Executing script .* for Context User .* as .*"
}
$logEntries | ForEach-Object {
if ($_ -match "Context User (?<context>\S+) as (?<impersonated>\S+)") {
[PSCustomObject]@{
ContextUser = $matches['context']
ImpersonatedUser = $matches['impersonated']
LogLine = $_
}
}
}
}if ([string]::IsNullOrWhiteSpace($itemPath)) {
Show-Alert "Invalid item path"
return
}# Only allow operations under /sitecore/content/Home
if (-not $item.Paths.FullPath.StartsWith("/sitecore/content/Home")) {
Show-Alert "Operation not allowed for this item"
return
}$result = Show-Confirm "This will delete $($items.Count) items. Continue?"
if ($result -ne "yes") { return }Write-Log "Delegated access: $([Sitecore.Context]::User.Name) published $($item.Paths.FullPath)"$itemPath = "master:\content\home\Sample Item 3"
New-Item -Path $itemPath -ItemType "Sample/Sample Item"
Name Children Language Version Id TemplateName
---- -------- -------- ------- -- ------------
Sample Item 3 False en 1 {29A68114-5137-4A46-A87C-3789B8D898FB} Sample Item$itemPath = "master:\content\home\Sample Item 4"
$templateId = "{76036F5E-CBCE-46D1-AF0A-4143F9B557AA}"
New-Item -Path $itemPath -ItemType $templateId$itemPath = "master:\content\home\Sample Item 5"
$templateId = "{76036F5E-CBCE-46D1-AF0A-4143F9B557AA}"
$itemId = "{9459ADDD-4471-4ED3-A041-D33E559BD321}"
New-Item -Path $itemPath -ItemType $templateId -ForceId $itemId
Name Children Language Version Id TemplateName
---- -------- -------- ------- -- ------------
Sample Item 5 False en 1 {9459ADDD-4471-4ED3-A041-D33E559BD321} Sample Item$templateId = "{76036F5E-CBCE-46D1-AF0A-4143F9B557AA}"
$parentItem = Get-Item -Path "master:" -ID "{110D559F-DEA5-42EA-9C1C-8A5DF7E70EF9}"
New-Item -Parent $parentItem -Name "Sample Item 6" -ItemType $templateId
Name Children Language Version Id TemplateName
---- -------- -------- ------- -- ------------
Sample Item 6 False en 1 {E7A73426-B9BB-4056-A15C-2E835796A4DD} Sample Item$itemPath = "master:\content\home\Sample Item 7"
New-Item -Path $itemPath -ItemType "Sample/Sample Item" -Language "en-CA"
Name Children Language Version Id TemplateName
---- -------- -------- ------- -- ------------
Sample Item 7 False en-CA 1 {5303A55C-5853-409D-AFC8-0DF04F4C1065} Sample Item$itemPath = "master:\content\home\Sample Item 8"
New-Item -Path $itemPath -ItemType "Sample/Sample Item" -StartWorkflow$item = New-Item -Path "master:\content\home\demo" -Name "New Page" -ItemType "Sample/Sample Item"
$item.Title = "Welcome to Our Site"
$item.Text = "This is the page content"
$item."Meta Description" = "SEO description for this page"# Assumes you uploaded a file to a folder on the server hosting Sitecore
$data = Import-Csv "$($SitecoreDataFolder)\import\pages.csv"
$parentPath = "master:\content\home"
$templateId = "{76036F5E-CBCE-46D1-AF0A-4143F9B557AA}"
foreach($row in $data) {
$item = New-Item -Parent (Get-Item $parentPath) -Name $row.Name -ItemType $templateId
$item.Title = $row.Title
$item.Text = $row.Text
}$itemsToCreate = @("Page 1", "Page 2", "Page 3", "Page 4", "Page 5")
$total = $itemsToCreate.Count
$current = 0
foreach($name in $itemsToCreate) {
$current++
Write-Progress -Activity "Creating items" -Status "Creating $name" `
-PercentComplete (($current / $total) * 100)
New-Item -Path "master:\content\home" -Name $name -ItemType "Sample/Sample Item"
}
Write-Progress -Activity "Creating items" -Completed$structure = @{
"Products" = @("Category A", "Category B", "Category C")
"Services" = @("Consulting", "Training", "Support")
"About" = @("Team", "History", "Contact")
}
foreach($section in $structure.Keys) {
$sectionItem = New-Item -Path "master:\content\home" -Name $section -ItemType "Common/Folder"
foreach($page in $structure[$section]) {
New-Item -Parent $sectionItem -Name $page -ItemType "Sample/Sample Item"
}
}$json = Get-Content "$($SitecoreDataFolder)\import\structure.json" | ConvertFrom-Json
foreach($item in $json.items) {
$newItem = New-Item -Path "master:\content\home" -Name $item.name -ItemType $item.template
$newItem.Title = $item.title
$newItem.Text = $item.text
}Remove-Item -Path "master:\content\home\Sample Item 3"Remove-Item -Path "master:\content\home\Sample Item 3" -PermanentlyGet-Item -Path "master:\content\home\delete-me" | Remove-ItemGet-ChildItem -Path "master:\content\temp" -Recurse |
Where-Object { $_.Name -like "Test*" } |
Remove-Item$cutoffDate = (Get-Date).AddYears(-2)
Get-ChildItem -Path "master:\content\archive" -Recurse |
Where-Object { $_.__Created -lt $cutoffDate } |
Remove-Item -PermanentlyGet-ChildItem -Path "master:\content\home" -Recurse |
Where-Object { $_.TemplateName -eq "Temporary Item" } |
Remove-ItemGet-ChildItem -Path "master:\content\home" -Recurse |
Where-Object { $_.TemplateName -eq "Folder" -and -not $_.HasChildren } |
Remove-Item$itemsToRemove = Get-ChildItem -Path "master:\content\home\temp" -Recurse
foreach($item in $itemsToRemove) {
$response = Show-Confirm -Title "Remove $($item.ItemPath)?"
if ($response -eq 'yes') {
Remove-Item -Path $item.ProviderPath
Write-Host "Removed: $($item.ItemPath)" -ForegroundColor Green
}
}$itemsToRemove = Get-ChildItem -Path "master:\content\temp" -Recurse
$report = @()
foreach($item in $itemsToRemove) {
try {
Remove-Item -Path $item.ProviderPath -Permanently
$report += [PSCustomObject]@{
ItemPath = $item.ItemPath
Status = "Deleted"
Error = ""
}
} catch {
$report += [PSCustomObject]@{
ItemPath = $item.ItemPath
Status = "Failed"
Error = $_.Exception.Message
}
}
}
New-Item -Path "$($SitecoreDataFolder)\export" -ItemType Directory -Force
$report | Export-Csv "$($SitecoreDataFolder)\export\deletion-report.csv" -NoTypeInformation$name = [Sitecore.Data.Items.ItemUtil]::ProposeValidItemName('Page: About Us')
# These names will be automatically cleaned
New-Item -Path "master:\content\home" -Name $name -ItemType "Sample/Sample Item"
# Results in item name: "Page About Us" or similar$name = [Sitecore.Data.Items.ItemUtil]::ProposeValidItemName('Page: About Us')
# Use Display Name for formatted names
$item = New-Item -Path "master:\content\home" -Name "page-about-us" -ItemType "Sample/Sample Item"
$item."__Display name" = $nametry {
$item = New-Item -Path "master:\content\home\new-page" -Name "New Page" -ItemType "Sample/Sample Item" -ErrorAction Stop
Write-Host "Created: $($item.ItemPath)" -ForegroundColor Green
} catch {
Write-Host "Error creating item: $($_.Exception.Message)" -ForegroundColor Red -BackgroundColor White
}$results = @()
foreach($name in $itemNames) {
try {
$item = New-Item -Path "master:\content\home" -Name $name -ItemType "Sample/Sample Item" -ErrorAction Stop
$results += [PSCustomObject]@{
Name = $name
Status = "Success"
ItemId = $item.ID
Error = ""
}
} catch {
$results += [PSCustomObject]@{
Name = $name
Status = "Failed"
ItemId = ""
Error = $_.Exception.Message
}
}
}
New-Item -Path "$($SitecoreDataFolder)\export" -ItemType Directory -Force
$results | Export-Csv "$($SitecoreDataFolder)\export\creation-results.csv" -NoTypeInformation$largeDataset = @(
[PSCustomObject]@{"Name"="BulkItem1";"Template"="Sample/Sample Item";"Title"="BulkItem1 Title";"Text"="BulkItem1 Text";},
[PSCustomObject]@{"Name"="BulkItem2";"Template"="Sample/Sample Item";"Title"="BulkItem2 Title";"Text"="BulkItem2 Text";},
[PSCustomObject]@{"Name"="BulkItem3";"Template"="Sample/Sample Item";"Title"="BulkItem3 Title";"Text"="BulkItem3 Text";}
)
New-UsingBlock (New-Object Sitecore.Data.BulkUpdateContext) {
New-UsingBlock (New-Object Sitecore.Data.Events.EventDisabler) {
foreach($data in $largeDataset) {
$item = New-Item -Path "master:\content\home" -Name $data.Name -ItemType $data.Template
$item.Editing.BeginEdit()
$item["Title"] = $data.Title
$item["Text"] = $data.Text
$item.Editing.EndEdit() > $null
}
}
}
# Clear all the caches may be required if working in the Content Editor
# [Sitecore.Caching.CacheManager]::ClearAllCaches()$item = Get-Item -Path "master:\content\home"
$item.Title = "New Title"$item = Get-Item -Path "master:\content\home"
$item."Closing Date" = [datetime]::Today$item = Get-Item -Path "master:" -ID "{110D559F-DEA5-42EA-9C1C-8A5DF7E70EF9}"
$item."__Display name" = "Custom Display Name"$item = Get-Item -Path "master:" -ID "{110D559F-DEA5-42EA-9C1C-8A5DF7E70EF9}"
$fieldName = "Title"
# All variations work
Write-Host ($item.$fieldName)
Write-Host ($item."$fieldName")
Write-Host ($item."$($fieldName)")
# To update (all variations work)
$item.$fieldName = "New Value"Set-ItemProperty -Path "master:\content\home" -Name "Title" -Value "New Title"$item = Get-Item -Path "master:\content\home"
$item.Editing.BeginEdit()
$item["Title"] = "New Title"
$item["Text"] = "New text content"
$item.BranchId = [Guid]::Empty
$item.Editing.EndEdit()$item = Get-Item -Path "master:\content\home"
$item.Editing.BeginEdit()
try {
$item["Title"] = "New Title"
$item["Text"] = "New text content"
$item.Editing.EndEdit()
} catch {
$item.Editing.CancelEdit()
throw
}$item = Get-Item -Path "master:" -ID "{110D559F-DEA5-42EA-9C1C-8A5DF7E70EF9}"
# Read returns System.DateTime
$item.__Created
# Monday, April 07, 2008 1:59:00 PM
# Write accepts System.DateTime
$item.__Created = [DateTime]::Now
$item.__Created
# Tuesday, March 17, 2020 12:00:00 PM$homeItem = Get-Item -Path "master:\content\home"
$homeItem.Image = Get-Item -Path "master:\media library\logo"$homeItem = Get-Item -Path "master:\content\home"
$homeItem.GeneralLink = Get-Item -Path "master:\content\home\about-us"$homeItem = Get-Item -Path "master:\content\home"
$homeItem.ItemList = Get-ChildItem -Path "master:\content\home"$item = Get-Item -Path "master:\content\home"
$item._.Image.Alt # Access Alt property
$item._.Image.Width # Access Width property
$item._.Image.Height # Access Height property$currentItem = Get-Item -Path "master:\content\home\sample-item"
$linkField = $currentItem.PSFields."LinkFieldName"
# Access all LinkField properties
$linkField.Anchor
$linkField.IsInternal
$linkField.LinkType
$linkField.TargetID
$linkField.TargetItem
$linkField.Text
$linkField.UrlAnchor :
Class :
InternalPath : /sitecore/content/home/sample-item/
IsInternal : True
IsMediaLink : False
LinkType : internal
MediaPath :
QueryString :
Target :
TargetID : {263293D3-B1B3-4C2C-9A75-6BD418F376BC}
TargetItem : Sitecore.Data.Items.Item
Text : CLICK HERE
Title :
Url :$item = Get-Item -Path "master:\content\home"
foreach($field in $item.Fields) {
$typedField = $item.PSFields."$($field.Name)"
if ($typedField -is [Sitecore.Data.Fields.TextField]) {
Write-Host "$($field.Name): $($typedField.Value)"
}
}Get-ChildItem -Path "master:\content\home" |
ForEach-Object {
$_.Title = "Updated: $($_.Name)"
}$item = Get-Item -Path "master:\content\home"
$item.Editing.BeginEdit()
$item["Title"] = "Sample Item"
$item["Text"] = "Sample Text"
$item["Date"] = [datetime]::Now.ToString("yyyyMMddTHHmmss")
$item.BranchId = [Guid]::Empty
$item.Editing.EndEdit()New-UsingBlock (New-Object Sitecore.Data.BulkUpdateContext) {
foreach($item in Get-ChildItem -Path "master:\content\home" -Recurse) {
$item.Editing.BeginEdit()
$item["Title"] = "Sample Item"
$item["Text"] = "Sample Item"
$item.Editing.EndEdit() > $null
}
}$items = Get-ChildItem -Path "master:\content\home" -Recurse |
Where-Object { $_.TemplateName -eq "Sample Item" }
New-UsingBlock (New-Object Sitecore.Data.BulkUpdateContext) {
foreach($item in $items) {
$item.Editing.BeginEdit()
$item["Title"] = "Updated Title"
$item["Text"] = "Updated Text"
$item.Editing.EndEdit() > $null
}
}$items = Get-ChildItem -Path "master:\content\home" -Recurse
$total = $items.Count
$current = 0
foreach($item in $items) {
$current++
Write-Progress -Activity "Updating items" -Status "Processing $($item.Name)" `
-PercentComplete (($current / $total) * 100)
$item.Title = "Updated: $($item.Name)"
}
Write-Progress -Activity "Updating items" -CompletedGet-ChildItem -Path "master:\content\home" -Recurse |
Where-Object { $_.TemplateName -eq "Sample Item" -and [string]::IsNullOrEmpty($_.Title) } |
ForEach-Object {
$_.Title = $_.Name # Use item name as title if title is empty
}$data = Import-Csv "$($SitecoreDataFolder)\import\updates.csv"
foreach($row in $data) {
$item = Get-Item -Path "master:" -ID $row.ItemId
if ($item) {
$item.Title = $row.Title
$item.Text = $row.Text
}
}$site = [Sitecore.Sites.SiteContextFactory]::GetSiteContext("usa")
$relativeUrl = New-UsingBlock (New-Object Sitecore.Sites.SiteContextSwitcher $site) {
$pageItem = Get-Item -Path "master:" -Id "{50BE527C-7241-4613-A7A9-20D0217B264B}"
[Sitecore.Links.LinkManager]::GetItemUrl($pageItem)
}New-UsingBlock (New-Object Sitecore.SecurityModel.SecurityDisabler) {
$items = Get-ChildItem -Path "master:\content" -Recurse
# Process items without security checks
}New-UsingBlock (New-Object Sitecore.Data.Events.EventDisabler) {
foreach($item in $itemsToUpdate) {
$item.Title = "Updated"
}
}$item = Get-Item -Path "master:\content\home" -Language "en-US"
$item.Title = "English Title"
$itemDanish = Get-Item -Path "master:\content\home" -Language "da"
$itemDanish.Title = "Danish Title"$item = Get-Item -Path "master:\content\home" -Language "en-US" -Version 2
$item.Title = "Updated Version 2"$sourceItem = Get-Item -Path "master:\content\source"
$targetItem = Get-Item -Path "master:\content\target"
$targetItem.Editing.BeginEdit()
foreach($field in $sourceItem.Fields) {
if (-not $field.Name.StartsWith("__")) { # Skip system fields
$targetItem[$field.Name] = $sourceItem[$field.Name]
}
}
$targetItem.Editing.EndEdit()$template = Get-Item -Path "master:\templates\Sample\Sample Item"
$standardValues = Get-Item -Path "$($template.ProviderPath)\__Standard Values"
$standardValues.Title = "Default Title"# Inefficient - calls BeginEdit/EndEdit for each field
foreach($item in $items) {
$item.Title = "Title" # BeginEdit/EndEdit
$item.Text = "Text" # BeginEdit/EndEdit
$item.Date = [datetime]::Now # BeginEdit/EndEdit
}# Efficient - single BeginEdit/EndEdit per item
foreach($item in $items) {
$item.Editing.BeginEdit()
$item["Title"] = "Title"
$item["Text"] = "Text"
$item["Date"] = [Sitecore.DateUtil]::ToIsoDate([datetime]::Now)
$item.Editing.EndEdit()
}# Most efficient for bulk operations
New-UsingBlock (New-Object Sitecore.Data.BulkUpdateContext) {
foreach($item in $items) {
$item.Editing.BeginEdit()
$item["Title"] = "Title"
$item["Text"] = "Text"
$item.Editing.EndEdit() > $null
}
}# BAD - item remains locked if error occurs
$item.Editing.BeginEdit()
$item["Title"] = "New Title" # If this throws, EndEdit never called
$item.Editing.EndEdit()# GOOD - use try/finally
$item.Editing.BeginEdit()
try {
$item["Title"] = "New Title"
$item.Editing.EndEdit()
} catch {
$item.Editing.CancelEdit()
throw
}# Be careful with system fields - some should not be modified
$item."__Updated" = [DateTime]::Now # OK - updating audit field
$item."__Updated by" = "sitecore\admin" # OK - updating audit field
# Avoid modifying these unless you know what you're doing:
# $item."__Revision"
# $item."__Created"
# $item."__Created by"# BAD - throws error if item doesn't exist
$item = Get-Item -Path "master:\content\missing"
$item.Title = "New Title"# GOOD - check for existence
$item = Get-Item -Path "master:\content\maybe-exists" -ErrorAction SilentlyContinue
if ($item) {
$item.Title = "New Title"
}<token name="Console">
<patch:attribute name="elevationAction">Allow</patch:attribute>
</token><token name="Console">
<patch:attribute name="elevationAction">Block</patch:attribute>
</token><token name="Console">
<patch:attribute name="elevationAction">Password</patch:attribute>
<patch:attribute name="expiration">00:05:00</patch:attribute>
</token><token name="Console">
<patch:attribute name="elevationAction">Confirm</patch:attribute>
<patch:attribute name="expiration">00:05:00</patch:attribute>
</token><configuration xmlns:patch="https://www.sitecore.net/xmlconfig/">
<sitecore>
<powershell>
<userAccountControl>
<tokens>
<token name="Console">
<patch:attribute name="expiration">01:00:00</patch:attribute>
<patch:attribute name="elevationAction">Allow</patch:attribute>
</token>
<token name="ISE">
<patch:attribute name="expiration">01:00:00</patch:attribute>
<patch:attribute name="elevationAction">Allow</patch:attribute>
</token>
<token name="ItemSave">
<patch:attribute name="expiration">01:00:00</patch:attribute>
<patch:attribute name="elevationAction">Allow</patch:attribute>
</token>
</tokens>
</userAccountControl>
</powershell>
</sitecore>
</configuration><configuration xmlns:patch="https://www.sitecore.net/xmlconfig/">
<sitecore>
<powershell>
<userAccountControl>
<tokens>
<token name="Console">
<patch:attribute name="expiration">00:05:00</patch:attribute>
<patch:attribute name="elevationAction">Password</patch:attribute>
</token>
<token name="ISE">
<patch:attribute name="expiration">00:05:00</patch:attribute>
<patch:attribute name="elevationAction">Password</patch:attribute>
</token>
<token name="ItemSave">
<patch:attribute name="expiration">00:05:00</patch:attribute>
<patch:attribute name="elevationAction">Password</patch:attribute>
</token>
</tokens>
</userAccountControl>
</powershell>
</sitecore>
</configuration><configuration xmlns:patch="https://www.sitecore.net/xmlconfig/">
<sitecore>
<powershell>
<userAccountControl>
<tokens>
<token name="Console">
<patch:attribute name="expiration">00:05:00</patch:attribute>
<patch:attribute name="elevationAction">Confirm</patch:attribute>
</token>
<token name="ISE">
<patch:attribute name="expiration">00:05:00</patch:attribute>
<patch:attribute name="elevationAction">Confirm</patch:attribute>
</token>
<token name="ItemSave">
<patch:attribute name="expiration">00:05:00</patch:attribute>
<patch:attribute name="elevationAction">Confirm</patch:attribute>
</token>
</tokens>
</userAccountControl>
</powershell>
</sitecore>
</configuration><configuration xmlns:patch="https://www.sitecore.net/xmlconfig/">
<sitecore>
<powershell>
<userAccountControl>
<tokens>
<token name="Console">
<patch:attribute name="elevationAction">Block</patch:attribute>
</token>
<token name="ISE">
<patch:attribute name="expiration">00:10:00</patch:attribute>
<patch:attribute name="elevationAction">Password</patch:attribute>
</token>
<token name="ItemSave">
<patch:attribute name="expiration">00:10:00</patch:attribute>
<patch:attribute name="elevationAction">Password</patch:attribute>
</token>
</tokens>
</userAccountControl>
</powershell>
</sitecore>
</configuration><userAccountControl>
<gates>
<gate name="Console" token="SharedToken" />
<gate name="ISE" token="SharedToken" />
<gate name="ItemSave" token="SharedToken" />
</gates>
<tokens>
<token name="SharedToken">
<patch:attribute name="expiration">00:10:00</patch:attribute>
<patch:attribute name="elevationAction">Password</patch:attribute>
</token>
</tokens>
</userAccountControl><userAccountControl>
<gates>
<gate name="Console" token="ConsoleToken" />
<gate name="ISE" token="ISEToken" />
<gate name="ItemSave" token="ItemSaveToken" />
</gates>
<tokens>
<token name="ConsoleToken">
<patch:attribute name="expiration">00:03:00</patch:attribute>
<patch:attribute name="elevationAction">Password</patch:attribute>
</token>
<token name="ISEToken">
<patch:attribute name="expiration">00:15:00</patch:attribute>
<patch:attribute name="elevationAction">Password</patch:attribute>
</token>
<token name="ItemSaveToken">
<patch:attribute name="expiration">00:05:00</patch:attribute>
<patch:attribute name="elevationAction">Confirm</patch:attribute>
</token>
</tokens>
</userAccountControl>


Get-PSProvider
Name Capabilities Drives
---- ------------ ------
Registry ShouldProcess, Transactions {HKLM, HKCU}
Alias ShouldProcess {Alias}
Environment ShouldProcess {Env}
FileSystem Filter, ShouldProcess, Credentials {C}
Function ShouldProcess {Function}
Variable ShouldProcess {Variable}
Certificate ShouldProcess {Cert}
WSMan Credentials {WSMan}
Sitecore Filter, ExpandWildcards, ShouldProcess {master, web, core}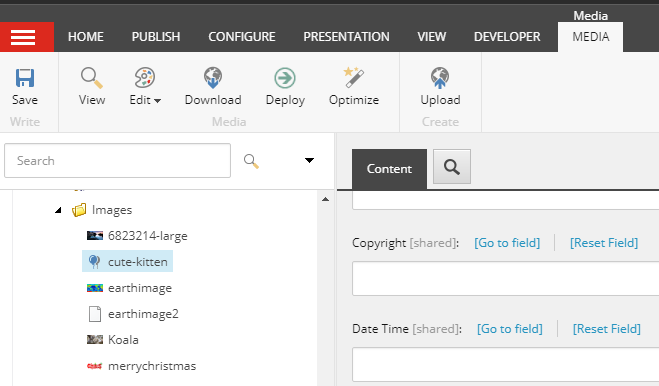


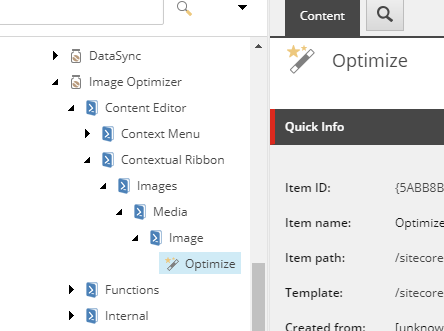
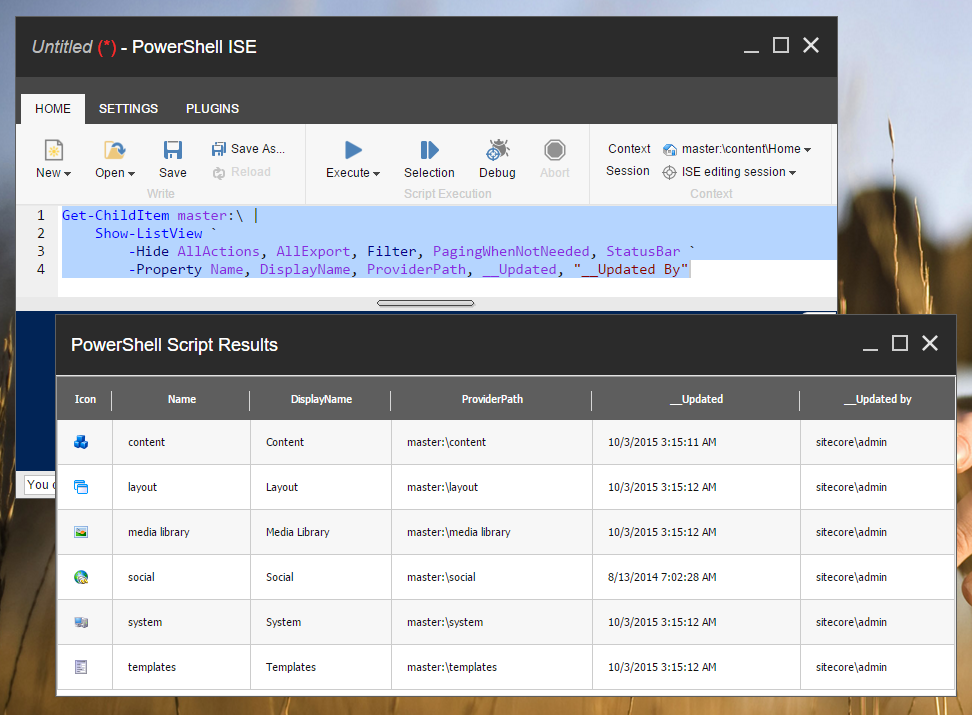

<#
All of the parameters in the command are surrounded by square brackets
indicating they are optional.
#>
Get-Something<#
SomeParameter has double brackets around the parameter name and argument
indicating the name is optional and when an argument is passed the name
can be skipped.
#>
Get-Something "data"<#
AnotherParameter has single brackets indicating that the parameter is
optional. If the argument is used so must the name. The same reasoning
can be applied to the switch.
#>
Get-Something "data","data2" -AnotherParameter 100 –SomeSwitch# Define parameters in a hashtable
$props = @{
"SomeParameter" = @("data","data2")
"AnotherParameter" = 100
"SomeSwitch" = $true
}
# Splat with @props instead of $props
Get-Something @props# GOOD - explicit and clear
Get-ChildItem -Path "master:\content\home" -Recurse |
Where-Object { $_.TemplateName -eq "Article" } |
Select-Object -Property Name, ID
# BAD - abbreviated and unclear
gci "master:\content\home" -r |
? { $_.TemplateName -eq "Article" } |
select Name, IDCommand1 | Command2 | Command3Get-ChildItem -Path "master:\content\home" |
Where-Object { $_.TemplateName -eq "Article" }
# $_ represents each item as it flows through# The remove command accepts pipeline input
Get-Item -Path "master:\content\home\sample item" | Remove-Item
# If multiple items are passed through the pipeline each are removed individually
$items | Remove-ItemGet-ChildItem -Path "master:\content\home" |
Select-Object -Property Name, TemplateName, ID# Use variables for parameters such as paths to make scripts easier to read
$path = "master:\content\home\"
Get-ChildItem -Path $path -Recurse |
Where-Object { $_.Name -like "*Sample*" } |
Select-Object -Property ID, Name, ItemPath |
Sort-Object -Property Name# Filter by property value
Get-ChildItem -Path "master:\content\home" |
Where-Object { $_.TemplateName -eq "Sample Item" }# Filter by multiple conditions
Get-ChildItem -Path "master:\content\home" |
Where-Object {
$_.TemplateName -eq "Sample Item" -and
$_.PSFields."__Updated".DateTime -gt (Get-Date).AddDays(-7)
}# Filter and negate
Get-ChildItem -Path "master:\content\home" |
Where-Object { $_.Name -notlike "*Test*" }# Select specific properties
Get-ChildItem -Path "master:\content\home" |
Select-Object Name, TemplateName, ID# Create calculated properties
Get-ChildItem -Path "master:\content\home" |
Select-Object Name,
@{Name="Updated";Expression={$_.PSFields."__Updated".DateTime}},
@{Name="Age";Expression={(Get-Date) - $_.PSFields."__Updated".DateTime}}$items = Get-ChildItem -Path "master:\content\home"
# Expand single property to array of values
$items | Select-Object -ExpandProperty Name
# Returns: @("Name1", "Name2", "Name3")# Count items by template
Get-ChildItem -Path "master:\content\home" -Recurse |
Group-Object TemplateName |
Select-Object Name, Count |
Sort-Object Count -Descending# Sort by name
$items | Sort-Object Name
# Sort descending
$items | Sort-Object Name -Descending
# Sort by multiple properties
$items | Sort-Object TemplateName, Name
# Sort by custom expression
$items | Sort-Object { $_.Name.Length }# Process each item
Get-ChildItem -Path "master:\content\home" |
ForEach-Object {
Write-Host "Processing: $($_.Name)"
# Do something with $_
}
# Transform each item
Get-ChildItem -Path "master:\content\home" |
ForEach-Object { $_.Name.ToUpper() }# Displays all of the about help documents
help about_*
# Displays help documentation on the topic of Splatting
help about_Splatting
# Displays help documentation on the specified command
help Get-Member
# Get detailed help with examples
Get-Help Get-Item -Detailed
# Get just the examples
Get-Help Get-Item -Examples
# Get help online (opens in browser)
Get-Help Get-Item -Online# List all commands
Get-Command
# Search for commands by name
Get-Command *Item*
# Search for SPE commands
Get-Command | Where-Object { $_.ImplementingType -and $_.ImplementingType.Assembly.GetName().Name -eq "Spe" }
# Get command details
Get-Command Get-Item | Select-Object *# See what properties and methods an object has
$item = Get-Item -Path "master:\content\home"
$item | Get-Member
# Filter to just properties
$item | Get-Member -MemberType Property
# Filter to just methods
$item | Get-Member -MemberType Method# Longhand - recommended for scripts
Get-Command -Name ForEach-Object –Type cmdlet |
Select-Object -ExpandProperty ParameterSets
# Shorthand - OK for interactive use, NOT recommended for scripts
gcm -na foreach-object -ty cmdlet | select -exp parametersetsGet-Aliasar|sitecore\Author|pe|+item:read|ar|sitecore\Author|pd|-item:read|ar|sitecore\Author|pd|^*|ar|sitecore\Developer|pd|+item:read|pe|+item:read|Get-Command -Noun Role*,User,ItemAcl* | Select-Object -Property Name | Sort-Object -Property NameGet-Item -Path "master:\content\home" | Select-Object -Property PSSecurityName ID __Owner __Security
---- -- ------- ----------
Home {110D559F-DEA5-42EA-9C1C-8A5DF7E70EF9} sitecore\Admin ar|sitecore\Developer|pd|+item:read|pe|+item:read|$item = Get-Item -Path "master:\content\home"
Get-ItemAcl -Item $itemAccount AccessRight PermissionType PropagationType SecurityPermission
------- ----------- -------------- --------------- ------------------
sitecore\Developer item:read Access Descendants AllowAccess
sitecore\Developer item:read Access Entity AllowAccess$devRead = @{
"Identity" = "sitecore\Developer"
"PropagationType" = "Any"
"SecurityPermission" = "AllowInheritance"
"AccessRight" = "item:read"
}
$acl = New-ItemAcl @devRead$everyoneDeny = @{
"Identity" = "\Everyone"
"PropagationType" = "Any"
"SecurityPermission" = "DenyInheritance"
"AccessRight" = "*"
}
$acl = New-ItemAcl @everyoneDeny$aclForEveryone = @{
"Identity" = "\Everyone"
"PropagationType" = "Any"
"SecurityPermission" = "DenyInheritance"
"AccessRight" = "*"
}
$acl = New-ItemAcl @aclForEveryone
Get-Item -Path "master:\content\home" |
Add-ItemAcl -AccessRules $acl -PassThru$authorAclRead = @{
"Identity" = "sitecore\Author"
"PropagationType" = "Any"
"SecurityPermission" = "AllowAccess"
"AccessRight" = "item:read"
}
$authorAclInherit = @{
"Identity" = "sitecore\Author"
"PropagationType" = "Any"
"SecurityPermission" = "AllowInheritance"
"AccessRight" = "*"
}
$acl1 = New-ItemAcl @authorAclRead
$acl2 = New-ItemAcl @authorAclInherit
Get-Item -Path "master:\content\home\sample2" |
Add-ItemAcl -AccessRules $acl1,$acl2 -PassThru
Get-ItemAcl -Path "master:\content\home\sample2" | Format-TableName Children Language Version Id TemplateName
---- -------- -------- ------- -- ------------
Sample2 True en 1 {91E814D3-78C8-44FA-B78B-E0A1B2374D8F} Sample Item
Account AccessRight PermissionType PropagationType SecurityPermission
------- ----------- -------------- --------------- ------------------
sitecore\Author item:read Access Descendants AllowAccess
sitecore\Author * Inheritance Descendants AllowInheritance
sitecore\Author item:read Access Entity AllowAccess
sitecore\Author * Inheritance Entity AllowInheritance$authorAccessRights = @(
"item:read",
"item:write",
"item:delete"
)
$authorAcl = @{
"Identity" = "sitecore\Author"
"PropagationType" = "Any"
"SecurityPermission" = "AllowAccess"
}
$accessRules = @()
foreach($accessRight in $authorAccessRights) {
$accessRules += @(New-ItemAcl @authorAcl -AccessRight $accessRight)
}
Set-ItemAcl -Item (Get-Item "master:\content\home") -AccessRules $accessRules -PassThruGet-Item -Path "master:\content\home" | Clear-ItemAcl$item = Get-Item -Path "master:\content\home"
$user = Get-Role -Identity "sitecore\Author"
Test-ItemAcl -Item $item -User $user -AccessRight "item:read"$authorAccessRights = @(
"item:read",
"item:write",
"item:rename",
"item:create",
"item:delete"
)
$authorAcl = @{
"Identity" = "sitecore\Author"
"PropagationType" = "Descendants"
"SecurityPermission" = "AllowAccess"
}
$accessRules = @()
foreach($accessRight in $authorAccessRights) {
$accessRules += @(New-ItemAcl @authorAcl -AccessRight $accessRight)
}
Get-Item -Path "master:\content\home\sample2" |
Add-ItemAcl -AccessRules $accessRules -PassThru$authorAccessRights = @(
"item:read",
"item:write",
"item:rename",
"item:create",
"item:delete"
)
$authorAcl = @{
"Identity" = "sitecore\Author"
"PropagationType" = "Entity"
"SecurityPermission" = "AllowAccess"
}
$accessRules = @()
foreach($accessRight in $authorAccessRights) {
$accessRules += @(New-ItemAcl @authorAcl -AccessRight $accessRight)
}
$items = Get-ChildItem -Path "master:\content\home" -Recurse
foreach($item in $items) {
Add-ItemAcl -Item $item -AccessRules $accessRules
Write-Host "Applied security to: $($item.ItemPath)"
}$items = Get-ChildItem -Path "master:\content\home" -Recurse
$report = @()
foreach($item in $items) {
$acls = Get-ItemAcl -Item $item
foreach($acl in $acls) {
$report += [PSCustomObject]@{
ItemPath = $item.ItemPath
Identity = $acl.Account.Name
AccessRights = $acl.AccessRight -join ", "
PropagationType = $acl.PropagationType
SecurityPermission = $acl.SecurityPermission
}
}
}
$report | Show-ListView -Property ItemPath, Identity, AccessRights, PropagationType# Copy security from one item to another
$sourceItem = Get-Item -Path "master:\content\home"
$targetItem = Get-Item -Path "master:\content\home\sample1"
# A combinination of Clear, Add, and Set may be used to alter item security
Write-Host "Cleared security for: $($sourceItem.ItemPath)"
Clear-ItemAcl -Item $targetItem
$sourceAcls = Get-ItemAcl -Item $sourceItem
if($sourceAcls) {
# Use Set-ItemAcl if you wish to replace the rules
Add-ItemAcl -Item $targetItem -AccessRules $sourceAcls
Write-Host "Cloned security to: $($targetItem.ItemPath)"
} else {
Write-Host "Cloned security to: $($targetItem.ItemPath)"
}$item = Get-Item -Path "master:\content\home"
Lock-Item -Item $itemGet-ChildItem -Path "master:\content\protected" -Recurse |
ForEach-Object {
Lock-Item -Item $_
Write-Host "Locked: $($_.ItemPath)"
}$item = Get-Item -Path "master:\content\home"
Unlock-Item -Item $itemGet-ChildItem -Path "master:\content\protected" -Recurse |
Where-Object { $_.Locking.IsLocked() } |
ForEach-Object {
Unlock-Item -Item $_
Write-Host "Unlocked: $($_.ItemPath)"
}$item = Get-Item -Path "master:\content\home"
if ($item.Locking.IsLocked()) {
Write-Host "Item is locked by: $($item.Locking.GetOwner())"
} else {
Write-Host "Item is not locked"
}$item = Get-Item -Path "master:\content\protected"
Protect-Item -Item $item$criticalItems = Get-ChildItem -Path "master:\content\critical" -Recurse
foreach($item in $criticalItems) {
Protect-Item -Item $item
Write-Host "Protected: $($item.ItemPath)"
}$item = Get-Item -Path "master:\content\home"
Unprotect-Item -Item $itemGet-ChildItem -Path "master:\content\temp" -Recurse |
ForEach-Object {
Unprotect-Item -Item $_
}Get-PSProvider -PSProvider Sitecore
Name Capabilities Drives
---- ------------ ------
Sitecore Filter, ExpandWildcards, ShouldProcess {master, web, core}# List files in the Data folder
Get-ChildItem -Path "$SitecoreDataFolder\logs"
# Read a log file
Get-Content -Path "$SitecoreLogFolder\log.txt" -Tail 50
# Create a temp file
New-Item -Path "$SitecoreTempFolder\myfile.txt" -ItemType File -Value "Content"Get-PSDrive
ame Used (GB) Free (GB) Provider Root CurrentLocation
---- --------- --------- -------- ---- ---------------
Alias Alias
C 0.42 126.46 FileSystem C:\ windows\system32\inetsrv
Cert Certificate \
core Sitecore core:
Env Environment
Function Function
HKCU Registry HKEY_CURRENT_USER
HKLM Registry HKEY_LOCAL_MACHINE
master Sitecore master: content\Home
Variable Variable
web Sitecore web:
WSMan WSManmaster:\
├── content\
├── layout\
├── media library\
├── system\
└── templates\# Start in master
PS master:\>
# Switch to core database
PS master:\> cd core:
PS core:\>
# Switch to web database
PS core:\> cd web:
PS web:\>
# Return to master
PS web:\> Set-Location -Path master:
PS master:\># Switch to file system
PS master:\> cd C:\
PS C:\>
# Return to master database
PS C:\> cd master:
PS master:\>Get-Item -Path "master:\content\home"Get-Item -Path "master:/sitecore/content/home"Get-Item -Path "master:\content/home"
Get-Item -Path "master:/content\home"PS master:\content> Get-Item -Path ".\home"
PS master:\content> cd home
PS master:\content\home> Get-Item -Path ".." # Returns parent (\content)# Language parameter (only available with Sitecore provider)
Get-Item -Path "master:\content\home" -Language "da"
# ID parameter (only available with Sitecore provider)
Get-Item -Path "master:" -ID "{110D559F-DEA5-42EA-9C1C-8A5DF7E70EF9}"
# Query parameter (only available with Sitecore provider)
Get-Item -Path "master:" -Query "/sitecore/content//*[@@templatename='Sample Item']"$item = Get-Item -Path "master:\content\home"
# Standard properties
$item.Name
$item.ID
$item.TemplateName
$item.ItemPath
$item.Language
$item.Version
# Field values
$item.Title
$item.Text
$item.__Created
$item.__Updated$databases = @("master", "core", "web")
foreach($db in $databases) {
$itemCount = (Get-ChildItem -Path "$($db):\content" -Recurse).Count
Write-Host "$db database: $itemCount items"
}$masterItem = Get-Item -Path "master:\content\home"
$webItem = Get-Item -Path "web:\content\home"
if ($masterItem.__Updated -gt $webItem.__Updated) {
Write-Host "Master is newer than Web"
} else {
Write-Host "Web is up to date"
}# Export items to file system
$items = Get-ChildItem -Path "master:\content\home" -Recurse
$report = $items | Select-Object Name, Template Name, ItemPath
$report | Export-Csv -Path "C:\reports\items.csv" -NoTypeInformation
# Read configuration files
$configPath = Join-Path $SitecoreDataFolder "serialization\config"
Get-ChildItem -Path $configPath -Filter "*.yml"# Save current location
Push-Location
# Do work in another location
cd "master:\templates"
# ... perform operations ...
# Return to previous location
Pop-Location# Export Sitecore items to JSON files
$items = Get-ChildItem -Path "master:\content\data" -Recurse
foreach($item in $items) {
$data = [PSCustomObject]@{
Name = $item.Name
ID = $item.ID
Template = $item.TemplateName
Title = $item.Title
Text = $item.Text
}
$fileName = "$($item.ID).json"
$filePath = Join-Path $SitecoreTempFolder $fileName
$data | ConvertTo-Json | Set-Content -Path $filePath
Write-Host "Exported: $fileName"
}if (Test-Path "master:\content\home") {
Write-Host "Item exists"
$item = Get-Item -Path "master:\content\home"
} else {
Write-Host "Item not found"
}$targetPath = "master:\content\import"
if (-not (Test-Path $targetPath)) {
New-Item -Path "master:\content" -Name "import" -ItemType "Common/Folder"
Write-Host "Created import folder"
}
# Now safe to use
$importFolder = Get-Item -Path $targetPath$item = Get-Item -Path "master:\content\home"
$item.ProviderPath
# master:\content\homeNew-PSDrive -Name "content" -PSProvider Sitecore -Root "master:\content"
# Now you can use:
Get-Item -Path "content:\home"(Get-PSProvider -PSProvider Sitecore).Capabilities
# Filter, ExpandWildcards, ShouldProcess# WRONG - no database specified
Get-Item -ID "{110D559F-DEA5-42EA-9C1C-8A5DF7E70EF9}"
# CORRECT - database specified
Get-Item -Path "master:" -ID "{110D559F-DEA5-42EA-9C1C-8A5DF7E70EF9}"# WRONG
cd C:
# CORRECT
cd C:\# Check if path exists
if (Test-Path "master:\content\home") {
$item = Get-Item -Path "master:\content\home"
} else {
Write-Host "Path not found. Check spelling and database."
}# Provider-based (convenient)
$items = Get-ChildItem -Path "master:\content" -Recurse
# Direct API (faster for large datasets)
$db = Get-Database -Name "master"
$root = $db.GetItem("/sitecore/content")
$items = $root.Axes.GetDescendants() | Initialize-Item# Clear caches
$db = Get-Database -Name "master"
$db.Caches.ItemCache.Clear()
$db.Caches.DataCache.Clear()Learn PowerShell syntax by comparing it to C#.
// C# - declare and assign
var name = "Michael";
string title = "Developer";
int count = 5;# PowerShell - assign (type is inferred)
$name = "Michael"
$title = "Developer"
$count = 5
# Optionally specify type
[string]$title = "Developer"
[int]$count = 5// Perform simple math in C#
var total = 1 + 1;
total += 2;
var result = total * 3 / 2;# Perform simple math in PowerShell
$total = 1 + 1
$total += 2
$result = $total * 3 / 2Add-ItemVersion [-Item] <Item> [-Recurse] [-IfExist <Append | Skip | OverwriteLatest>] [-TargetLanguage <String[]>] [-DoNotCopyFields] [-IgnoredFields <String[]>] [-Language <String[]>]
Add-ItemVersion [-Path] <String> [-Recurse] [-IfExist <Append | Skip | OverwriteLatest>] [-TargetLanguage <String[]>] [-DoNotCopyFields] [-IgnoredFields <String[]>] [-Language <String[]>]
Add-ItemVersion -Id <String> [-Database <String>] [-Recurse] [-IfExist <Append | Skip | OverwriteLatest>] [-TargetLanguage <String[]>] [-DoNotCopyFields] [-IgnoredFields <String[]>] [-Language <String[]>]


/*
Create a new dynamic list of strings in C#
*/
var names = new List<string>();
names.Add("Michael");
names.Add("Adam");<#
Create a new fixed list of strings in PowerShell
#>
[string[]]$names = @()
$names += "Michael"
$names += "Adam"// Create a hashtable of data in C#
var table = new Hashtable();
table["Name"] = "Michael";
table["Age"] = 33;# Create a new hashtable of data in PowerShell
$table = @{}
$table["Name"] = "Michael"
$table["Age"] = 33
# Or create inline
$table = @{
Name = "Michael"
Age = 33
}// Ordered Dictionary in C#
var od = new OrderedDictionary();
od.Add("z","Last Letter");
od.Add("a","First Letter");# Ordered Dictionary in PowerShell
$od = [ordered]@{}
$od.Add("z","Last Letter")
$od.Add("a","First Letter")// Check if the string is null or empty using a static method in C#
if(string.IsNullOrEmpty(name)) {
...
}
else {
...
}# Check if the string is null or empty using a static method in PowerShell
if([string]::IsNullOrEmpty($name)) {
...
} else {
...
}// C# switch
switch(value) {
case "A":
DoSomething();
break;
case "B":
DoSomethingElse();
break;
default:
DoDefault();
break;
}# PowerShell switch
switch($value) {
"A" {
Do-Something
}
"B" {
Do-SomethingElse
}
default {
Do-Default
}
}// Compare values in C#
name == "Michael"
total <= 3
names.Count() > 2 && name[0] != "Adam"# Compare values in PowerShell
$name -eq "Michael"
$total -le 3
$names.Count -gt 2 -and $name[0] -ne "Adam"# Case-insensitive (default)
$name -eq "Michael" # Matches "michael", "MICHAEL", "Michael"
# Case-sensitive
$name -ceq "Michael" # Only matches exact case
# Wildcard matching
$name -like "*Smith" # Matches "John Smith", "Jane Smith"
$name -notlike "*Test*" # Excludes items with "Test"
# Regular expressions
$name -match "^\d{3}" # Matches names starting with 3 digits// Negate value in C#
var isTrue = !false;
var isNotEmpty = !string.IsNullOrEmpty(value);# Negate value in PowerShell
$isTrue = !$false
$isTrue = -not $false
$isNotEmpty = ![string]::IsNullOrEmpty($value)
$isNotEmpty = -not [string]::IsNullOrEmpty($value)// String interpolation in C#
var message = $"Hello, {name}";
var result = $"Total: {count * 2}";# String interpolation in PowerShell
$message = "Hello, $name"
$result = "Total: $($count * 2)"// Escape characters in C#
string message = "They said, \"SPE is the greatest!\".";
message = 'I said, "Thanks!"';
message = "We celebrated together, 'Go SPE!'";# Escape characters in PowerShell
$message = "They said, `"SPE is the greatest!`"."
$message = 'I said, "Thanks!".'
$message = "We celebrated together, 'Go SPE!'."// C# multi-line
var text = @"
Line 1
Line 2
Line 3
";# PowerShell here-string
$text = @"
Line 1
Line 2
Line 3
"@# Concatenation
$fullName = $firstName + " " + $lastName
$fullName = "$firstName $lastName"
# Length
$length = $name.Length
# Substring
$sub = $name.Substring(0, 5)
# Replace
$updated = $name.Replace("old", "new")
# Split
$parts = $name.Split(" ")
# Join
$joined = $parts -join ", "
# To upper/lower
$upper = $name.ToUpper()
$lower = $name.ToLower()// C# for loop
for(int i = 0; i < 10; i++) {
Console.WriteLine(i);
}# PowerShell for loop
for($i = 0; $i -lt 10; $i++) {
Write-Host $i
}// C# foreach
foreach(var item in items) {
ProcessItem(item);
}# PowerShell foreach
foreach($item in $items) {
Process-Item $item
}// C# while
while(count < 100) {
count++;
}# PowerShell while
while($count -lt 100) {
$count++
}// Access static property in C#
var today = DateTime.Today;
var guid = Guid.NewGuid();# Access static property in PowerShell
$today = [datetime]::Today
$guid = [guid]::NewGuid()# DateTime
$now = [datetime]::Now
$today = [datetime]::Today
$parsed = [datetime]::Parse("2024-01-15")
$custom = Get-Date -Year 2024 -Month 1 -Day 15
# String
$empty = [string]::Empty
$isNullOrEmpty = [string]::IsNullOrEmpty($value)
$joined = [string]::Join(", ", $array)
# Math
$max = [math]::Max(5, 10)
$min = [math]::Min(5, 10)
$rounded = [math]::Round(3.7)
# Guid
$newGuid = [guid]::NewGuid()
$parsed = [guid]::Parse("{110D559F-DEA5-42EA-9C1C-8A5DF7E70EF9}")
# Path
$combined = [System.IO.Path]::Combine("C:\temp", "file.txt")
$extension = [System.IO.Path]::GetExtension("file.txt")// C# - create object
var list = new List<string>();
var dict = new Dictionary<string, int>();# PowerShell - create object
$list = New-Object System.Collections.Generic.List[string]
$dict = New-Object 'System.Collections.Generic.Dictionary[string,int]'
# Alternative syntax
$list = [System.Collections.Generic.List[string]]::new()// C# - Single line comment
/*
C# - Multi-line comment
More text here
*/# PowerShell - Single line comment
<#
PowerShell - Multi-line comment
More text here
#>// C# - call method
string upper = name.ToUpper();
items.Add("new item");# PowerShell - call method
$upper = $name.ToUpper()
$items.Add("new item")
# Note: Some methods return values you may want to suppress
$items.Add("new item") > $null// C# - define function
public string GetFullName(string first, string last) {
return first + " " + last;
}
var name = GetFullName("John", "Smith");# PowerShell - define function
function Get-FullName {
param(
[string]$First,
[string]$Last
)
return "$First $Last"
}
$name = Get-FullName -First "John" -Last "Smith"// C# - try/catch
try {
DoSomething();
}
catch(Exception ex) {
Console.WriteLine(ex.Message);
}
finally {
Cleanup();
}# PowerShell - try/catch
try {
Do-Something
}
catch {
Write-Host $_.Exception.Message
}
finally {
Clean-up
}# SLOW - creates new array each time
$names = @()
$names += "Michael"
$names += "Adam"
# FAST - use ArrayList
$names = [System.Collections.ArrayList]@()
$names.Add("Michael") > $null
$names.Add("Adam") > $null
# FAST - use List<T>
$names = [System.Collections.Generic.List[string]]@()
$names.Add("Michael") > $null
$names.Add("Adam") > $null
# FAST - use HashSet for distinct values
$names = New-Object System.Collections.Generic.HashSet[string]
$names.Add("Michael") > $null# SLOW - Out-Null is a cmdlet
$list.Add($item) | Out-Null
# FAST - redirect to $null
$list.Add($item) > $null$SitecoreLogFolder\SPE.log.{date}.txtC:\inetpub\wwwroot\App_Data\logs\SPE.log.20260101.txt<configuration>
<log4net>
<appender name="PowerShellExtensionsFileAppender" type="log4net.Appender.SitecoreLogFileAppender, Sitecore.Logging">
<file value="$(dataFolder)/logs/SPE.log.{date}.txt"/>
<appendToFile value="true"/>
<layout type="log4net.Layout.PatternLayout">
<conversionPattern value="%4t %d{ABSOLUTE} %-5p %m%n"/>
</layout>
<encoding value="utf-8"/>
</appender>
<logger name="Spe" additivity="false">
<level value="INFO"/>
<appender-ref ref="PowerShellExtensionsFileAppender"/>
</logger>
</log4net>
</configuration>INFO Arbitrary script execution in ISE by user: 'sitecore\Admin'WARN Session state elevated for 'ISE' by user: sitecore\AdminINFO [Gutter] Executing script {CFE81AF6-2468-4E62-8BF2-588B7CC60F80} for Context User sitecore\test as sitecore\Admin.INFO A request to the remoting service was made from IP 10.0.0.27
INFO A request to the mediaUpload service was made from IP 10.0.0.27
WARN A request to the mediaUpload service could not be completed because the provided credentials are invalid.INFO [Runner] Executing script {BD07C7D1-700D-450C-B79B-8526C6643BF3} for Context User sitecore\test2 as sitecore\Admin.# TODO# Tail the SPE log file
# Note that the SPE Console doesn't exit when using -Wait
Get-Content -Path "$($SitecoreLogFolder)\SPE.log.20251201.txt" -Tail 10# Tail the latest SPE log file dynamically
Get-ChildItem -Path $SitecoreLogFolder -Filter "SPE.log.*.txt" | Sort-Object -Descending -Property LastWriteTime | Select-Object -First 1 | ForEach-Object { Get-Content -Path $_.FullName -Tail 10}# Watch for tasks
Get-Content "$SitecoreLogFolder\SPE.log.20251201.txt" | Where-Object { $_ -match "\[Task\]" }# Watch for warnings
Get-Content "$SitecoreLogFolder\SPE.log.20251201.txt" | Where-Object { $_ -match "WARN" }$logPath = "$SitecoreLogFolder\SPE.log.20251201.txt"
$failedAuth = Get-Content $logPath |
Where-Object { $_ -match "credentials are invalid" } |
ForEach-Object {
if ($_ -match "(\d{2}:\d{2}:\d{2}).*WARN\s*(\S+)") {
[PSCustomObject]@{
Timestamp = $matches[1]
User = $matches[2]
LogLine = $_
}
}
}
$failedAuth
# Timestamp User LogLine
# --------- ---- -------
# 11:20:23 A 1508 11:20:23 WARN A request to the mediaUpload service could not be completed because the provided credentials are invalid.$logPath = "$SitecoreLogFolder\SPE.log.20251201.txt"
$delegated = Get-Content $logPath |
Where-Object { $_ -match "Executing script" } |
ForEach-Object {
if ($_ -match "(?<time>\d{2}:\d{2}:\d{2}).*Runner\s*.*Context User\s(?<user>[0-9a-zA-Z\\]*)\sas\s(?<impersonated>[0-9a-zA-Z\\]*).*") {
[PSCustomObject]@{
Timestamp = $matches["time"]
ContextUser = $matches["user"]
ImpersonatedAs = $matches["impersonated"]
LogLine = $_
}
}
}
$delegated | Group-Object ContextUser |
Select-Object Name, Count |
Sort-Object Count -Descending
# Name Count
# ---- -----
# sitecore\test2 1$logPath = "$SitecoreLogFolder\SPE.log.20251201.txt"
$unauthorized = Get-Content $logPath |
Where-Object { $_ -match "credentials are invalid" }
$unauthorized | ForEach-Object {
Write-Host $_ -ForegroundColor Red -BackgroundColor White
}
# 1508 11:20:23 WARN A request to the mediaUpload service could not be completed because the provided credentials are invalid.$logPath = "$SitecoreLogFolder\SPE.log.20251201.txt"
$webServiceCalls = Get-Content $logPath |
Where-Object { $_ -match "remoting" }
# Group by IP address
$webServiceCalls | ForEach-Object {
if ($_ -match "IP\s*(?<ip>[\d\.]+)") {
[PSCustomObject]@{
IP = $matches['ip']
LogLine = $_
}
}
} | Group-Object IP |
Select-Object Name, Count |
Sort-Object Count -Descending
# Name Count
# ---- -----
# 10.0.0.27 105# TODO: Example using Send-MailMessageC:\inetpub\logs\LogFiles\W3SVC1\# TODO Inspect IIS Logs# TODO Inspect IIS Logs# TODO Example with Send-MailMessage# SLOW - Retrieves all items then filters
$items = Get-ChildItem -Path "master:\content" -Recurse |
Where-Object { $_.TemplateName -eq "Sample Item" }
# FASTER - Uses Sitecore query to filter server-side
$items = Get-Item -Path "master:" -Query "/sitecore/content//*[@@templatename='Sample Item']"
# FASTEST - Uses the search index
# See Find-Item# SLOWEST - Automated properties call BeginEdit/EndEdit each time
foreach($item in $items) {
$item.Title = "Title" # BeginEdit/EndEdit
$item.Text = "Text" # BeginEdit/EndEdit
$item.Date = [datetime]::Now # BeginEdit/EndEdit
}
# BETTER - Manual BeginEdit/EndEdit once per item
foreach($item in $items) {
$item.Editing.BeginEdit()
$item["Title"] = "Title"
$item["Text"] = "Text"
$item["Date"] = [Sitecore.DateUtil]::ToIsoDate([datetime]::Now)
$item.Editing.EndEdit() > $null
}
# BEST - BulkUpdateContext for large datasets
New-UsingBlock (New-Object Sitecore.Data.BulkUpdateContext) {
foreach($item in $items) {
$item.Editing.BeginEdit()
$item["Title"] = "Title"
$item["Text"] = "Text"
$item.Editing.EndEdit() > $null
}
}
# OPTIMAL - Combine with EventDisabler when events aren't needed
New-UsingBlock (New-Object Sitecore.Data.BulkUpdateContext) {
New-UsingBlock (New-Object Sitecore.Data.Events.EventDisabler) {
foreach($item in $items) {
$item.Editing.BeginEdit()
$item["Title"] = "Title"
$item["Text"] = "Text"
$item.Editing.EndEdit() > $null
}
}
}$batchSize = 250
$offset = 0
$totalProcessed = 0
# Define search criteria
$criteria = @(
@{Filter = "Equals"; Field = "_templatename"; Value = "Sample Item"},
@{Filter = "DescendantOf"; Value = (Get-Item "master:\content").ID}
)
$props = @{
Index = "sitecore_master_index"
Criteria = $criteria
}
do {
# Query batch from search index (server-side pagination)
$searchItems = @(Find-Item @props -Skip $offset -First $batchSize)
if ($searchItems.Count -eq 0) { break }
# Process batch with bulk update context
New-UsingBlock (New-Object Sitecore.Data.BulkUpdateContext) {
foreach($searchItem in $searchItems) {
# Convert search result to full Sitecore item
# Pipe items to Initialize-Item or call Get-Item with the ID
# The prefix `$script is required because of the ScriptBlock closure created by New-UsingBlock
$script:totalProcessed++
}
}
$offset += $searchItems.Count
Write-Host "Processed: $totalProcessed items"
} while ($searchItems.Count -eq $batchSize)
Write-Host "Completed processing $totalProcessed items"
# Processed: 1 items
# Completed processing 1 itemsfunction Update-ItemTitle {
[CmdletBinding(SupportsShouldProcess)]
param(
[Parameter(Mandatory, ValueFromPipeline)]
[Sitecore.Data.Items.Item]$Item,
[Parameter(Mandatory)]
[string]$Title
)
process {
try {
# Validation
if (-not $Item) {
Write-Error "Item is null"
return
}
# WhatIf support
if ($PSCmdlet.ShouldProcess($Item.ItemPath, "Update title to '$Title'")) {
$Item.Editing.BeginEdit()
try {
$Item["Title"] = $Title
$Item.Editing.EndEdit()
Write-Verbose "Updated: $($Item.ItemPath)"
} catch {
$Item.Editing.CancelEdit()
throw
}
}
} catch {
Write-Error "Failed to update $($Item.ItemPath): $($_.Exception.Message)"
}
}
}
# Usage
Get-ChildItem -Path "master:\content\" |
Update-ItemTitle -Title "New Title" -Verbose -WhatIf$itemPaths = @(
"master:/content/Home"
)
$results = @()
$errors = @()
foreach($itemPath in $itemPaths) {
try {
$item = Get-Item -Path $itemPath -ErrorAction Stop
$item.Editing.BeginEdit()
try {
$item["Title"] = "Updated"
$item.Editing.EndEdit()
$results += [PSCustomObject]@{
ItemPath = $item.ItemPath
Status = "Success"
Error = ""
}
} catch {
$item.Editing.CancelEdit()
throw
}
} catch {
$errors += [PSCustomObject]@{
ItemPath = $itemPath
Status = "Failed"
Error = $_.Exception.Message
}
}
}
# Report results
$results | Show-ListViewfunction Update-ItemsWithProgress {
param(
[Sitecore.Data.Items.Item[]]$Items,
[scriptblock]$UpdateAction
)
$total = $Items.Count
$current = 0
$sw = [System.Diagnostics.Stopwatch]::StartNew()
foreach($item in $Items) {
$current++
# Calculate ETA
$percentComplete = ($current / $total) * 100
$elapsedSeconds = $sw.Elapsed.TotalSeconds
$estimatedTotalSeconds = ($elapsedSeconds / $current) * $total
$remainingSeconds = $estimatedTotalSeconds - $elapsedSeconds
Write-Progress -Activity "Processing items" `
-Status "Processing $($item.Name) ($current of $total)" `
-PercentComplete $percentComplete `
-SecondsRemaining $remainingSeconds
& $UpdateAction $item
}
$sw.Stop()
Write-Progress -Activity "Processing items" -Completed
Write-Host "Completed $total items in $($sw.Elapsed.TotalSeconds.ToString('F2')) seconds"
}
# Usage
$items = Get-ChildItem -Path "master:\content\" -Recurse
Update-ItemsWithProgress -Items $items -UpdateAction {
param($item)
$item.Title = "Updated: $($item.Name)"
}$languages = @("en", "de-DE", "da", "es-ES")
foreach($lang in $languages) {
$item = Get-Item -Path "master:\content\home" -Language $lang -ErrorAction SilentlyContinue
if ($item) {
$item.Title = "Localized Title for $lang"
Write-Host "Updated $lang version"
} else {
Write-Warning "No $lang version exists"
}
}# Get latest version
$item = Get-Item -Path "master:\content\home" -Language "en"
# Create new version before updating
$newVersion = $item.Versions.AddVersion()
$newVersion.Editing.BeginEdit()
$newVersion["Title"] = "Updated in new version"
$newVersion.Editing.EndEdit()
Write-Host "Created version $($newVersion.Version)"$item = Get-Item -Path "master:\content\home"
# Use the Automatic Properties
Write-Host "Title: $($item.Title)"
# Use Typed Fields
$textField = $item.PSFields.Text
if($textField.Value) {
Write-Host "Text: $($item.PSFields.Text.Value)"
}
# Use typed fields for complex types
$linkField = [Sitecore.Data.Fields.LinkField]$item.Fields["Link"]
if ($linkField -and $linkField.LinkType -eq "internal") {
$targetItem = $linkField.TargetItem
Write-Host "Links to: $($targetItem.ItemPath)"
}
# Use typed fields for images
$imageField = [Sitecore.Data.Fields.ImageField]$item.Fields["Image"]
if ($imageField -and $imageField.MediaItem) {
Write-Host "Image: $($imageField.MediaItem.Name)"
Write-Host "Alt: $($imageField.Alt)"
Write-Host "Size: $($imageField.Width)x$($imageField.Height)"
}$item = Get-Item -Path "master:\content\home"
# CORRECT - Use ISO format for manual field assignment
$item.Editing.BeginEdit()
$item["MyDateField"] = [Sitecore.DateUtil]::ToIsoDate([datetime]::Now)
$item.Editing.EndEdit()
# ALSO CORRECT - Automatic properties handle conversion
$item.MyDateField = [datetime]::Now
# Reading dates
$createdDate = [Sitecore.DateUtil]::IsoDateToDateTime($item["__Created"])
# Or using automated properties
$createdDate = $item.__Created # Returns System.DateTimefunction Remove-TestContent {
param(
[switch]$WhatIf
)
$itemsToDelete = Get-ChildItem -Path "master:\content\" -Recurse
foreach($item in $itemsToDelete) {
if ($WhatIf) {
Write-Host "WHATIF: Would delete $($item.ItemPath)" -ForegroundColor Yellow
} else {
#Remove-Item -Path $item.ProviderPath -Permanently
Write-Host "Deleted: $($item.ItemPath)" -ForegroundColor Red -BackgroundColor White
}
}
}
Remove-TestContent -WhatIfWrite-Log "Starting item updates"
$items = Get-ChildItem -Path "master:\content"
foreach($item in $items) {
try {
$item.Title = "Updated"
Write-Log "Updated: $($item.ItemPath)"
} catch {
Write-Log "Failed: $($item.ItemPath) - $($_.Exception.Message)" -Log Error
}
}
Write-Log "Completed item updates"# BAD
$item = Get-Item -Path "master:\content\maybe-exists"
$item.Title = "New Title" # Throws if item doesn't exist# GOOD
$item = Get-Item -Path "master:\content\maybe-exists" -ErrorAction SilentlyContinue
if ($item) {
$item.Title = "New Title"
} else {
Write-Warning "Item not found"
}# BAD
foreach($item in $items) {
try {
$item.Title = "Updated"
} catch {
# Silent failure
}
}# GOOD
$items = Get-ChildItem -Path "master:\content"
$errors = @()
foreach($item in $items) {
try {
$item.Title = "Updated"
} catch {
$errors += [PSCustomObject]@{
Item = $item.ItemPath
Error = $_.Exception.Message
}
}
}
if ($errors.Count -gt 0) {
$errors | Show-ListView
}# Method 1
$time1 = Measure-Command {
$items = Get-ChildItem -Path "master:\content" -Recurse |
Where-Object { $_.TemplateName -eq "Sample Item" }
}
# Method 2
$time2 = Measure-Command {
$items = Get-Item -Path "master:" -Query "/sitecore/content//*[@@templatename='Sample Item']"
}
Write-Host "Method 1: $($time1.TotalSeconds)s"
Write-Host "Method 2: $($time2.TotalSeconds)s"
Write-Host "Improvement: $(($time1.TotalSeconds / $time2.TotalSeconds).ToString('P0'))"Show-Confirm -Title "Click OK to acknowledge SPE is great!"Show-Input "Please provide 5 characters at most" -MaxLength 5$inputProps = @{
Prompt = "Enter a new name for the item:"
Validation = [Sitecore.Configuration.Settings]::ItemNameValidation
ErrorMessage = "'`$Input' is not a valid name."
MaxLength = [Sitecore.Configuration.Settings]::MaxItemNameLength
}
Show-Input @inputProps$options = @{
"A"="a"
"B"="b"
}
$props = @{
Parameters = @(
@{Name="selectedOption"; Title="Choose an option"; Options=$options; Tooltip="Choose one."}
)
Title = "Option selector"
Description = "Choose the right option."
Width = 300
Height = 300
ShowHints = $true
}
Read-Variable @propsShow-ModalDialog -Control "ConfirmChoice" -Parameters @{btn_0="Yes - returns btn_0"; btn_1="No - returns btn_1"; btn_2="returns btn_2"; te="Have you downloaded SPE?"; cp="Important Questions"} -Height 120 -Width 650Receive-File (Get-Item "master:\media library\Files") -AdvancedDialogGet-Item -Path "master:\media library\Files\readme" | Send-FileGet-Item "master:\content\home" | Show-FieldEditor -Name "*" -PreserveSectionsShow-ModalDialog -HandleParameters @{
"h"="Create an Anti-Package";
"t" = "Select a package that needs an anti-package";
"ic"="People/16x16/box.png";
"ok"="Pick";
"ask"="";
"path"= "packPath:$SitecorePackageFolder";
"mask"="*.zip";
} -Control "Installer.Browse"Show-ModalDialog -HandleParameters @{
"h"="FileBrowser";
} -Control "FileBrowser" -Width 500Show-ModalDialog -Control "SetIcon"Get-Item -Path master:\* | Show-ListView -Property Name, DisplayName, ProviderPath, TemplateName, Languagefor($i = 0; $i -lt 10; $i++) {
Write-Verbose "Index = $($i)" -Verbose
}
Show-Result -TextPS master:\> Add-ItemVersion -Path "master:\content\home" -Language "en" -TargetLanguage "pl-pl", "en-us" -IfExist Skip -IgnoredFields "Title"Add a Japanese version to /sitecore/content/home item in the master database based on itself
PS master:\> Add-ItemVersion -Path "master:\content\home" -Language ja-JP -IfExist AppendGet-ChildItem "master:\content\home" -Language "en" -Recurse | `
Where-Object { $_.TemplateName -eq "Sample Item" } | `
Add-ItemVersion -TargetLanguage "pl-pl" -IfExist Append | `
Format-Table Name, Language, Version -auto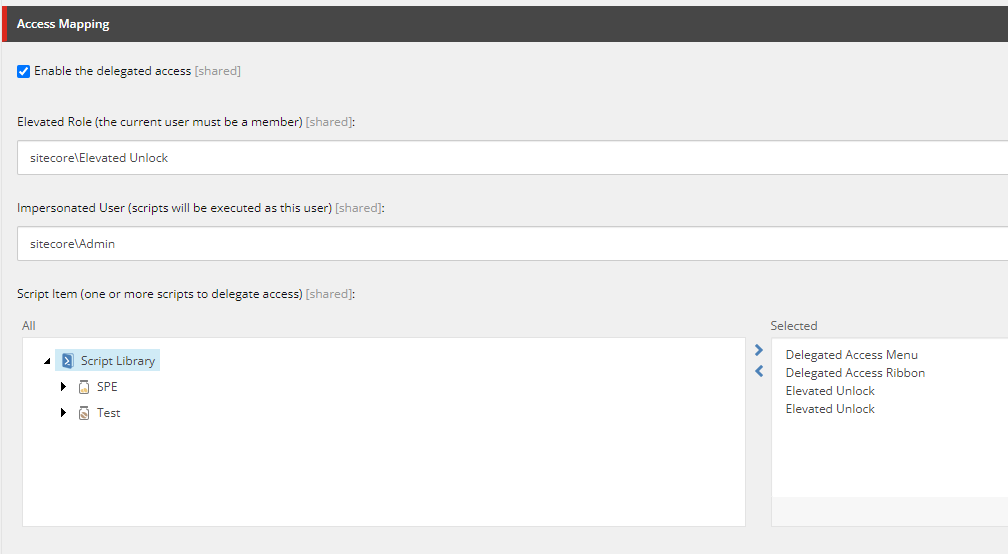
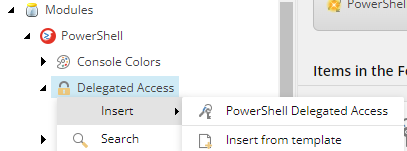
<!-- Add to config patch to disable all external access -->
<configuration xmlns:patch="https://www.sitecore.net/xmlconfig/">
<sitecore>
<powershell>
<services>
<remoting enabled="false" />
<restfulv1 enabled="false" />
<restfulv2 enabled="false" />
<fileDownload enabled="false" />
<fileUpload enabled="false" />
<mediaDownload enabled="false" />
<mediaUpload enabled="false" />
</services>
<userAccountControl>
<tokens>
<token name="Console">
<patch:attribute name="elevationAction">Block</patch:attribute>
</token>
<token name="ISE">
<patch:attribute name="elevationAction">Block</patch:attribute>
</token>
</tokens>
</userAccountControl>
</powershell>
</sitecore>
</configuration><authorization>
<deny users="*" />
</authorization>1. Network Security
- Firewall rules
- VPN/private network
- Not internet-facing
2. IIS-Level Security
- Deny anonymous access
- IP restrictions
- HTTPS requirements
- Request filtering
3. Sitecore User Security
- Role-based access control
- Application-level permissions
- Item-level security
4. SPE Security Hardening
- Session Elevation (UAC)
- Web service controls
- File upload restrictions
- Delegated access controls
5. Logging and Monitoring
- Comprehensive logging
- Real-time alerting
- Regular audit reviews
- SIEM integration<configuration xmlns:patch="http://www.sitecore.net/xmlconfig/" xmlns:role="http://www.sitecore.net/xmlconfig/role/" xmlns:security="http://www.sitecore.net/xmlconfig/security/">
<sitecore role:require="Standalone or ContentManagement or XMCloud" security:require="Sitecore">
<pipelines>
<owin.cookieAuthentication.validateIdentity>
<processor type="Sitecore.Owin.Authentication.Pipelines.CookieAuthentication.ValidateIdentity.ValidateSiteNeutralPaths, Sitecore.Owin.Authentication">
<siteNeutralPaths hint="list">
<!-- This entry corrects the infinite loop of ExecuteCommand in the SPE Console -->
<path hint="spe">/sitecore%20modules/PowerShell</path>
</siteNeutralPaths>
</processor>
</owin.cookieAuthentication.validateIdentity>
</pipelines>
</sitecore>
</configuration><sitecore>
<powershell>
<services>
<restfulv1 enabled="false" />
<restfulv2 enabled="false" />
<remoting enabled="false" />
<fileDownload enabled="false" />
<fileUpload enabled="false" />
<mediaDownload enabled="false" />
<mediaUpload enabled="false" />
<handleDownload enabled="true" />
<client enabled="true" />
<execution enabled="true" />
</services>
</powershell>
</sitecore><configuration xmlns:patch="https://www.sitecore.net/xmlconfig/">
<sitecore>
<powershell>
<services>
<remoting>
<patch:attribute name="enabled">true</patch:attribute>
<patch:attribute name="requireSecureConnection">true</patch:attribute>
<authorization>
<add Permission="Allow" IdentityType="Role" Identity="sitecore\PowerShell Extensions Remoting" />
</authorization>
</remoting>
</services>
</powershell>
</sitecore>
</configuration><remoting>
<patch:attribute name="enabled">true</patch:attribute>
<patch:attribute name="requireSecureConnection">true</patch:attribute>
<authorization>
<add Permission="Allow" IdentityType="User" Identity="sitecore\automation-user" />
</authorization>
</remoting><configuration xmlns:patch="https://www.sitecore.net/xmlconfig/">
<sitecore>
<powershell>
<services>
<restfulv2>
<patch:attribute name="enabled">true</patch:attribute>
</restfulv2>
</services>
</powershell>
</sitecore>
</configuration><services>
<restfulv1 enabled="false" />
<restfulv2 enabled="false" />
<remoting enabled="false" />
<fileDownload enabled="false" />
<fileUpload enabled="false" />
<mediaDownload enabled="false" />
<mediaUpload enabled="false" />
<handleDownload enabled="true" />
<client enabled="true" />
<execution enabled="true" />
</services><configuration xmlns:patch="https://www.sitecore.net/xmlconfig/">
<sitecore>
<powershell>
<services>
<remoting>
<patch:attribute name="enabled">true</patch:attribute>
<patch:attribute name="requireSecureConnection">true</patch:attribute>
<authorization>
<patch:delete />
</authorization>
<authorization>
<add Permission="Allow" IdentityType="User" Identity="sitecore\build-automation" />
</authorization>
</remoting>
<fileDownload>
<patch:attribute name="enabled">true</patch:attribute>
</fileDownload>
</services>
</powershell>
</sitecore>
</configuration><configuration xmlns:patch="https://www.sitecore.net/xmlconfig/">
<sitecore>
<powershell>
<services>
<restfulv2>
<patch:attribute name="enabled">true</patch:attribute>
</restfulv2>
</services>
</powershell>
</sitecore>
</configuration><configuration xmlns:patch="https://www.sitecore.net/xmlconfig/">
<sitecore>
<powershell>
<services>
<remoting>
<patch:attribute name="enabled">true</patch:attribute>
<patch:attribute name="requireSecureConnection">true</patch:attribute>
</remoting>
<fileDownload>
<patch:attribute name="enabled">true</patch:attribute>
</fileDownload>
<fileUpload>
<patch:attribute name="enabled">true</patch:attribute>
</fileUpload>
<mediaDownload>
<patch:attribute name="enabled">true</patch:attribute>
</mediaDownload>
<mediaUpload>
<patch:attribute name="enabled">true</patch:attribute>
</mediaUpload>
</services>
</powershell>
</sitecore>
</configuration><authorization>
<add Permission="Allow" IdentityType="Role" Identity="sitecore\PowerShell Extensions Remoting" />
</authorization><authorization>
<patch:delete />
</authorization>
<authorization>
<add Permission="Allow" IdentityType="Role" Identity="sitecore\Automation" />
<add Permission="Allow" IdentityType="Role" Identity="sitecore\Developers" />
</authorization><authorization>
<add Permission="Allow" IdentityType="User" Identity="sitecore\ci-user" />
<add Permission="Allow" IdentityType="User" Identity="sitecore\deployment-user" />
</authorization><authorization>
<add Permission="Allow" IdentityType="Role" Identity="sitecore\PowerShell Extensions Remoting" />
<add Permission="Allow" IdentityType="User" Identity="sitecore\admin" />
<add Permission="Allow" IdentityType="User" Identity="sitecore\build-agent" />
</authorization><configuration>
<system.web>
<authorization>
<deny users="?" />
</authorization>
</system.web>
</configuration>$session = New-ScriptSession -Username "domain\user" -Password "password" -ConnectionUri "https://sitecore.local"sitecore modules\PowerShell\Services\<configuration>
<system.web>
<authorization>
<deny users="?" />
</authorization>
</system.web>
</configuration><configuration>
<system.web>
<authorization>
<deny users="?" />
</authorization>
</system.web>
</configuration># Create credential object
$credential = Get-Credential
# Create session with Windows credentials
$session = New-ScriptSession `
-Username "sitecore\sitecore-user" `
-Password "password" `
-ConnectionUri "https://sitecore.local" `
-Credential $credential
# Or use credential parameter directly
$session = New-ScriptSession `
-ConnectionUri "https://sitecore.local" `
-Credential (Get-Credential)<configuration>
<system.web>
<authorization>
<deny users="?" />
<allow users="DOMAIN\username1, DOMAIN\username2" />
<deny users="*" />
</authorization>
</system.web>
</configuration><configuration>
<system.web>
<authorization>
<deny users="?" />
<allow roles="DOMAIN\Sitecore Administrators" />
<deny users="*" />
</authorization>
</system.web>
</configuration><authorization>
<!-- 1. Deny anonymous -->
<deny users="?" />
<!-- 2. Allow specific users -->
<allow users="DOMAIN\username1" />
<!-- 3. Allow specific roles -->
<allow roles="DOMAIN\Sitecore Administrators" />
<!-- 4. Deny everyone else -->
<deny users="*" />
</authorization><configuration>
<system.webServer>
<security>
<ipSecurity allowUnlisted="false">
<add ipAddress="10.0.0.1" allowed="true" />
<add ipAddress="10.0.0.2" allowed="true" />
<add ipAddress="192.168.1.0" subnetMask="255.255.255.0" allowed="true" />
</ipSecurity>
</security>
</system.webServer>
</configuration><configuration>
<system.webServer>
<security>
<ipSecurity allowUnlisted="true">
<add ipAddress="203.0.113.1" allowed="false" />
<add ipAddress="198.51.100.0" subnetMask="255.255.255.0" allowed="false" />
</ipSecurity>
</security>
</system.webServer>
</configuration><system.webServer>
<security>
<ipSecurity allowUnlisted="false">
<add ipAddress="10.0.0.100" allowed="true" />
</ipSecurity>
</security>
</system.webServer><configuration>
<system.webServer>
<security>
<access sslFlags="Ssl, SslNegotiateCert" />
</security>
</system.webServer>
</configuration><system.webServer>
<security>
<access sslFlags="Ssl" />
</security>
</system.webServer><system.webServer>
<security>
<access sslFlags="Ssl, SslRequireCert" />
</security>
</system.webServer><configuration>
<system.webServer>
<rewrite>
<rules>
<!-- Block requests with suspicious query strings -->
<rule name="Block Malicious Query Strings" stopProcessing="true">
<match url=".*" />
<conditions>
<add input="{QUERY_STRING}" pattern="(eval|exec|system|cmd\.exe)" />
</conditions>
<action type="CustomResponse" statusCode="403" statusReason="Forbidden" />
</rule>
</rules>
</rewrite>
</system.webServer>
</configuration><rewrite>
<rules>
<rule name="Force HTTPS" stopProcessing="true">
<match url="(.*)" />
<conditions>
<add input="{HTTPS}" pattern="^OFF$" />
</conditions>
<action type="Redirect" url="https://{HTTP_HOST}/{R:1}" redirectType="Permanent" />
</rule>
</rules>
</rewrite><configuration>
<system.webServer>
<security>
<requestFiltering>
<fileExtensions>
<add fileExtension=".exe" allowed="false" />
<add fileExtension=".dll" allowed="false" />
<add fileExtension=".bat" allowed="false" />
<add fileExtension=".cmd" allowed="false" />
</fileExtensions>
</requestFiltering>
</security>
</system.webServer>
</configuration><system.webServer>
<security>
<requestFiltering>
<!-- Max 10MB requests -->
<requestLimits maxAllowedContentLength="10485760" />
</requestFiltering>
</security>
</system.webServer><system.webServer>
<security>
<requestFiltering>
<verbs>
<add verb="TRACE" allowed="false" />
<add verb="TRACK" allowed="false" />
<add verb="OPTIONS" allowed="false" />
</verbs>
</requestFiltering>
</security>
</system.webServer><configuration>
<system.web>
<authorization>
<!-- Deny anonymous access -->
<deny users="?" />
</authorization>
</system.web>
<system.webServer>
<security>
<!-- Require HTTPS -->
<access sslFlags="Ssl" />
<!-- Request filtering -->
<requestFiltering>
<requestLimits maxAllowedContentLength="10485760" />
<fileExtensions>
<add fileExtension=".exe" allowed="false" />
<add fileExtension=".dll" allowed="false" />
</fileExtensions>
</requestFiltering>
</security>
</system.webServer>
</configuration><configuration>
<system.web>
<authorization>
<deny users="?" />
</authorization>
</system.web>
<system.webServer>
<security>
<!-- Require HTTPS -->
<access sslFlags="Ssl" />
<!-- Only allow build server -->
<ipSecurity allowUnlisted="false">
<add ipAddress="10.0.0.100" allowed="true" />
</ipSecurity>
</security>
</system.webServer>
</configuration><configuration>
<system.web>
<authorization>
<deny users="?" />
<allow roles="DOMAIN\Sitecore Administrators, DOMAIN\Sitecore Developers" />
<deny users="*" />
</authorization>
</system.web>
<system.webServer>
<security>
<access sslFlags="Ssl" />
</security>
</system.webServer>
</configuration><configuration>
<system.web>
<authorization>
<deny users="?" />
<allow users="DOMAIN\sitecore-admin" />
<deny users="*" />
</authorization>
</system.web>
<system.webServer>
<security>
<!-- Require HTTPS and client certificate -->
<access sslFlags="Ssl, SslRequireCert" />
<!-- IP restriction to internal network -->
<ipSecurity allowUnlisted="false">
<add ipAddress="10.0.0.0" subnetMask="255.0.0.0" allowed="true" />
</ipSecurity>
<!-- Request filtering -->
<requestFiltering>
<requestLimits maxAllowedContentLength="5242880" />
<verbs>
<add verb="TRACE" allowed="false" />
<add verb="OPTIONS" allowed="false" />
</verbs>
</requestFiltering>
</security>
<!-- URL rewrite to block patterns -->
<rewrite>
<rules>
<rule name="Block Suspicious Patterns" stopProcessing="true">
<match url=".*" />
<conditions>
<add input="{QUERY_STRING}" pattern="(eval|exec|cmd)" />
</conditions>
<action type="CustomResponse" statusCode="403" />
</rule>
</rules>
</rewrite>
</system.webServer>
</configuration>Examples for managing complex interactive dialogs.
<#
.SYNOPSIS
Demonstrates basic text input controls in Read-Variable dialogs.
.DESCRIPTION
Shows how to use single-line text, multi-line text, password fields,
and placeholder text in SPE dialogs.
.NOTES
Documentation: https://doc.sitecorepowershell.com
#>
$dialogParams = @{
Title = "Basic Text Controls"
Description = "Examples of text input fields available in SPE dialogs."
Width = 500
Height = 400
OkButtonName = "Submit"
CancelButtonName = "Cancel"
ShowHints = $true
Parameters = @(
@{
Name = "singleLineText"
Value = ""
Title = "Single Line Text"
Tooltip = "A simple single-line text input"
Placeholder = "Enter text here..."
},
@{
Name = "multiLineText"
Value = ""
Title = "Multi-Line Text"
Lines = 3
Tooltip = "A multi-line text area for longer content"
Placeholder = "Enter multiple lines of text..."
},
@{
Name = "passwordField"
Value = ""
Title = "Password"
Editor = "password"
Tooltip = "Password input - characters are masked"
Placeholder = "Enter password..."
}
)
}
$result = Read-Variable @dialogParams
if ($result -eq "ok") {
Write-Host "Single Line Text: $singleLineText" -ForegroundColor Green
Write-Host "Multi-Line Text: $multiLineText" -ForegroundColor Green
Write-Host "Password: $passwordField" -ForegroundColor Green
}<#
.SYNOPSIS
Demonstrates number input controls in Read-Variable dialogs.
.DESCRIPTION
Shows how to use integer and floating-point number inputs in SPE dialogs.
.NOTES
Documentation: https://doc.sitecorepowershell.com
#>
$dialogParams = @{
Title = "Number Input Controls"
Description = "Examples of numeric input fields."
Width = 400
Height = 300
OkButtonName = "Submit"
CancelButtonName = "Cancel"
ShowHints = $true
Parameters = @(
@{
Name = "integerValue"
Value = 100
Editor = "number"
Title = "Integer Value"
Tooltip = "Enter a whole number"
Columns = 6
},
@{
Name = "floatValue"
Value = 1.5
Editor = "number"
Title = "Decimal Value"
Tooltip = "Enter a decimal number"
Columns = 6
}
)
}
$result = Read-Variable @dialogParams
if ($result -eq "ok") {
Write-Host "Integer Value: $integerValue" -ForegroundColor Green
Write-Host "Float Value: $floatValue" -ForegroundColor Green
# Demonstrate the returned types
Write-Host "`nReturned Types:" -ForegroundColor Cyan
Write-Host "Integer Type: $($integerValue.GetType().Name)"
Write-Host "Float Type: $($floatValue.GetType().Name)"
}<#
.SYNOPSIS
Demonstrates checkbox control in Read-Variable dialogs.
.DESCRIPTION
Shows how to use checkbox inputs that return boolean values.
.NOTES
Documentation: https://doc.sitecorepowershell.com
#>
# Initialize default value
$enableFeature = $true
$dialogParams = @{
Title = "Checkbox Control"
Description = "Example of checkbox input that returns a boolean value."
Width = 400
Height = 250
OkButtonName = "Submit"
CancelButtonName = "Cancel"
ShowHints = $true
Parameters = @(
@{
Name = "enableFeature"
Value = $true
Title = "Enable Feature"
Tooltip = "Check to enable, uncheck to disable"
Editor = "checkbox"
},
@{
Name = "includeSubitems"
Value = $false
Title = "Include Subitems"
Tooltip = "Process child items as well"
Editor = "checkbox"
},
@{
Name = "publishAfterSave"
Value = $false
Title = "Publish After Save"
Tooltip = "Automatically publish changes"
Editor = "checkbox"
}
)
}
$result = Read-Variable @dialogParams
if ($result -eq "ok") {
Write-Host "Enable Feature: $enableFeature" -ForegroundColor Green
Write-Host "Include Subitems: $includeSubitems" -ForegroundColor Green
Write-Host "Publish After Save: $publishAfterSave" -ForegroundColor Green
# Example conditional logic based on checkbox values
if ($enableFeature) {
Write-Host "`nFeature is enabled!" -ForegroundColor Cyan
}
}<#
.SYNOPSIS
Demonstrates dropdown (combo) controls in Read-Variable dialogs.
.DESCRIPTION
Shows how to create dropdown lists with predefined options and tooltips.
.NOTES
Documentation: https://doc.sitecorepowershell.com
#>
# Define options as an ordered hashtable
# Format: @{ "Display Text" = "Value" }
$priorityOptions = [ordered]@{
"Low" = "1"
"Medium" = "2"
"High" = "3"
"Critical" = "4"
}
# Options with tooltips
$actionOptions = [ordered]@{
"Create" = "create"
"Update" = "update"
"Delete" = "delete"
"Archive" = "archive"
}
$actionTooltips = [ordered]@{
"create" = "Create a new item in Sitecore"
"update" = "Modify an existing item"
"delete" = "Remove the item permanently"
"archive" = "Move the item to archive"
}
$dialogParams = @{
Title = "Dropdown Controls"
Description = "Examples of combo/dropdown selection controls."
Width = 450
Height = 350
OkButtonName = "Submit"
CancelButtonName = "Cancel"
ShowHints = $true
Parameters = @(
@{
Name = "selectedPriority"
Value = "2"
Title = "Priority Level"
Options = $priorityOptions
Tooltip = "Select the priority for this task"
Editor = "combo"
},
@{
Name = "selectedAction"
Value = "update"
Title = "Action Type"
Options = $actionOptions
OptionTooltips = $actionTooltips
Tooltip = "Choose the action to perform"
Editor = "combo"
}
)
}
$result = Read-Variable @dialogParams
if ($result -eq "ok") {
Write-Host "Selected Priority: $selectedPriority" -ForegroundColor Green
Write-Host "Selected Action: $selectedAction" -ForegroundColor Green
}<#
.SYNOPSIS
Demonstrates checklist control for multiple selections in Read-Variable dialogs.
.DESCRIPTION
Shows how to create a checklist that allows users to select multiple options.
The checklist uses bitmask values for selections.
.NOTES
Documentation: https://doc.sitecorepowershell.com
#>
# Define options with bitmask values
# Each value should be a power of 2 for proper bitmask operations
$daysOfWeek = [ordered]@{
"Monday" = 1
"Tuesday" = 2
"Wednesday" = 4
"Thursday" = 8
"Friday" = 16
"Saturday" = 32
"Sunday" = 64
}
# Pre-select some items by providing an array of values
$selectedDays = @(1, 4, 16) # Monday, Wednesday, Friday
$languageOptions = [ordered]@{
"English" = 1
"German" = 2
"French" = 4
"Spanish" = 8
"Japanese" = 16
}
$selectedLanguages = @(1) # English pre-selected
$dialogParams = @{
Title = "Checklist Controls"
Description = "Select multiple options using checklists."
Width = 450
Height = 450
OkButtonName = "Submit"
CancelButtonName = "Cancel"
ShowHints = $true
Parameters = @(
@{
Name = "selectedDays"
Title = "Days of the Week"
Options = $daysOfWeek
Tooltip = "Select which days to run the scheduled task"
Editor = "checklist"
},
@{
Name = "selectedLanguages"
Title = "Target Languages"
Options = $languageOptions
Tooltip = "Select languages for content translation"
Editor = "checklist"
}
)
}
$result = Read-Variable @dialogParams
if ($result -eq "ok") {
Write-Host "Selected Days (values): $($selectedDays -join ', ')" -ForegroundColor Green
Write-Host "Selected Languages (values): $($selectedLanguages -join ', ')" -ForegroundColor Green
# Map values back to display names
Write-Host "`nSelected Day Names:" -ForegroundColor Cyan
foreach ($day in $daysOfWeek.GetEnumerator()) {
if ($selectedDays -contains $day.Value) {
Write-Host " - $($day.Key)"
}
}
}<#
.SYNOPSIS
Demonstrates radio button control for single selection in Read-Variable dialogs.
.DESCRIPTION
Shows how to create radio button groups that allow users to select exactly one option.
.NOTES
Documentation: https://doc.sitecorepowershell.com
#>
# Define options for radio buttons
$publishMode = [ordered]@{
"Smart Publish" = 1
"Incremental Publish" = 2
"Full Republish" = 3
}
$targetDatabase = [ordered]@{
"Web" = "web"
"Preview" = "preview"
"Staging" = "staging"
}
# Pre-select an option
$selectedPublishMode = 1
$selectedDatabase = "web"
$dialogParams = @{
Title = "Radio Button Controls"
Description = "Select exactly one option from each group."
Width = 450
Height = 400
OkButtonName = "Submit"
CancelButtonName = "Cancel"
ShowHints = $true
Parameters = @(
@{
Name = "selectedPublishMode"
Title = "Publish Mode"
Options = $publishMode
Tooltip = "Choose how content should be published"
Editor = "radio"
},
@{
Name = "selectedDatabase"
Title = "Target Database"
Options = $targetDatabase
Tooltip = "Select the destination database"
Editor = "radio"
}
)
}
$result = Read-Variable @dialogParams
if ($result -eq "ok") {
Write-Host "Selected Publish Mode: $selectedPublishMode" -ForegroundColor Green
Write-Host "Selected Database: $selectedDatabase" -ForegroundColor Green
# Use the selection in logic
switch ($selectedPublishMode) {
1 { Write-Host "`nPerforming Smart Publish..." -ForegroundColor Cyan }
2 { Write-Host "`nPerforming Incremental Publish..." -ForegroundColor Cyan }
3 { Write-Host "`nPerforming Full Republish..." -ForegroundColor Cyan }
}
}<#
.SYNOPSIS
Demonstrates date and time picker controls in Read-Variable dialogs.
.DESCRIPTION
Shows how to use date-only and date-time picker controls.
Both return System.DateTime objects.
.NOTES
Documentation: https://doc.sitecorepowershell.com
#>
# Set default values
$startDateTime = [System.DateTime]::Now.AddDays(-7)
$endDateTime = [System.DateTime]::Now
$publishDate = [System.DateTime]::Now.AddDays(1)
$dialogParams = @{
Title = "Date and Time Controls"
Description = "Select dates and times for your operation."
Width = 500
Height = 400
OkButtonName = "Submit"
CancelButtonName = "Cancel"
ShowHints = $true
Parameters = @(
@{
Name = "startDateTime"
Value = [System.DateTime]::Now.AddDays(-7)
Title = "Start Date/Time"
Tooltip = "Select the starting date and time"
Editor = "date time"
},
@{
Name = "endDateTime"
Value = [System.DateTime]::Now
Title = "End Date/Time"
Tooltip = "Select the ending date and time"
Editor = "date time"
},
@{
Name = "publishDate"
Value = [System.DateTime]::Now.AddDays(1)
Title = "Publish Date (Date Only)"
Tooltip = "Select the date for publishing"
Editor = "date"
}
)
}
$result = Read-Variable @dialogParams
if ($result -eq "ok") {
Write-Host "Date/Time Controls return System.DateTime objects:" -ForegroundColor Cyan
Write-Host ""
Write-Host "Start DateTime: $startDateTime" -ForegroundColor Green
Write-Host " Type: $($startDateTime.GetType().FullName)"
Write-Host ""
Write-Host "End DateTime: $endDateTime" -ForegroundColor Green
Write-Host " Type: $($endDateTime.GetType().FullName)"
Write-Host ""
Write-Host "Publish Date: $publishDate" -ForegroundColor Green
Write-Host " Type: $($publishDate.GetType().FullName)"
Write-Host ""
# Calculate duration
$duration = $endDateTime - $startDateTime
Write-Host "Duration: $($duration.Days) days, $($duration.Hours) hours" -ForegroundColor Yellow
}<#
.SYNOPSIS
Demonstrates single item picker control in Read-Variable dialogs.
.DESCRIPTION
Shows how to use the item picker to select a single Sitecore item.
Returns a Sitecore Item object.
.NOTES
Documentation: https://doc.sitecorepowershell.com
#>
# Initialize item variables with default Item objects
# Read-Variable requires item variables to be pre-initialized
$selectedItem = Get-Item -Path "master:\content\Home"
$templateItem = Get-Item -Path "master:\templates\System\Templates\Template"
$dialogParams = @{
Title = "Single Item Picker"
Description = "Select a single item from the content tree."
Width = 500
Height = 350
OkButtonName = "Select"
CancelButtonName = "Cancel"
ShowHints = $true
Parameters = @(
@{
Name = "selectedItem"
Title = "Select Content Item"
Root = "/sitecore/content/"
Tooltip = "Browse and select an item from the content tree"
},
@{
Name = "templateItem"
Title = "Select Template"
Root = "/sitecore/templates/"
Tooltip = "Browse and select a template"
}
)
}
$result = Read-Variable @dialogParams
if ($result -eq "ok") {
Write-Host "Item Picker returns Sitecore Item objects:" -ForegroundColor Cyan
Write-Host ""
if ($selectedItem) {
Write-Host "Selected Content Item:" -ForegroundColor Green
Write-Host " Name: $($selectedItem.Name)"
Write-Host " Path: $($selectedItem.ItemPath)"
Write-Host " ID: $($selectedItem.ID)"
Write-Host " Template: $($selectedItem.TemplateName)"
} else {
Write-Host "No content item selected" -ForegroundColor Yellow
}
Write-Host ""
if ($templateItem) {
Write-Host "Selected Template:" -ForegroundColor Green
Write-Host " Name: $($templateItem.Name)"
Write-Host " Path: $($templateItem.ItemPath)"
Write-Host " ID: $($templateItem.ID)"
} else {
Write-Host "No template selected" -ForegroundColor Yellow
}
}<#
.SYNOPSIS
Demonstrates treelist control for multiple item selection in Read-Variable dialogs.
.DESCRIPTION
Shows how to use treelist to select multiple items with a tree-based interface.
Returns an array of Sitecore Item objects.
.NOTES
Documentation: https://doc.sitecorepowershell.com
#>
# Initialize with an array of Item objects (can be empty array or pre-selected items)
$selectedTemplates = @(Get-Item -Path "master:\templates\System\Templates\Template")
$dialogParams = @{
Title = "Treelist Control"
Description = "Select multiple items using the treelist interface."
Width = 600
Height = 500
OkButtonName = "Select"
CancelButtonName = "Cancel"
ShowHints = $true
Parameters = @(
@{
Name = "selectedTemplates"
Title = "Select Templates"
Source = "DataSource=/sitecore/templates&DatabaseName=master&IncludeTemplatesForDisplay=Node,Folder,Template,Template Folder&IncludeTemplatesForSelection=Template"
Editor = "treelist"
Tooltip = "Select one or more templates from the tree"
}
)
}
$result = Read-Variable @dialogParams
if ($result -eq "ok") {
Write-Host "Treelist returns an array of Sitecore Item objects:" -ForegroundColor Cyan
Write-Host ""
if ($selectedTemplates -and $selectedTemplates.Count -gt 0) {
Write-Host "Selected $($selectedTemplates.Count) template(s):" -ForegroundColor Green
Write-Host ""
foreach ($template in $selectedTemplates) {
Write-Host " - $($template.Name)" -ForegroundColor White
Write-Host " Path: $($template.ItemPath)"
Write-Host " ID: $($template.ID)"
Write-Host ""
}
} else {
Write-Host "No templates selected" -ForegroundColor Yellow
}
}
<#
TREELIST SOURCE PARAMETERS:
The Source parameter uses a query string format with these options:
- DataSource: Root path for the tree (e.g., /sitecore/templates)
- DatabaseName: Target database (master, web, core)
- IncludeTemplatesForDisplay: Templates to show in tree (comma-separated)
- IncludeTemplatesForSelection: Templates that can be selected (comma-separated)
- ExcludeTemplatesForDisplay: Templates to hide
- ExcludeTemplatesForSelection: Templates that cannot be selected
Example configurations:
# Select pages under content
Source = "DataSource=/sitecore/content&DatabaseName=master&IncludeTemplatesForSelection=Page,Article"
# Select media items
Source = "DataSource=/sitecore/media library&DatabaseName=master&IncludeTemplatesForSelection=Image,Jpeg,Png"
#><#
.SYNOPSIS
Demonstrates multilist control for multiple item selection in Read-Variable dialogs.
.DESCRIPTION
Shows how to use multilist and multilist search controls.
Both return arrays of Sitecore Item objects.
.NOTES
Documentation: https://doc.sitecorepowershell.com
#>
# Initialize item variable - required for item picker
$selectedItems = @(Get-Item -Path "master:\templates\System\Templates\Template")
$searchableItems = @(Get-Item -Path "master:\templates\System\Templates\Standard template")
$dialogParams = @{
Title = "Multilist Controls"
Description = "Select multiple items using multilist interfaces."
Width = 650
Height = 600
OkButtonName = "Select"
CancelButtonName = "Cancel"
ShowHints = $true
Parameters = @(
@{
Name = "selectedItems"
Title = "Multilist (Standard)"
Source = "DataSource=/sitecore/templates/System&DatabaseName=master&IncludeTemplatesForDisplay=Template Folder,Template&IncludeTemplatesForSelection=Template"
Editor = "multilist"
Height = "200px"
Tooltip = "Select items by moving them between lists"
},
@{
Name = "searchableItems"
Title = "Multilist with Search"
Source = "DataSource=/sitecore/templates&DatabaseName=master&IncludeTemplatesForDisplay=Template Folder,Template&IncludeTemplatesForSelection=Template"
Editor = "multilist search"
Height = "200px"
Tooltip = "Search and select items - great for large lists"
}
)
}
$result = Read-Variable @dialogParams
if ($result -eq "ok") {
Write-Host "Multilist controls return arrays of Sitecore Item objects:" -ForegroundColor Cyan
Write-Host ""
Write-Host "Standard Multilist Selection:" -ForegroundColor Green
if ($selectedItems -and $selectedItems.Count -gt 0) {
foreach ($item in $selectedItems) {
Write-Host " - $($item.Name) [$($item.ID)]"
}
} else {
Write-Host " (none selected)" -ForegroundColor Yellow
}
Write-Host ""
Write-Host "Multilist Search Selection:" -ForegroundColor Green
if ($searchableItems -and $searchableItems.Count -gt 0) {
foreach ($item in $searchableItems) {
Write-Host " - $($item.Name) [$($item.ID)]"
}
} else {
Write-Host " (none selected)" -ForegroundColor Yellow
}
}
<#
MULTILIST vs MULTILIST SEARCH:
Standard Multilist:
- Shows all available items in a scrollable list
- Best for smaller datasets (< 100 items)
- Drag-and-drop interface
Multilist Search:
- Includes a search box to filter items
- Best for larger datasets where browsing isn't practical
- Same selection behavior as standard multilist
Both use the same Source parameter format as treelist.
#><#
.SYNOPSIS
Demonstrates droplist control for single item selection in Read-Variable dialogs.
.DESCRIPTION
Shows how to use droplist to select a single item from a flat list.
Returns a Sitecore Item object.
.NOTES
Documentation: https://doc.sitecorepowershell.com
#>
# Initialize item variable - required for item picker
$selectedTemplate = Get-Item -Path "master:\templates\sample\sample item"
$dialogParams = @{
Title = "Droplist Control"
Description = "Select a single item from a dropdown list."
Width = 500
Height = 300
OkButtonName = "Select"
CancelButtonName = "Cancel"
ShowHints = $true
Parameters = @(
@{
Name = "selectedTemplate"
Title = "Select a Template"
Source = "DataSource=/sitecore/templates/sample&DatabaseName=master&IncludeTemplatesForDisplay=Template Folder,Template&IncludeTemplatesForSelection=Template"
Editor = "droplist"
Tooltip = "Choose a single template from the dropdown"
}
)
}
$result = Read-Variable @dialogParams
if ($result -eq "ok") {
Write-Host "Droplist returns a single Sitecore Item object:" -ForegroundColor Cyan
Write-Host ""
if ($selectedTemplate) {
Write-Host "Selected Template:" -ForegroundColor Green
Write-Host " Name: $($selectedTemplate.Name)"
Write-Host " Path: $($selectedTemplate.ItemPath)"
Write-Host " ID: $($selectedTemplate.ID)"
Write-Host " Type: $($selectedTemplate.GetType().FullName)"
} else {
Write-Host "No template selected" -ForegroundColor Yellow
}
}
<#
DROPLIST vs COMBO:
Droplist:
- Displays Sitecore items from a data source
- Returns a Sitecore Item object
- Uses Source parameter with DataSource path
Combo:
- Displays key-value pairs defined in script
- Returns the value (usually a string or number)
- Uses Options parameter with hashtable
Use Droplist when you need to select from Sitecore items.
Use Combo when you need predefined options.
#><#
.SYNOPSIS
Demonstrates grouped dropdown controls in Read-Variable dialogs.
.DESCRIPTION
Shows how to use groupeddroplink and groupeddroplist controls.
These display items grouped by their parent folders.
- groupeddroplink: Returns the selected Item object
- groupeddroplist: Returns the item's string value (path or ID)
.NOTES
Documentation: https://doc.sitecorepowershell.com
#>
$dialogParams = @{
Title = "Grouped Dropdown Controls"
Description = "Select items from grouped dropdown lists."
Width = 550
Height = 350
OkButtonName = "Select"
CancelButtonName = "Cancel"
ShowHints = $true
Parameters = @(
@{
Name = "selectedGroupedDroplink"
Title = "Grouped Droplink (Returns Item)"
Source = "DataSource=/sitecore/templates&DatabaseName=master&IncludeTemplatesForDisplay=Node,Folder,Template,Template Folder&IncludeTemplatesForSelection=Template"
Editor = "groupeddroplink"
Tooltip = "Items grouped by folder - returns Item object"
},
@{
Name = "selectedGroupedDroplist"
Title = "Grouped Droplist (Returns String)"
Source = "DataSource=/sitecore/templates&DatabaseName=master&IncludeTemplatesForDisplay=Node,Folder,Template,Template Folder&IncludeTemplatesForSelection=Template"
Editor = "groupeddroplist"
Tooltip = "Items grouped by folder - returns string value"
}
)
}
$result = Read-Variable @dialogParams
if ($result -eq "ok") {
Write-Host "Grouped Dropdown Controls:" -ForegroundColor Cyan
Write-Host ""
Write-Host "Grouped Droplink (returns Item):" -ForegroundColor Green
if ($selectedGroupedDroplink) {
Write-Host " Name: $($selectedGroupedDroplink.Name)"
Write-Host " Path: $($selectedGroupedDroplink.ItemPath)"
Write-Host " Type: $($selectedGroupedDroplink.GetType().Name)"
} else {
Write-Host " (none selected)" -ForegroundColor Yellow
}
Write-Host ""
Write-Host "Grouped Droplist (returns String):" -ForegroundColor Green
if ($selectedGroupedDroplist) {
Write-Host " Value: $selectedGroupedDroplist"
Write-Host " Type: $($selectedGroupedDroplist.GetType().Name)"
} else {
Write-Host " (none selected)" -ForegroundColor Yellow
}
}
<#
GROUPED DROPDOWNS:
Both groupeddroplink and groupeddroplist display items organized
by their parent folders, making it easier to navigate large item sets.
Key Difference:
- groupeddroplink: Returns the actual Sitecore Item object
- groupeddroplist: Returns a string representation
Use groupeddroplink when you need to work with the Item object.
Use groupeddroplist when you only need the item's path or ID.
#><#
.SYNOPSIS
Demonstrates user and role picker controls in Read-Variable dialogs.
.DESCRIPTION
Shows how to use user, role, and combined user/role selection controls.
These are essential for security and permission-related scripts.
.NOTES
Documentation: https://doc.sitecorepowershell.com
#>
$dialogParams = @{
Title = "User and Role Pickers"
Description = "Select users and roles for permission management."
Width = 550
Height = 450
OkButtonName = "Select"
CancelButtonName = "Cancel"
ShowHints = $true
Parameters = @(
@{
Name = "selectedUser"
Title = "Select User(s)"
Editor = "user multiple"
Tooltip = "Select one or more users"
},
@{
Name = "selectedRole"
Title = "Select Role(s)"
Editor = "role multiple"
Domain = "sitecore"
Tooltip = "Select one or more roles from the sitecore domain"
},
@{
Name = "selectedUserOrRole"
Title = "Select User(s) or Role(s)"
Editor = "user role multiple"
Domain = "sitecore"
Tooltip = "Select any combination of users and roles"
}
)
}
$result = Read-Variable @dialogParams
if ($result -eq "ok") {
Write-Host "User and Role Pickers return string values:" -ForegroundColor Cyan
Write-Host ""
Write-Host "Selected Users:" -ForegroundColor Green
if ($selectedUser) {
$selectedUser | ForEach-Object { Write-Host " - $_" }
} else {
Write-Host " (none selected)" -ForegroundColor Yellow
}
Write-Host ""
Write-Host "Selected Roles:" -ForegroundColor Green
if ($selectedRole) {
$selectedRole | ForEach-Object { Write-Host " - $_" }
} else {
Write-Host " (none selected)" -ForegroundColor Yellow
}
Write-Host ""
Write-Host "Selected Users or Roles:" -ForegroundColor Green
if ($selectedUserOrRole) {
$selectedUserOrRole | ForEach-Object { Write-Host " - $_" }
} else {
Write-Host " (none selected)" -ForegroundColor Yellow
}
}
<#
USER AND ROLE EDITOR VARIANTS:
Single Selection:
- "user" : Select one user
- "role" : Select one role
- "user role" : Select one user or role
Multiple Selection:
- "user multiple" : Select multiple users
- "role multiple" : Select multiple roles
- "user role multiple" : Select multiple users and/or roles
Domain Parameter:
The Domain parameter filters roles to a specific security domain.
Common domains: "sitecore", "extranet", custom domains
Return Values:
- Single selection returns a string
- Multiple selection returns an array of strings
- Format: "domain\username" or "domain\rolename"
#><#
.SYNOPSIS
Demonstrates rule editor controls in Read-Variable dialogs.
.DESCRIPTION
Shows how to use rule and rule action editors for creating
Sitecore rules with conditions and actions.
.NOTES
Documentation: https://doc.sitecorepowershell.com
#>
# You can pre-populate with an existing rule
# Get a sample rule from an existing item
$existingRule = $null
$ruleItem = Get-Item -Path "master:" -ID "{D00BD134-EB15-41A7-BEF1-E6455C6BC9AC}" -ErrorAction SilentlyContinue
if ($ruleItem) {
$existingRule = $ruleItem | Select-Object -ExpandProperty ShowRule -ErrorAction SilentlyContinue
}
$dialogParams = @{
Title = "Rule Editor Controls"
Description = "Create rules with conditions and optional actions."
Width = 700
Height = 500
OkButtonName = "Save Rules"
CancelButtonName = "Cancel"
ShowHints = $true
Parameters = @(
@{
Name = "conditionRule"
Title = "Condition Rule"
Editor = "rule"
Tooltip = "Define conditions only (no actions)"
},
@{
Name = "actionRule"
Title = "Rule with Actions"
Editor = "rule action"
Tooltip = "Define conditions and actions to execute"
}
)
}
$result = Read-Variable @dialogParams
if ($result -eq "ok") {
Write-Host "Rule Editors return XML string values:" -ForegroundColor Cyan
Write-Host ""
Write-Host "Condition Rule:" -ForegroundColor Green
if ($conditionRule) {
Write-Host " Length: $($conditionRule.Length) characters"
Write-Host " Preview: $($conditionRule.Substring(0, [Math]::Min(100, $conditionRule.Length)))..."
} else {
Write-Host " (no rule defined)" -ForegroundColor Yellow
}
Write-Host ""
Write-Host "Rule with Actions:" -ForegroundColor Green
if ($actionRule) {
Write-Host " Length: $($actionRule.Length) characters"
Write-Host " Preview: $($actionRule.Substring(0, [Math]::Min(100, $actionRule.Length)))..."
} else {
Write-Host " (no rule defined)" -ForegroundColor Yellow
}
}
<#
RULE EDITOR TYPES:
"rule" Editor:
- Conditions only (WHERE clauses)
- Use for filtering, visibility rules, validation
- Example: Show field when template is X
"rule action" Editor:
- Conditions AND actions
- Use for automation, workflows, scheduled tasks
- Example: When item is created, set default values
Return Value:
Both editors return an XML string representing the rule definition.
This XML can be stored in a rule field or parsed for processing.
Common Use Cases:
- Content validation rules
- Conditional rendering rules
- Workflow state transitions
- Scheduled task filters
- Personalization conditions
#><#
.SYNOPSIS
Demonstrates information display controls in Read-Variable dialogs.
.DESCRIPTION
Shows how to use info and marquee controls to display
read-only information and messages to users.
.NOTES
Documentation: https://doc.sitecorepowershell.com
#>
$dialogParams = @{
Title = "Information Display Controls"
Description = "Display important information to users."
Width = 550
Height = 400
OkButtonName = "Continue"
CancelButtonName = "Cancel"
ShowHints = $true
Parameters = @(
@{
Name = "marqueeMessage"
Title = "Marquee - Scrolling Message"
Value = "This is an important scrolling message that catches attention!"
Editor = "marquee"
},
@{
Name = "infoMessage"
Title = "Info - Static Information"
Value = "This is static informational text that provides context or instructions to the user. It does not scroll and is easier to read for longer messages."
Editor = "info"
},
@{
Name = "userInput"
Title = "Your Response"
Value = ""
Tooltip = "Enter your response after reading the information above"
}
)
}
$result = Read-Variable @dialogParams
if ($result -eq "ok") {
Write-Host "User acknowledged the information and provided:" -ForegroundColor Cyan
Write-Host "Response: $userInput" -ForegroundColor Green
}
<#
DISPLAY CONTROLS (Read-Only):
"marquee" Editor:
- Displays scrolling text
- Good for alerts or important notices
- Catches user attention with animation
"info" Editor:
- Displays static text
- Good for instructions, context, or longer messages
- No animation, easier to read
Common Use Cases:
- Display warnings before destructive operations
- Show instructions for complex forms
- Provide context about selected items
- Display calculated values or status information
Note: These are display-only controls. The Value is shown
but not returned or modified by user interaction.
#><#
.SYNOPSIS
Demonstrates variable binding in Read-Variable dialogs.
.DESCRIPTION
Shows how to bind existing PowerShell variables to dialog controls
using the Variable parameter instead of Name/Value.
.NOTES
Documentation: https://doc.sitecorepowershell.com
#>
# Get an existing item to use as a variable
$parentItem = Get-Item -Path "master:\content\Home" -ErrorAction SilentlyContinue
if (-not $parentItem) {
$parentItem = Get-Item -Path "master:\content" -ErrorAction SilentlyContinue
}
# Define other variables
$searchQuery = "sample query"
$maxResults = 50
$dialogParams = @{
Title = "Variable Binding Example"
Description = "Bind existing variables directly to dialog controls."
Width = 500
Height = 400
OkButtonName = "Process"
CancelButtonName = "Cancel"
ShowHints = $true
Parameters = @(
@{
# Use Variable instead of Name to bind directly to existing variable
Variable = Get-Variable "parentItem"
Title = "Parent Item (Variable Binding)"
Tooltip = "This control is bound to the `$parentItem variable"
},
@{
Variable = Get-Variable "searchQuery"
Title = "Search Query (Variable Binding)"
Tooltip = "Bound to `$searchQuery variable"
},
@{
Variable = Get-Variable "maxResults"
Title = "Max Results (Variable Binding)"
Editor = "number"
Tooltip = "Bound to `$maxResults variable"
}
)
}
$result = Read-Variable @dialogParams
if ($result -eq "ok") {
Write-Host "Variable Binding Results:" -ForegroundColor Cyan
Write-Host ""
Write-Host "Parent Item:" -ForegroundColor Green
if ($parentItem) {
Write-Host " Name: $($parentItem.Name)"
Write-Host " Path: $($parentItem.ItemPath)"
}
Write-Host ""
Write-Host "Search Query: $searchQuery" -ForegroundColor Green
Write-Host "Max Results: $maxResults" -ForegroundColor Green
}
<#
VARIABLE BINDING vs NAME/VALUE:
Name/Value Approach:
- Creates a new variable with the specified Name
- Initial value set with Value parameter
@{ Name = "myVar"; Value = "initial" }
Variable Binding:
- Binds directly to an existing PowerShell variable
- Use Get-Variable to reference the variable
- Variable is updated in-place when dialog closes
@{ Variable = Get-Variable "existingVar" }
When to Use Variable Binding:
- When you already have variables with values from previous operations
- When you want to modify existing context variables
- When working with items from the current context (like $item)
Benefits:
- Less boilerplate code
- Variables retain their type information
- Direct modification of existing state
#><#
.SYNOPSIS
Demonstrates tabbed dialogs in Read-Variable.
.DESCRIPTION
Shows how to organize controls into multiple tabs for complex dialogs.
Use the Tab parameter to assign controls to specific tabs.
.NOTES
Documentation: https://doc.sitecorepowershell.com
#>
# Initialize item variable - required for item picker
$template = Get-Item -Path "master:\templates\sample\sample item"
$dialogParams = @{
Title = "Tabbed Dialog Example"
Description = "Controls organized into logical tabs."
Width = 600
Height = 500
OkButtonName = "Save"
CancelButtonName = "Cancel"
ShowHints = $true
Parameters = @(
# General Tab
@{
Name = "itemName"
Title = "Item Name"
Value = ""
Tooltip = "Enter the name for the new item"
Tab = "General"
Placeholder = "Enter name..."
},
@{
Name = "itemTitle"
Title = "Display Title"
Value = ""
Tooltip = "The title shown to users"
Tab = "General"
Placeholder = "Enter title..."
},
@{
Name = "description"
Title = "Description"
Value = ""
Lines = 3
Tooltip = "Describe this item"
Tab = "General"
},
# Settings Tab
@{
Name = "isActive"
Title = "Active"
Value = $true
Editor = "checkbox"
Tooltip = "Enable or disable this item"
Tab = "Settings"
},
@{
Name = "priority"
Title = "Priority"
Value = 100
Editor = "number"
Tooltip = "Sort order priority"
Tab = "Settings"
},
@{
Name = "publishDate"
Title = "Publish Date"
Value = [DateTime]::Now
Editor = "date time"
Tooltip = "When to publish"
Tab = "Settings"
},
# Advanced Tab
@{
Name = "template"
Title = "Template"
Root = "/sitecore/templates/"
Tooltip = "Select a template"
Tab = "Advanced"
},
@{
Name = "targetUser"
Title = "Owner"
Editor = "user"
Tooltip = "Select the owner"
Tab = "Advanced"
}
)
}
$result = Read-Variable @dialogParams
if ($result -eq "ok") {
Write-Host "Tabbed Dialog Results:" -ForegroundColor Cyan
Write-Host ""
Write-Host "General Tab:" -ForegroundColor Green
Write-Host " Item Name: $itemName"
Write-Host " Title: $itemTitle"
Write-Host " Description: $description"
Write-Host ""
Write-Host "Settings Tab:" -ForegroundColor Green
Write-Host " Active: $isActive"
Write-Host " Priority: $priority"
Write-Host " Publish Date: $publishDate"
Write-Host ""
Write-Host "Advanced Tab:" -ForegroundColor Green
Write-Host " Template: $($template.Name)"
Write-Host " Owner: $targetUser"
}
<#
TAB ORGANIZATION:
Use the Tab parameter to organize controls:
@{ Name = "field"; Tab = "Tab Name" }
Tips:
- Tabs appear in the order of their first control
- Group related controls on the same tab
- Use clear, concise tab names
- Limit to 4-5 tabs maximum for usability
Common Tab Patterns:
- "General" / "Settings" / "Advanced"
- "Content" / "Metadata" / "Publishing"
- "Source" / "Target" / "Options"
- "Basic" / "Security" / "Workflow"
#><#
.SYNOPSIS
Demonstrates conditional visibility of controls in Read-Variable dialogs.
.DESCRIPTION
Shows how to show/hide controls based on other control values using
GroupId, ParentGroupId, and HideOnValue parameters.
.NOTES
Documentation: https://doc.sitecorepowershell.com
#>
# Define options for the controlling dropdown
$modeOptions = [ordered]@{
"Simple Mode" = "simple"
"Advanced Mode" = "advanced"
"Expert Mode" = "expert"
}
$dialogParams = @{
Title = "Conditional Visibility Example"
Description = "Controls appear/disappear based on your selection."
Width = 550
Height = 450
OkButtonName = "Continue"
CancelButtonName = "Cancel"
ShowHints = $true
Parameters = @(
# Checkbox controlling visibility
@{
Name = "showAdvanced"
Title = "Show Advanced Options"
Value = $true
Editor = "checkbox"
Tooltip = "Toggle to show/hide advanced options"
GroupId = 1 # This control is the "parent" group
},
@{
Name = "advancedOption1"
Title = "Advanced Option 1"
Value = ""
Tooltip = "This field shows when checkbox is checked"
ParentGroupId = 1 # Linked to group 1
HideOnValue = "0" # Hide when checkbox value is 0 (unchecked)
},
@{
Name = "advancedOption2"
Title = "Advanced Option 2"
Value = ""
Tooltip = "This field also shows when checkbox is checked"
ParentGroupId = 1
HideOnValue = "0"
},
# Dropdown controlling visibility
@{
Name = "operationMode"
Title = "Operation Mode"
Value = "simple"
Options = $modeOptions
Editor = "combo"
Tooltip = "Select mode to see different options"
GroupId = 2 # This dropdown controls group 2
},
@{
Name = "simpleField"
Title = "Simple Mode Field"
Value = ""
Tooltip = "Visible only in Simple Mode"
ParentGroupId = 2
ShowOnValue = "simple" # Hidden when advanced or expert selected
},
@{
Name = "advancedField"
Title = "Advanced Mode Field"
Value = ""
Tooltip = "Visible only in Advanced Mode"
ParentGroupId = 2
ShowOnValue = "advanced" # Hidden when simple or expert selected
},
@{
Name = "expertField"
Title = "Expert Mode Field"
Value = ""
Tooltip = "Visible only in Expert Mode"
ParentGroupId = 2
ShowOnValue = "expert" # Hidden when simple or advanced selected
}
)
}
$result = Read-Variable @dialogParams
if ($result -eq "ok") {
Write-Host "Conditional Visibility Results:" -ForegroundColor Cyan
Write-Host ""
Write-Host "Show Advanced: $showAdvanced" -ForegroundColor Green
if ($showAdvanced) {
Write-Host " Advanced Option 1: $advancedOption1"
Write-Host " Advanced Option 2: $advancedOption2"
}
Write-Host ""
Write-Host "Operation Mode: $operationMode" -ForegroundColor Green
switch ($operationMode) {
"simple" { Write-Host " Simple Field: $simpleField" }
"advanced" { Write-Host " Advanced Field: $advancedField" }
"expert" { Write-Host " Expert Field: $expertField" }
}
}
<#
CONDITIONAL VISIBILITY PARAMETERS:
GroupId:
- Assigns a numeric ID to a "controlling" control
- This control's value determines visibility of child controls
ParentGroupId:
- Links a control to a parent group
- This control's visibility depends on the parent's value
HideOnValue:
- Specifies which parent values hide this control
- For checkboxes: "0" = unchecked, "1" = checked
- For combos/radios: Use the option values (not display text)
- Multiple values: Comma-separated list
Common Patterns:
1. Checkbox Toggle:
Parent: @{ Editor="checkbox"; GroupId=1 }
Child: @{ ParentGroupId=1; HideOnValue="0" } # Show when checked
Child: @{ ParentGroupId=1; HideOnValue="1" } # Show when unchecked
2. Dropdown Selection:
Parent: @{ Editor="combo"; Options=$opts; GroupId=2 }
Child: @{ ParentGroupId=2; HideOnValue="optionA,optionB" }
3. Radio Selection:
Parent: @{ Editor="radio"; Options=$opts; GroupId=3 }
Child: @{ ParentGroupId=3; HideOnValue="1,2" } # Hide for values 1 and 2
#><#
.SYNOPSIS
Demonstrates column layout in Read-Variable dialogs.
.DESCRIPTION
Shows how to arrange controls in columns using the Columns parameter.
The dialog uses a 12-column grid system.
.NOTES
Documentation: https://doc.sitecorepowershell.com
#>
$dialogParams = @{
Title = "Column Layout Example"
Description = "Controls arranged in a responsive grid layout."
Width = 650
Height = 500
OkButtonName = "Save"
CancelButtonName = "Cancel"
ShowHints = $true
Parameters = @(
# Full width (12 columns - default)
@{
Name = "fullWidthField"
Title = "Full Width Field (12 columns)"
Value = ""
Tooltip = "This field spans the full width"
# Columns = 12 is the default
},
# Two columns side by side (6 + 6)
@{
Name = "firstName"
Title = "First Name"
Value = ""
Tooltip = "Half width"
Columns = 6
},
@{
Name = "lastName"
Title = "Last Name"
Value = ""
Tooltip = "Half width"
Columns = 6
},
# Three columns (4 + 4 + 4)
@{
Name = "city"
Title = "City"
Value = ""
Tooltip = "One third width"
Columns = 4
},
@{
Name = "state"
Title = "State"
Value = ""
Tooltip = "One third width"
Columns = 4
},
@{
Name = "zip"
Title = "ZIP Code"
Value = ""
Tooltip = "One third width"
Columns = 4
},
# Unequal columns (8 + 4)
@{
Name = "email"
Title = "Email Address"
Value = ""
Tooltip = "Two thirds width"
Columns = 8
},
@{
Name = "extension"
Title = "Ext"
Value = ""
Tooltip = "One third width"
Columns = 4
},
# Mixed with checkbox (small column)
@{
Name = "notes"
Title = "Additional Notes"
Value = ""
Lines = 2
Tooltip = "Main content area"
Columns = 9
},
@{
Name = "isUrgent"
Title = "Urgent"
Value = $false
Editor = "checkbox"
Tooltip = "Mark as urgent"
Columns = 3
}
)
}
$result = Read-Variable @dialogParams
if ($result -eq "ok") {
Write-Host "Column Layout Results:" -ForegroundColor Cyan
Write-Host ""
Write-Host "Full Width: $fullWidthField" -ForegroundColor Green
Write-Host "Name: $firstName $lastName" -ForegroundColor Green
Write-Host "Location: $city, $state $zip" -ForegroundColor Green
Write-Host "Email: $email (ext: $extension)" -ForegroundColor Green
Write-Host "Notes: $notes" -ForegroundColor Green
Write-Host "Urgent: $isUrgent" -ForegroundColor Green
}
<#
COLUMN LAYOUT (12-Column Grid):
The Columns parameter uses a 12-column grid system:
Full Width: Columns = 12 (default)
Half Width: Columns = 6
Third Width: Columns = 4
Quarter Width: Columns = 3
Two-Thirds: Columns = 8
Common Patterns:
Two Equal Columns:
@{ Columns = 6 }, @{ Columns = 6 }
Three Equal Columns:
@{ Columns = 4 }, @{ Columns = 4 }, @{ Columns = 4 }
Main + Sidebar:
@{ Columns = 8 }, @{ Columns = 4 }
Four Equal Columns:
@{ Columns = 3 }, @{ Columns = 3 }, @{ Columns = 3 }, @{ Columns = 3 }
Tips:
- Column values should add up to 12 for a complete row
- Controls wrap to next row automatically
- Combine with tabs for complex layouts
- Consider dialog width when using many columns
#><#
.SYNOPSIS
Demonstrates mandatory fields and validation in Read-Variable dialogs.
.DESCRIPTION
Shows how to mark fields as required using the Mandatory parameter.
Required fields must have a value before the dialog can be submitted.
.NOTES
Documentation: https://doc.sitecorepowershell.com
#>
# Initialize item variable - required for item picker
$requiredItem = Get-Item -Path "master:\content\home"
$dialogParams = @{
Title = "Required Fields Example"
Description = "Fields marked with * are required."
Width = 500
Height = 400
OkButtonName = "Submit"
CancelButtonName = "Cancel"
ShowHints = $true
Parameters = @(
@{
Name = "requiredField"
Title = "Required Text Field"
Value = ""
Tooltip = "This field must be filled in"
Placeholder = "This field is required..."
Mandatory = $true
},
@{
Name = "optionalField"
Title = "Optional Text Field"
Value = ""
Tooltip = "This field is optional"
Placeholder = "This field is optional..."
Mandatory = $false
},
@{
Name = "requiredNumber"
Title = "Required Number"
Value = $null
Editor = "number"
Tooltip = "A number must be entered"
Mandatory = $true
},
@{
Name = "requiredItem"
Title = "Required Item Selection"
Root = "/sitecore/content/"
Tooltip = "An item must be selected"
Mandatory = $true
},
@{
Name = "optionalMultiline"
Title = "Optional Notes"
Value = ""
Lines = 3
Tooltip = "Additional notes (optional)"
Mandatory = $false
}
)
}
$result = Read-Variable @dialogParams
if ($result -eq "ok") {
Write-Host "Form submitted successfully!" -ForegroundColor Cyan
Write-Host ""
Write-Host "Required Field: $requiredField" -ForegroundColor Green
Write-Host "Optional Field: $optionalField" -ForegroundColor Green
Write-Host "Required Number: $requiredNumber" -ForegroundColor Green
if ($requiredItem) {
Write-Host "Required Item: $($requiredItem.Name)" -ForegroundColor Green
}
Write-Host "Optional Notes: $optionalMultiline" -ForegroundColor Green
} else {
Write-Host "Dialog was cancelled" -ForegroundColor Yellow
}
<#
MANDATORY FIELDS:
The Mandatory parameter enforces that a field has a value:
@{ Name = "field"; Mandatory = $true }
Behavior:
- Required fields show an asterisk (*) in the label
- Dialog cannot be submitted until all required fields have values
- An error message appears if user tries to submit with empty required fields
- Default is Mandatory = $false
Supported Field Types:
- Text fields (single and multi-line)
- Number fields
- Item pickers
- User/Role selectors
- Dropdowns and lists
- Date/time fields
Notes:
- Checkboxes don't support Mandatory (they always have a value)
- For item pickers, the user must select an item
- Empty strings "" are considered invalid for mandatory text fields
- Consider using Placeholder text to guide users on required fields
#><#
.SYNOPSIS
Demonstrates dialog customization options in Read-Variable.
.DESCRIPTION
Shows how to customize dialog appearance including title, description,
icon, dimensions, button labels, and hint display.
.NOTES
Documentation: https://doc.sitecorepowershell.com
#>
$dialogParams = @{
# Dialog Title - appears in the title bar
Title = "Custom Dialog Example"
# Description - appears below the title
Description = "This dialog demonstrates all available customization options for Read-Variable dialogs."
# Icon - Sitecore icon path (various icon sets available)
Icon = "Office/32x32/coffee.png"
# Dimensions
Width = 550
Height = 400
# Button Labels
OkButtonName = "Process Items"
CancelButtonName = "Abort"
# Show tooltips for controls
ShowHints = $true
# Controls
Parameters = @(
@{
Name = "inputText"
Title = "Sample Input"
Value = ""
Tooltip = "This tooltip appears when ShowHints is enabled"
Placeholder = "Enter something..."
},
@{
Name = "confirm"
Title = "I understand the implications"
Value = $false
Editor = "checkbox"
Tooltip = "Check to confirm"
}
)
}
$result = Read-Variable @dialogParams
if ($result -eq "ok") {
Write-Host "Dialog completed with custom settings!" -ForegroundColor Green
Write-Host "Input: $inputText"
Write-Host "Confirmed: $confirm"
} else {
Write-Host "User clicked the custom cancel button" -ForegroundColor Yellow
}
<#
DIALOG CUSTOMIZATION OPTIONS:
Title (string):
- Text shown in the dialog title bar
- Keep concise but descriptive
Description (string):
- Explanatory text below the title
- Use for instructions or context
- Can span multiple lines
Icon (string):
- Sitecore icon path
- Format: "IconSet/Size/iconname.png"
- Common sets: Office, Business, Software, People, Officewhite
- Sizes: 16x16, 24x24, 32x32, 48x48
- Examples:
- "Office/32x32/document.png"
- "Business/32x32/users.png"
- "Software/32x32/gear.png"
- "Officewhite/32x32/knife_fork_spoon.png"
Width / Height (integer):
- Dialog dimensions in pixels
- Minimum recommended: 400x300
- Default: 500x500 approximately
OkButtonName (string):
- Custom label for the OK/Submit button
- Examples: "Continue", "Process", "Save", "Apply"
CancelButtonName (string):
- Custom label for the Cancel button
- Examples: "Abort", "Skip", "Close", "Back"
ShowHints (boolean):
- When true, tooltips appear for controls with Tooltip set
- Recommended: $true for complex dialogs
Return Values:
- "ok" - User clicked the OK button
- "cancel" - User clicked Cancel or closed the dialog
#><#
.SYNOPSIS
Demonstrates a simple dialog without tabs in Read-Variable.
.DESCRIPTION
Shows how to create a straightforward dialog for common operations
without using tabs or complex layouts.
.NOTES
Documentation: https://doc.sitecorepowershell.com
#>
# Initialize item variable - required for item picker
$targetItem = Get-Item -Path "master:\content\home"
$dialogParams = @{
Title = "Simple Dialog Example"
Description = "A straightforward dialog for quick data collection."
Width = 500
Height = 450
OkButtonName = "Finish"
CancelButtonName = "Cancel"
Parameters = @(
@{
Name = "inputText"
Value = "Some Text"
Title = "Single Line Text"
Tooltip = "Enter a single line of text"
Placeholder = "Enter text here..."
},
@{
Name = "multiLineText"
Value = "Multiple lines\nof text"
Title = "Multi Line Text"
Lines = 3
Tooltip = "Enter multiple lines"
Placeholder = "Enter detailed text..."
},
@{
Name = "startDate"
Value = [System.DateTime]::Now.AddDays(-5)
Title = "Start Date"
Tooltip = "Select a start date"
Editor = "date time"
},
@{
Name = "selectedUser"
Value = ""
Title = "Select User"
Tooltip = "Choose a user for this operation"
Editor = "user multiple"
},
@{
Name = "targetItem"
Title = "Target Item"
Root = "/sitecore/content/"
Tooltip = "Select the target location"
}
)
}
$result = Read-Variable @dialogParams
if ($result -ne "ok") {
Write-Host "Operation cancelled by user" -ForegroundColor Yellow
Exit
}
# Process the collected data
Write-Host "Dialog Results:" -ForegroundColor Cyan
Write-Host ""
Write-Host "Text: $inputText" -ForegroundColor Green
Write-Host "Multi-line: $multiLineText" -ForegroundColor Green
Write-Host "Start Date: $startDate" -ForegroundColor Green
Write-Host "User: $selectedUser" -ForegroundColor Green
if ($targetItem) {
Write-Host "Target Item: $($targetItem.ItemPath)" -ForegroundColor Green
}
<#
SIMPLE DIALOG PATTERN:
For many scripts, a simple dialog without tabs is sufficient.
This pattern is ideal when you have:
- 5-8 related fields
- A single, focused task
- No need for complex organization
Best Practices:
1. Order fields logically (most important first)
2. Use clear, descriptive titles
3. Provide helpful tooltips
4. Use placeholder text for text inputs
5. Set sensible default values
6. Keep the dialog focused on one task
When to Use Tabs Instead:
- More than 8-10 fields
- Fields can be grouped into logical categories
- Complex operations with multiple phases
- Advanced options that most users won't need
#><#
.SYNOPSIS
Comprehensive example combining multiple dialog features.
.DESCRIPTION
Demonstrates how to combine tabs, columns, conditional visibility,
and various control types in a real-world scenario.
.NOTES
Documentation: https://doc.sitecorepowershell.com
#>
# Initialize item variable - required for item picker
$sourceItem = Get-Item -Path "master:\content\home"
# Pre-define some default values
$publishModes = [ordered]@{
"Smart Publish" = "smart"
"Republish" = "republish"
"Incremental" = "incremental"
}
$targetDatabases = [ordered]@{
"Web" = 1
"Preview" = 2
}
$languageOptions = [ordered]@{
"English" = 1
"German" = 2
"French" = 4
"Spanish" = 8
}
$selectedLanguages = @(1) # English pre-selected
# Build the dialog parameters
$dialogParams = @{
Title = "Content Publishing Wizard"
Description = "Configure and execute content publishing operations."
Icon = "Office/32x32/document_up.png"
Width = 650
Height = 600
OkButtonName = "Publish"
CancelButtonName = "Cancel"
ShowHints = $true
Parameters = @(
# === SOURCE TAB ===
@{
Name = "sourceItem"
Title = "Source Item"
Root = "/sitecore/content/"
Tooltip = "Select the root item to publish"
Tab = "Source"
Mandatory = $true
},
@{
Name = "includeSubitems"
Title = "Include Subitems"
Value = $true
Editor = "checkbox"
Tooltip = "Publish all descendant items"
Tab = "Source"
Columns = 6
},
@{
Name = "includeRelated"
Title = "Include Related Items"
Value = $false
Editor = "checkbox"
Tooltip = "Also publish referenced items"
Tab = "Source"
Columns = 6
},
# === TARGETS TAB ===
@{
Name = "targetDbs"
Title = "Target Databases"
Options = $targetDatabases
Editor = "checklist"
Tooltip = "Select destination databases"
Tab = "Targets"
},
@{
Name = "selectedLanguages"
Title = "Languages"
Options = $languageOptions
Editor = "checklist"
Tooltip = "Select languages to publish"
Tab = "Targets"
},
# === OPTIONS TAB ===
@{
Name = "publishMode"
Title = "Publish Mode"
Value = "smart"
Options = $publishModes
Editor = "radio"
Tooltip = "Select publishing mode"
Tab = "Options"
},
@{
Name = "schedulePublish"
Title = "Schedule for Later"
Value = $false
Editor = "checkbox"
Tooltip = "Check to schedule publication"
Tab = "Options"
GroupId = 1
},
@{
Name = "scheduledTime"
Title = "Scheduled Time"
Value = [DateTime]::Now.AddHours(1)
Editor = "date time"
Tooltip = "When to publish"
Tab = "Options"
ParentGroupId = 1
HideOnValue = "0"
},
# === NOTIFICATIONS TAB ===
@{
Name = "sendNotification"
Title = "Send Notification"
Value = $false
Editor = "checkbox"
Tooltip = "Notify users when complete"
Tab = "Notifications"
GroupId = 2
},
@{
Name = "notifyUsers"
Title = "Notify Users"
Editor = "user multiple"
Tooltip = "Select users to notify"
Tab = "Notifications"
ParentGroupId = 2
HideOnValue = "0"
},
@{
Name = "notifyRoles"
Title = "Notify Roles"
Editor = "role multiple"
Domain = "sitecore"
Tooltip = "Select roles to notify"
Tab = "Notifications"
ParentGroupId = 2
HideOnValue = "0"
},
@{
Name = "notificationMessage"
Title = "Custom Message"
Value = ""
Lines = 3
Tooltip = "Add a custom message to the notification"
Tab = "Notifications"
ParentGroupId = 2
HideOnValue = "0"
Placeholder = "Optional message to include..."
}
)
}
$result = Read-Variable @dialogParams
if ($result -ne "ok") {
Write-Host "Publishing cancelled by user" -ForegroundColor Yellow
Exit
}
# Display collected settings
Write-Host ("=" * 50) -ForegroundColor Cyan
Write-Host "PUBLISHING CONFIGURATION" -ForegroundColor Cyan
Write-Host ("=" * 50) -ForegroundColor Cyan
Write-Host ""
Write-Host "SOURCE:" -ForegroundColor Green
Write-Host " Item: $($sourceItem.ItemPath)"
Write-Host " Include Subitems: $includeSubitems"
Write-Host " Include Related: $includeRelated"
Write-Host ""
Write-Host "TARGETS:" -ForegroundColor Green
Write-Host " Databases: $($targetDbs -join ', ')"
Write-Host " Languages: $($selectedLanguages -join ', ')"
Write-Host ""
Write-Host "OPTIONS:" -ForegroundColor Green
Write-Host " Mode: $publishMode"
if ($schedulePublish) {
Write-Host " Scheduled: $scheduledTime"
} else {
Write-Host " Scheduled: Immediate"
}
Write-Host ""
if ($sendNotification) {
Write-Host "NOTIFICATIONS:" -ForegroundColor Green
Write-Host " Users: $($notifyUsers -join ', ')"
Write-Host " Roles: $($notifyRoles -join ', ')"
if ($notificationMessage) {
Write-Host " Message: $notificationMessage"
}
}
Write-Host ""
Write-Host "Ready to execute publishing operation!" -ForegroundColor Yellow